Tsunami MP.11 Installation and Management Model 5012-SUR ...
Tsunami MP.11 Installation and Management Model 5012-SUR ...
Tsunami MP.11 Installation and Management Model 5012-SUR ...

You also want an ePaper? Increase the reach of your titles
YUMPU automatically turns print PDFs into web optimized ePapers that Google loves.
Configuration <strong>Tsunami</strong> <strong>MP.11</strong> <strong>5012</strong>-<strong>SUR</strong> <strong>Installation</strong> <strong>and</strong> <strong>Management</strong><br />
Network Parameters<br />
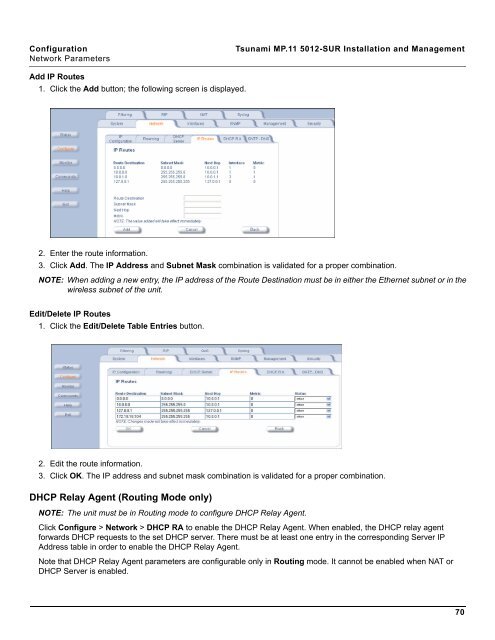
Add IP Routes<br />
1. Click the Add button; the following screen is displayed.<br />
2. Enter the route information.<br />
3. Click Add. The IP Address <strong>and</strong> Subnet Mask combination is validated for a proper combination.<br />
NOTE: When adding a new entry, the IP address of the Route Destination must be in either the Ethernet subnet or in the<br />
wireless subnet of the unit.<br />
Edit/Delete IP Routes<br />
1. Click the Edit/Delete Table Entries button.<br />
2. Edit the route information.<br />
3. Click OK. The IP address <strong>and</strong> subnet mask combination is validated for a proper combination.<br />
DHCP Relay Agent (Routing Mode only)<br />
NOTE: The unit must be in Routing mode to configure DHCP Relay Agent.<br />
Click Configure > Network > DHCP RA to enable the DHCP Relay Agent. When enabled, the DHCP relay agent<br />
forwards DHCP requests to the set DHCP server. There must be at least one entry in the corresponding Server IP<br />
Address table in order to enable the DHCP Relay Agent.<br />
Note that DHCP Relay Agent parameters are configurable only in Routing mode. It cannot be enabled when NAT or<br />
DHCP Server is enabled.<br />
70