FONIX® 8000 - Frye Electronics
FONIX® 8000 - Frye Electronics
FONIX® 8000 - Frye Electronics
You also want an ePaper? Increase the reach of your titles
YUMPU automatically turns print PDFs into web optimized ePapers that Google loves.
158 FONIX <strong>8000</strong> Hearing Aid Analyzer<br />
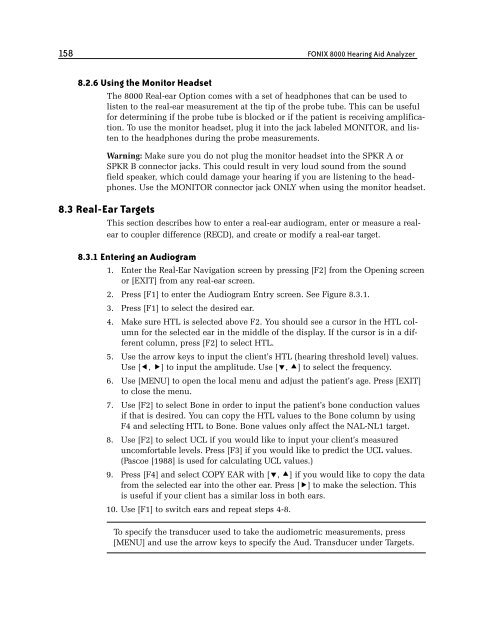
8.2.6 Using the Monitor Headset<br />
The <strong>8000</strong> Real-ear Option comes with a set of headphones that can be used to<br />
listen to the real-ear measurement at the tip of the probe tube. This can be useful<br />
for determining if the probe tube is blocked or if the patient is receiving amplification.<br />
To use the monitor headset, plug it into the jack labeled MONITOR, and listen<br />
to the headphones during the probe measurements.<br />
Warning: Make sure you do not plug the monitor headset into the SPKR A or<br />
SPKR B connector jacks. This could result in very loud sound from the sound<br />
field speaker, which could damage your hearing if you are listening to the headphones.<br />
Use the MONITOR connector jack ONLY when using the monitor headset.<br />
8.3 Real-Ear Targets<br />
This section describes how to enter a real-ear audiogram, enter or measure a realear<br />
to coupler difference (RECD), and create or modify a real-ear target.<br />
8.3.1 Entering an Audiogram<br />
1. Enter the Real-Ear Navigation screen by pressing [F2] from the Opening screen<br />
or [EXIT] from any real-ear screen.<br />
2. Press [F1] to enter the Audiogram Entry screen. See Figure 8.3.1.<br />
3. Press [F1] to select the desired ear.<br />
4. Make sure HTL is selected above F2. You should see a cursor in the HTL column<br />
for the selected ear in the middle of the display. If the cursor is in a different<br />
column, press [F2] to select HTL.<br />
5. Use the arrow keys to input the client’s HTL (hearing threshold level) values.<br />
Use [, ] to input the amplitude. Use [, ] to select the frequency.<br />
6. Use [MENU] to open the local menu and adjust the patient’s age. Press [EXIT]<br />
to close the menu.<br />
7. Use [F2] to select Bone in order to input the patient’s bone conduction values<br />
if that is desired. You can copy the HTL values to the Bone column by using<br />
F4 and selecting HTL to Bone. Bone values only affect the NAL-NL1 target.<br />
8. Use [F2] to select UCL if you would like to input your client’s measured<br />
uncomfortable levels. Press [F3] if you would like to predict the UCL values.<br />
(Pascoe [1988] is used for calculating UCL values.)<br />
9. Press [F4] and select COPY EAR with [, ] if you would like to copy the data<br />
from the selected ear into the other ear. Press [] to make the selection. This<br />
is useful if your client has a similar loss in both ears.<br />
10. Use [F1] to switch ears and repeat steps 4-8.<br />
To specify the transducer used to take the audiometric measurements, press<br />
[MENU] and use the arrow keys to specify the Aud. Transducer under Targets.


