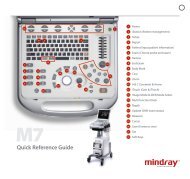
Datascope - Mindray
Datascope - Mindray
Datascope - Mindray

You also want an ePaper? Increase the reach of your titles
YUMPU automatically turns print PDFs into web optimized ePapers that Google loves.
Functional Tests Periodic Maintenance<br />
6.8.10.2 Vaporizer Accuracy Test<br />
WARNING: Avoid exposure to respiratory gases by always directing<br />
the fresh gas flow from the fresh gas outlet to the waste gas<br />
scavenger.<br />
1. Remove the Fresh Gas Hose from the Common Gas Outlet.<br />
2. Insert an endo-tracheal tube mask elbow adapter with monitoring port, into the Common<br />
Gas Outlet.<br />
3. Set the APL Valve to 70 cmH 2 O.<br />
4. Remove the Waste Gas Scavenger Hose from the bottom of the Breathing System EVAC<br />
port. Leave the connection to the waste gas scavenger attached.<br />
5. Set the waste gas scavenger flow above the minimum setting.<br />
6. Adapt the Waste Gas Scavenger Hose to connect to the endo-tracheal tube mask elbow,<br />
now connected to the Common Gas Outlet port.<br />
7. Attach the Agent Analyzer meter sampling tube to the endo-tracheal tube mask elbow's<br />
monitoring port.<br />
8. Fill the vaporizer with anesthetic agent (if necessary).<br />
NOTE: Do not overfill by filling past the indicator line on the<br />
vaporizer.<br />
9. Test the vaporizer accuracy per the Dräger Vapor 2000 instructions (See<br />
section 6.8.10.4), or see the appropriate vaporizer manual for testing details.<br />
10. Test each vaporizer in turn.<br />
11. Test any vaporizer on the Vaporizer Storage Mount.<br />
12. Remove the measuring equipment from the Common Gas Outlet.<br />
13. Reconnect the Fresh Gas, and Waste Gas Scavenger Hoses.<br />
6.8.10.3 Vaporizer Leak Test<br />
NOTE: Verify the system has passed the leak test without the<br />
vaporizers prior to this test.<br />
1. Verify that vaporizers are mounted correctly.<br />
2. Ensure that the gas pressure for O 2 , N 2 O, and AIR are at 50 ±10 psi.<br />
3. Power ON the AS3000.<br />
4. Attach a reusable-silicone-rubber breathing circuit to the Breathing System.<br />
NOTE: For testing purposes always use a reusable breathing<br />
circuit.<br />
5. Tightly connect the Y-fitting on the breathing circuit to the test port.<br />
6. Attach a breathing bag to the bag arm.<br />
7. Set the APL Valve to the fully closed position (70 cmH 2 O).<br />
8. Rotate the O 2 Flow Control Valve until 50 cmH 2O pressure is observed on the Airway<br />
Pressure Gauge.<br />
9. Verify that the necessary flow to stabilize the pressure is less than 300 mL/min.<br />
6 - 36 0070-10-0683 AS3000 Service Manual