TRD 05: Data Presentation techniques (Mapping) Quantum GIS ...
TRD 05: Data Presentation techniques (Mapping) Quantum GIS ...
TRD 05: Data Presentation techniques (Mapping) Quantum GIS ...

Create successful ePaper yourself
Turn your PDF publications into a flip-book with our unique Google optimized e-Paper software.
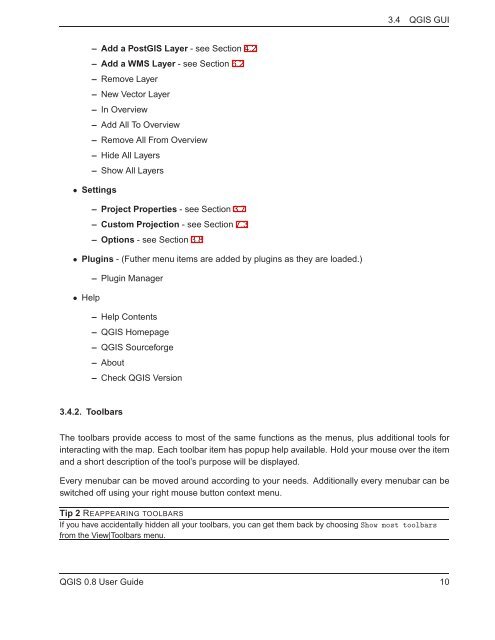
3.4 Q<strong>GIS</strong> GUI<br />
– Add a Post<strong>GIS</strong> Layer - see Section 4.2<br />
– Add a WMS Layer - see Section 6.2<br />
– Remove Layer<br />
– New Vector Layer<br />
– In Overview<br />
– Add All To Overview<br />
– Remove All From Overview<br />
– Hide All Layers<br />
– Show All Layers<br />
• Settings<br />
– Project Properties - see Section 3.7<br />
– Custom Projection - see Section 7.3<br />
– Options - see Section 3.8<br />
• Plugins - (Futher menu items are added by plugins as they are loaded.)<br />
– Plugin Manager<br />
• Help<br />
– Help Contents<br />
– Q<strong>GIS</strong> Homepage<br />
– Q<strong>GIS</strong> Sourceforge<br />
– About<br />
– Check Q<strong>GIS</strong> Version<br />
3.4.2. Toolbars<br />
The toolbars provide access to most of the same functions as the menus, plus additional tools for<br />
interacting with the map. Each toolbar item has popup help available. Hold your mouse over the item<br />
and a short description of the tool’s purpose will be displayed.<br />
Every menubar can be moved around according to your needs. Additionally every menubar can be<br />
switched off using your right mouse button context menu.<br />
Tip 2 REAPPEARING TOOLBARS<br />
If you have accidentally hidden all your toolbars, you can get them back by choosing Show most toolbars<br />
from the View|Toolbars menu.<br />
Q<strong>GIS</strong> 0.8 User Guide 10