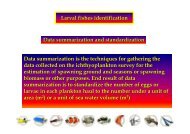
TRD 05: Data Presentation techniques (Mapping) Quantum GIS ...
TRD 05: Data Presentation techniques (Mapping) Quantum GIS ...
TRD 05: Data Presentation techniques (Mapping) Quantum GIS ...

Create successful ePaper yourself
Turn your PDF publications into a flip-book with our unique Google optimized e-Paper software.
3.4 Q<strong>GIS</strong> GUI<br />
3.4.3. Map Legend<br />
The map legend area is used to set the visibility and z-ordering of layers. Z-ordering means that<br />
layers listed nearer the top of the legend are drawn over layers listed lower down in the legend. The<br />
checkbox in each legend entry can be used to show or hide the layer.<br />
Layers can be grouped in the legend window by adding a layer group and dragging layers into the<br />
group. To do so, go with the mouse to the legend window, right click, choose ’Add group’. A new<br />
folder appears. Now drag the layers to the folder symbol. It is then possible to toggle the visibility of<br />
all the layers in the group with one click. To bring layers out of a group, go with the mouse to the layer<br />
symbol, right click, choose ’make to toplevel item’. To give the folder a new name, choose ’Rename’<br />
in the right click menu of the group.<br />
If several vector data sources have the same vector type and the same attributes, their symbolisations<br />
may be grouped. This means that if the symbolisation of one data source is changed, the others<br />
automatically have the new symbolisation as well. To group symbologies, open the right click menu<br />
in the legend window and choose ’Show file groups’. The file groups of the layers appear. It is now<br />
possible to drag a file from one file group into another one. If this is done, the symbologies are<br />
grouped. Note that Q<strong>GIS</strong> only permits the drag if the two layers are able to share symbology (same<br />
vector type and same attribute).<br />
3.4.4. Map View<br />
This is the ’business end’ of Q<strong>GIS</strong> - maps are displayed in this area! The map displayed in this<br />
window will depend on the vector and raster layers you have chosen to load (see sections that follow<br />
for more information on how to load layers). The map view can be panned (shifting the focus of the<br />
map display to another region) and zoomed in and out. Various other operations can be performed<br />
on the map as described in the toolbar description above. The map view and the legend are tightly<br />
bound to each other - the maps in view reflect changes you make in the legend area.<br />
Tip 3 ZOOMING THE MAP WITH THE MOUSE WHEEL<br />
You can use the mouse wheel to zoom in and out on the map. Place the mouse cursor inside the map area<br />
and roll it forward (away from you) to zoom in and backwards (towards you) to zoom out. The mouse cursor is<br />
the center where the zoom occurs. You can customize the behavior of the mouse wheel zoom using the Map<br />
tools tab under the Settings|Options menu.<br />
3.4.5. Map Overview<br />
The map overview area provides a full extent view of layers added to it. Within the view is a rectangle<br />
showing the current map extent. This allows you to quickly determine which area of the map you are<br />
currently viewing. Note that labels are not rendered to the map overview even if the layers in the map<br />
Q<strong>GIS</strong> 0.8 User Guide 11