TRD 05: Data Presentation techniques (Mapping) Quantum GIS ...
TRD 05: Data Presentation techniques (Mapping) Quantum GIS ...
TRD 05: Data Presentation techniques (Mapping) Quantum GIS ...
You also want an ePaper? Increase the reach of your titles
YUMPU automatically turns print PDFs into web optimized ePapers that Google loves.
6.2 WMS Client<br />
rasterizes the map, and sends it back to the client in a raster format. For Q<strong>GIS</strong> this would typically be<br />
JPEG or PNG.<br />
WMS is generically a REST (Representational State Transfer) service rather than a fully-blown Web<br />
Service. As such, you can actually take the URLs generated by Q<strong>GIS</strong> and use them in a web browser<br />
to retrieve the same images that Q<strong>GIS</strong> uses internally. This can be useful when troubleshooting<br />
problems, as there are several brands of WMS servers in the market and they all have their own<br />
interpretation of the WMS standard.<br />
WMS layers can be added quite simply, as long as you know the URL to access the WMS server, you<br />
have a serviceable connection to that server, and the server understands HTTP as the data transport<br />
mechanism.<br />
6.2.2. Selecting WMS Servers<br />
You can begin by clicking the Add WMS layer button inside the toolbar, or through the Layer menu.<br />
The dialog for adding layers from the WMS server pops up. In the Server Connections section, select<br />
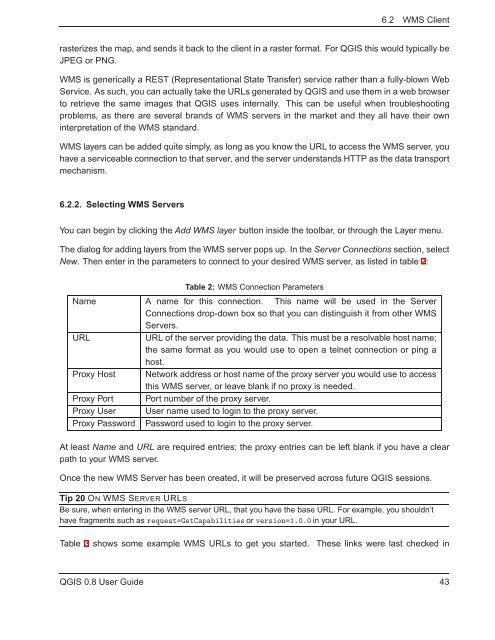
New. Then enter in the parameters to connect to your desired WMS server, as listed in table 2:<br />
Table 2: WMS Connection Parameters<br />
Name A name for this connection. This name will be used in the Server<br />
Connections drop-down box so that you can distinguish it from other WMS<br />
Servers.<br />
URL<br />
URL of the server providing the data. This must be a resolvable host name;<br />
the same format as you would use to open a telnet connection or ping a<br />
host.<br />
Proxy Host Network address or host name of the proxy server you would use to access<br />
this WMS server, or leave blank if no proxy is needed.<br />
Proxy Port Port number of the proxy server.<br />
Proxy User User name used to login to the proxy server.<br />
Proxy Password Password used to login to the proxy server.<br />
At least Name and URL are required entries; the proxy entries can be left blank if you have a clear<br />
path to your WMS server.<br />
Once the new WMS Server has been created, it will be preserved across future Q<strong>GIS</strong> sessions.<br />
Tip 20 ON WMS SERVER URLS<br />
Be sure, when entering in the WMS server URL, that you have the base URL. For example, you shouldn’t<br />
have fragments such as request=GetCapabilities or version=1.0.0 in your URL.<br />
Table 3 shows some example WMS URLs to get you started.<br />
These links were last checked in<br />
Q<strong>GIS</strong> 0.8 User Guide 43


