You also want an ePaper? Increase the reach of your titles
YUMPU automatically turns print PDFs into web optimized ePapers that Google loves.
Chapter 2. Playing<br />
■ Holding an Arpeggio<br />
If you hold down [ARPEGGIO] and press [TRANSPOSE],<br />
and get the indicator to start blinking, the arpeggio will<br />
continue to be played even if you release the chord.<br />
1. Hold down [ARPEGGIO] and press [TRANSPOSE] to<br />
make the indicator blink.<br />
2. Play a chord.<br />
3. If you play a different chord or notes while the arpeggio<br />
is being held, the arpeggio will change accordingly.<br />
4. To cancel Arpeggio Hold, hold down [ARPEGGIO] and<br />
press [TRANSPOSE] simultaneously once again.<br />
Using a Hold Pedal<br />
If you play an arpeggio while pressing the hold pedal, the<br />
arpeggio will continue to be played even if you release the<br />
chord.<br />
1. Connect an optional pedal switch to the HOLD PEDAL<br />
jack.<br />
2. Play a chord while pressing the hold pedal.<br />
3. To play another chord, release the pedal, press it again as<br />
you play the next chord.<br />
■ Simulating a Guitar Cutting<br />
Technique<br />
You can simulate a guitar cutting technique by following the<br />
procedure below. By using the Sound Palette, it is also<br />
possible to apply a wah effect as you play.<br />
1. Select a guitar Patch.<br />
2. Set the Style parameter (SYSTEM/ARPEGGIO/<br />
ARPEGGIO) to RHYTHM GTR B, RHYTHM GTR C,<br />
RHYTHM GTR D or RHYTHM GTR E.<br />
3. Press [FILTER/ENV] so the indicator lights.<br />
4. Move the CUTOFF slider or RESO slider while you play<br />
a chord.<br />
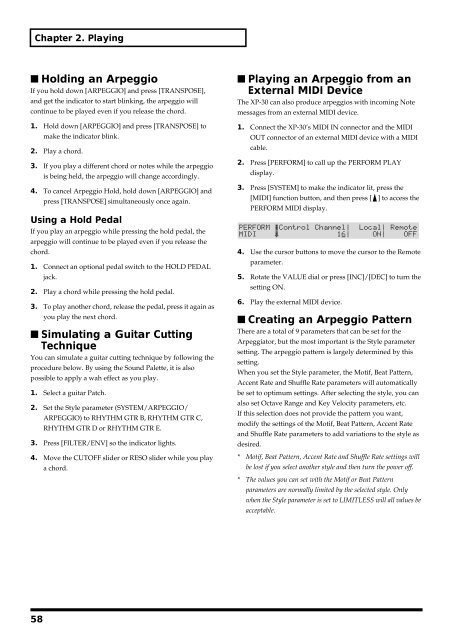
■ Playing an Arpeggio from an<br />
External MIDI Device<br />
The XP-30 can also produce arpeggios with incoming Note<br />
messages from an external MIDI device.<br />
1. Connect the XP-30’s MIDI IN connector and the MIDI<br />
OUT connector of an external MIDI device with a MIDI<br />
cable.<br />
2. Press [PERFORM] to call up the PERFORM PLAY<br />
display.<br />
3. Press [SYSTEM] to make the indicator lit, press the<br />
[MIDI] function button, and then press [ ] to access the<br />
PERFORM MIDI display.<br />
fig.2-19<br />
4. Use the cursor buttons to move the cursor to the Remote<br />
parameter.<br />
5. Rotate the VALUE dial or press [INC]/[DEC] to turn the<br />
setting ON.<br />
6. Play the external MIDI device.<br />
■ Creating an Arpeggio Pattern<br />
There are a total of 9 parameters that can be set for the<br />
Arpeggiator, but the most important is the Style parameter<br />
setting. The arpeggio pattern is largely determined by this<br />
setting.<br />
When you set the Style parameter, the Motif, Beat Pattern,<br />
Accent Rate and Shuffle Rate parameters will automatically<br />
be set to optimum settings. After selecting the style, you can<br />
also set Octave Range and Key Velocity parameters, etc.<br />
If this selection does not provide the pattern you want,<br />
modify the settings of the Motif, Beat Pattern, Accent Rate<br />
and Shuffle Rate parameters to add variations to the style as<br />
desired.<br />
* Motif, Beat Pattern, Accent Rate and Shuffle Rate settings will<br />
be lost if you select another style and then turn the power off.<br />
* The values you can set with the Motif or Beat Pattern<br />
parameters are normally limited by the selected style. Only<br />
when the Style parameter is set to LIMITLESS will all values be<br />
acceptable.<br />
58


