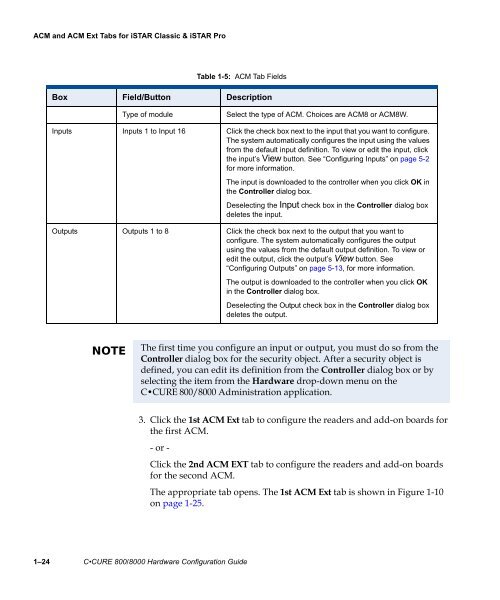
- Page 2 and 3: C•CURE ® and Software House ® a
- Page 4: Table of ContentsConfiguring Holida
- Page 9 and 10: Table of ContentsConfiguring Option
- Page 11 and 12: PrefaceThis C•CURE ® 800/8000 Ha
- Page 13 and 14: PrefaceChapter 4, “Configuring Re
- Page 15 and 16: PrefaceFinding More InformationIn a
- Page 17 and 18: PrefaceConventionsThis manual uses
- Page 19 and 20: 1Configuring C•CUREiSTAR Pro/Clas
- Page 21 and 22: Understanding C•CURE iSTAR Contro
- Page 23 and 24: Understanding C•CURE iSTAR Contro
- Page 25 and 26: Understanding C•CURE iSTAR Contro
- Page 27 and 28: Understanding C•CURE iSTAR Contro
- Page 29 and 30: Configuration Overview for iSTAR Cl
- Page 31 and 32: Configuring iSTAR Classic & iSTAR P
- Page 33 and 34: Configuring iSTAR Classic & iSTAR P
- Page 35 and 36: Configuring iSTAR Classic & iSTAR P
- Page 37 and 38: Configuring iSTAR Classic & iSTAR P
- Page 39 and 40: Main Board Tab for iSTAR Classic &
- Page 41: ACM and ACM Ext Tabs for iSTAR Clas
- Page 45 and 46: ACM and ACM Ext Tabs for iSTAR Clas
- Page 47 and 48: ACM and ACM Ext Tabs for iSTAR Clas
- Page 49 and 50: Cluster Communications Overview for
- Page 51 and 52: Cluster Communications Overview for
- Page 53 and 54: Maintaining Cluster Communications
- Page 55 and 56: Maintaining Cluster Communications
- Page 57 and 58: Maintaining Cluster Communications
- Page 59 and 60: Configuring Clusters for iSTAR Clas
- Page 61 and 62: Configuring Clusters for iSTAR Clas
- Page 63 and 64: Primary Tab for iSTAR Classic & iST
- Page 65 and 66: Primary Tab for iSTAR Classic & iST
- Page 67 and 68: Secondary Tab for iSTAR Classic & i
- Page 69 and 70: Secondary Tab for iSTAR Classic & i
- Page 71 and 72: Cluster Tab for iSTAR Classic & iST
- Page 73 and 74: Cluster Tab for iSTAR Classic & iST
- Page 75 and 76: Misc Tab for iSTAR Classic & iSTAR
- Page 77 and 78: Global APB Tab for iSTAR Classic &
- Page 79 and 80: 2Configuring C•CUREiSTAR eX Contr
- Page 81 and 82: Understanding C•CURE iSTAR Contro
- Page 83 and 84: Understanding C•CURE iSTAR Contro
- Page 85 and 86: Understanding C•CURE iSTAR Contro
- Page 87 and 88: Understanding C•CURE iSTAR Contro
- Page 89 and 90: Configuring iSTAR eX ControllersCon
- Page 91 and 92: Configuring iSTAR eX ControllersIf
- Page 93 and 94:
Configuring iSTAR eX ControllersTab
- Page 95 and 96:
Configuring iSTAR eX ControllersCon
- Page 97 and 98:
Main Board TabMain Board TabConfigu
- Page 99 and 100:
Main Board TabTable 2-4: Main Board
- Page 101 and 102:
Main Board TabTable 2-4: Main Board
- Page 103 and 104:
Serial Ports TabTable 2-5: Serial P
- Page 105 and 106:
Serial Ports TabFigure 2-11: Wyrele
- Page 107 and 108:
Cluster Communications Overview•
- Page 109 and 110:
Cluster Communications OverviewUse
- Page 111 and 112:
Maintaining Cluster CommunicationsE
- Page 113 and 114:
Configuring ClustersFigure 2-13: iS
- Page 115 and 116:
Configuring ClustersTable 2-6: Clus
- Page 117 and 118:
Primary TabPrimary TabConfiguring t
- Page 119 and 120:
Primary TabTable 2-7: Primary Tab F
- Page 121 and 122:
Secondary TabSecondary TabConfiguri
- Page 123 and 124:
Secondary TabTable 2-8: Secondary T
- Page 125 and 126:
Cluster TabCluster TabConfiguring C
- Page 127 and 128:
Cluster TabTable 2-9: Cluster Tab F
- Page 129 and 130:
Misc TabTable 2-10: Misc Tab Fields
- Page 131 and 132:
Global APB TabTable 2-11: Global AP
- Page 133 and 134:
3Configuring theAdvanced Processing
- Page 135 and 136:
Panel OverviewOutputsAn output is a
- Page 137 and 138:
Configuring PanelsFigure 3-2: apC S
- Page 139 and 140:
Configuring PanelsTable 3-1: apC Di
- Page 141 and 142:
Configuring PanelsTable 3-1: apC Di
- Page 143 and 144:
Configuring Security Objects on Pan
- Page 145 and 146:
Configuring Panel EventsConfiguring
- Page 147 and 148:
Configuring Holiday Lists for a Pan
- Page 149 and 150:
Viewing the Intrusion Zones on Pane
- Page 151 and 152:
4Configuring Readers,RM Reader LCDM
- Page 153 and 154:
Configuring ReadersFigure 4-1: Read
- Page 155 and 156:
Configuring ReadersTable 4-1: Reade
- Page 157 and 158:
Configuring Reader Keypad OptionsCo
- Page 159 and 160:
Configuring Reader Keypad OptionsTa
- Page 161 and 162:
Configuring Advanced Options for Re
- Page 163 and 164:
Configuring Advanced Options for Re
- Page 165 and 166:
Configuring Advanced Options for Re
- Page 167 and 168:
Configuring RM Reader LCD Messages2
- Page 169 and 170:
Configuring RM Reader LCD MessagesT
- Page 171 and 172:
Configuring RM Reader LCD MessagesT
- Page 173 and 174:
Configuring RM Reader LCD MessagesT
- Page 175 and 176:
Configuring RM Reader LCD MessagesF
- Page 177 and 178:
Configuring Card Formats2. Click Ne
- Page 179 and 180:
Configuring Card FormatsFigure 4-16
- Page 181 and 182:
Configuring Card Formats4. Click OK
- Page 183 and 184:
Configuring Card FormatsTable 4-13:
- Page 185 and 186:
5Configuring Inputs andOutputsThis
- Page 187 and 188:
Configuring InputsNOTETo edit the d
- Page 189 and 190:
Configuring InputsTable 5-1: Input
- Page 191 and 192:
Configuring InputsTable 5-1: Input
- Page 193 and 194:
Input EventsTable 5-2: Input -Event
- Page 195 and 196:
Viewing Input LinkagesViewing Input
- Page 197 and 198:
Configuring OutputsConfiguring Outp
- Page 199 and 200:
Configuring OutputsTable 5-4: Outpu
- Page 201 and 202:
Viewing Output LinkagesTable 5-5: O
- Page 203 and 204:
Tamper and AC Power Failure InputsW
- Page 205 and 206:
6Configuring Add-onBoards for apCs
- Page 207 and 208:
Configuring Add-On Boards for apCsF
- Page 209 and 210:
I/32 System Input BoardsI/32 System
- Page 211 and 212:
I/32 System Input BoardsFigure 6-7:
- Page 213 and 214:
I/32 System Input Boards- Enter the
- Page 215 and 216:
R/48 System Output Boards3. Choose
- Page 217 and 218:
Star Couplers2. Select the Star opt
- Page 219 and 220:
Wiegand/Proximity Star Coupler (WPS
- Page 221 and 222:
I/8 — Input ModulesI/8 — Input
- Page 223 and 224:
R/8 — Output ModulesR/8 — Outpu
- Page 225 and 226:
7Configuring PortsThe C•CURE 800/
- Page 227 and 228:
Configuring COM Ports from WindowsC
- Page 229 and 230:
Configuring COM Ports from WindowsT
- Page 231 and 232:
Configuring Network PortsFigure 7-1
- Page 233 and 234:
Configuring Ports from C•CURE 800
- Page 235 and 236:
Configuring Ports from C•CURE 800
- Page 237 and 238:
Configuring Ports from C•CURE 800
- Page 239 and 240:
8Configuring andSelecting HostModem
- Page 241 and 242:
Configuring Host ModemsConfiguring
- Page 243 and 244:
Configuring Host ModemsFigure 8-3:
- Page 245 and 246:
Configuring Host Modems• Modify o
- Page 247 and 248:
Configuring Advanced Options for No
- Page 249 and 250:
Selecting Host Modems for Dial InSe
- Page 251 and 252:
Selecting Host Modems for Dial InYo
- Page 253 and 254:
Selecting Host Modems for Dial OutF
- Page 255 and 256:
9Configuring Dialup forapC PanelsTh
- Page 257 and 258:
apC Dialup Overview• Each input c
- Page 259 and 260:
apC Dialup OverviewTable 9-1: Confi
- Page 261 and 262:
Configuring apC Dialup PanelsFigure
- Page 263 and 264:
Configuring apC Dialup PanelsFigure
- Page 265 and 266:
Configuring Options for apC Dial-up
- Page 267 and 268:
Configuring Options for apC Dial-up
- Page 269 and 270:
Configuring Options for apC Dial-up
- Page 271 and 272:
Configuring Options for apC Dial-up
- Page 273 and 274:
Configuring Options for apC Dial-up
- Page 275 and 276:
10Configuring Dialup foriSTAR Pro C
- Page 277 and 278:
iSTAR Dialup OverviewHost - Cluster
- Page 279 and 280:
iSTAR Dialup OverviewDialing Out to
- Page 281 and 282:
iSTAR Dialup OverviewTable 10-1: So
- Page 283 and 284:
Configuring iSTAR Clusters for Dial
- Page 285 and 286:
Configuring iSTAR Clusters for Dial
- Page 287 and 288:
Configuring Dialup Options for iSTA
- Page 289 and 290:
Configuring Dialup Options for iSTA
- Page 291 and 292:
Configuring Dialup Options for iSTA
- Page 293 and 294:
AA Card FormatsPrimerThe C•CURE 8
- Page 295 and 296:
Card FormatsTable A-1: Card Format
- Page 297 and 298:
Magnetic CardsMagnetic CardsMagneti
- Page 299 and 300:
Proximity CardsProximity CardsProxi
- Page 301 and 302:
Offset Values for Card NumbersOffse
- Page 303 and 304:
IndexIndexAAC power fail input on G
- Page 305 and 306:
IndexapC/L, continuedevent to activ
- Page 307 and 308:
IndexCommunicationsmaintaining 1-35
- Page 309 and 310:
IndexController 1-23, 1-49, 2-24, 2
- Page 311 and 312:
IndexHoliday Lists, continuedconfig
- Page 313 and 314:
IndexMaster controller, continuedco
- Page 315 and 316:
IndexPrimary communications path, c


