Norstar Version - IP Office Info
Norstar Version - IP Office Info
Norstar Version - IP Office Info

Create successful ePaper yourself
Turn your PDF publications into a flip-book with our unique Google optimized e-Paper software.
Installing the <strong>IP</strong> <strong>Office</strong> Admin Applications<br />
1. Using the Add or Remove Programs option in the Windows Control Panel, check that the PC does not already<br />
have a version of the <strong>IP</strong> <strong>Office</strong> Admin suite installed.<br />
· If 'yes' and the suite is a pre-<strong>IP</strong> <strong>Office</strong> 3.2 version, remove the existing <strong>IP</strong> <strong>Office</strong> Admin suite via Add/Remove<br />
Programs.<br />
· If the existing suite is <strong>IP</strong> <strong>Office</strong> 3.2 or higher, it is possible to upgrade without removing the previous<br />
installation. However, if the system already has a USB Feature Key, the key should be removed prior to<br />
upgrading and then reinserted and the PC restarted.<br />
2. Insert the <strong>IP</strong> <strong>Office</strong> Administrator Applications DVD. Select the option for the <strong>IP</strong> <strong>Office</strong> Administration Suit. A folder<br />
window will display the installation files for the administration suite.<br />
3. Double-click on setup.exe.<br />
4. Select the language you want to use for the installation process. This does not affect the language used by Manager<br />
when running. Click Next >.<br />
5. Select who should be able to run the Admin Suite applications. Click Next >.<br />
6. If required select the destination to which the applications should be installed. We recommend that you accept the<br />
default destination. Click Next >.<br />
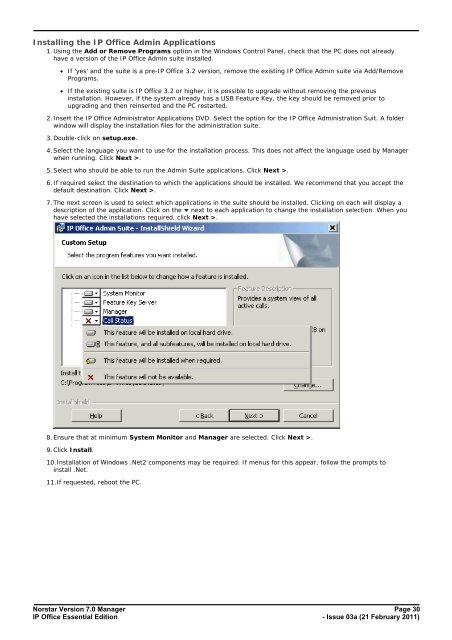
7. The next screen is used to select which applications in the suite should be installed. Clicking on each will display a<br />
description of the application. Click on the next to each application to change the installation selection. When you<br />
have selected the installations required, click Next >.<br />
8. Ensure that at minimum System Monitor and Manager are selected. Click Next >.<br />
9. Click Install.<br />
10.Installation of Windows .Net2 components may be required. If menus for this appear, follow the prompts to<br />
install .Net.<br />
11.If requested, reboot the PC.<br />
<strong>Norstar</strong> <strong>Version</strong> 7.0 Manager Page 30<br />
<strong>IP</strong> <strong>Office</strong> Essential Edition<br />
- Issue 03a (21 February 2011)