

MMC User Manual - AMS Neve
MMC User Manual - AMS Neve
MMC User Manual - AMS Neve

Create successful ePaper yourself
Turn your PDF publications into a flip-book with our unique Google optimized e-Paper software.
Options Menu<br />
Glide Times<br />
Options Menu<br />
Glide Times<br />
Allows users to adjust Glide rates for Match and Auto Match mode. Glide times can be changed at any time<br />
(including during the running of automation).<br />
Because a Glide is written into the fader data, any change in Glide Time settings does not affect previously<br />
written Glides.<br />
To set glide times click on Glide Times in the drop down Options menu or click on the Glide Times area in the<br />
main screen.<br />
The Glide Times dialogue box will appear.<br />
Safety Nets<br />
Adjust the times as required by either using the horizontal scroll bars or entering the desired number into the<br />
Frame boxes via the keyboard and click on OK to close the Dialogue box.<br />
Used to set up a window (between two points in timecode) inside which new automation Events can be<br />
recorded. For instance, in post production the Safety Nets can be used to safeguard the automation in the<br />
regions either side of a scene and automatically record new automation during the scene.<br />
The Safe Before and Safe After times can be set manually or from the Label List.<br />
Controls can be placed into a pending record mode in advance of the Safe Before time using any automation<br />
Record Mode, including Master Touch Record in Collect Touch. At the Safe Before time the system will<br />
immediately transition the controls into recording new automation and drop out of record at the Safe After time<br />
to return to the previous automation pass settings.<br />
The Encore screen displays countdown wipes which start 5 seconds before the Safe Before and Safe After times.<br />
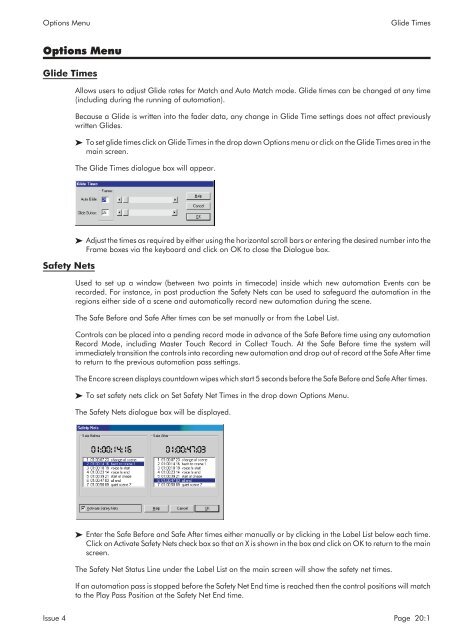
To set safety nets click on Set Safety Net Times in the drop down Options Menu.<br />
The Safety Nets dialogue box will be displayed.<br />
Enter the Safe Before and Safe After times either manually or by clicking in the Label List below each time.<br />
Click on Activate Safety Nets check box so that an X is shown in the box and click on OK to return to the main<br />
screen.<br />
The Safety Net Status Line under the Label List on the main screen will show the safety net times.<br />
If an automation pass is stopped before the Safety Net End time is reached then the control positions will match<br />
to the Play Pass Position at the Safety Net End time.<br />
Issue 4 Page 20:1


