

MOAC_Powerpoint_2016

Create successful ePaper yourself
Turn your PDF publications into a flip-book with our unique Google optimized e-Paper software.
Adding Graphics to a Presentation 155<br />
8. Click Keep Changes in the Close group of the Background Removal tab to finalize the<br />
background removal. Now that the background is removed, the slide title is no longer<br />
partly obscured.<br />
9. Click away from the image to deselect it.<br />
10. Click Fit Slide to Current Window in the status bar at the bottom of the PowerPoint<br />
window to reset the slide’s zoom (see Figure 8-15). You can also click Fit to Window on<br />
the View tab.<br />
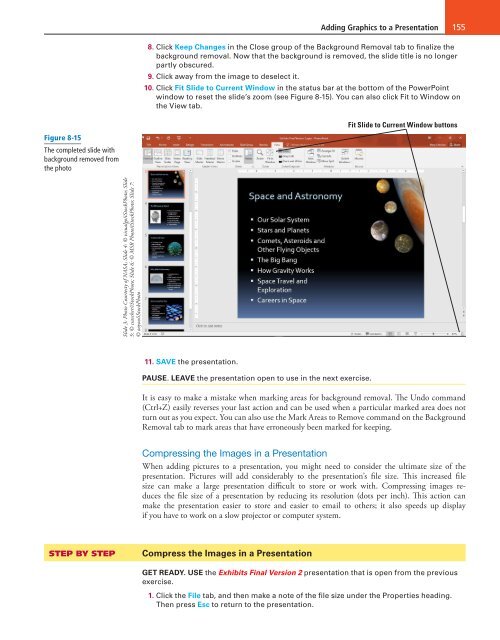
Figure 8-15<br />
The completed slide with<br />
background removed from<br />
the photo<br />
Fit Slide to Current Window buttons<br />
Slide 3: Photo Courtesty of NASA; Slide 4: © visualgo/iStockPhoto; Slide<br />
5: © csascher/iStockPhoto; Slide 6: © MSR Photo/iStockPhoto; Slide 7:<br />
© ooyoo/iStockPhoto<br />
11. SAVE the presentation.<br />
PAUSE. LEAVE the presentation open to use in the next exercise.<br />
It is easy to make a mistake when marking areas for background removal. The Undo command<br />
(Ctrl+Z) easily reverses your last action and can be used when a particular marked area does not<br />
turn out as you expect. You can also use the Mark Areas to Remove command on the Background<br />
Removal tab to mark areas that have erroneously been marked for keeping.<br />
Compressing the Images in a Presentation<br />
When adding pictures to a presentation, you might need to consider the ultimate size of the<br />
presentation. Pictures will add considerably to the presentation’s file size. This increased file<br />
size can make a large presentation difficult to store or work with. Compressing images reduces<br />
the file size of a presentation by reducing its resolution (dots per inch). This action can<br />
make the presentation easier to store and easier to email to others; it also speeds up display<br />
if you have to work on a slow projector or computer system.<br />
STEP BY STEP<br />
Compress the Images in a Presentation<br />
GET READY. USE the Exhibits Final Version 2 presentation that is open from the previous<br />
exercise.<br />
1. Click the File tab, and then make a note of the file size under the Properties heading.<br />
Then press Esc to return to the presentation.

