

MOAC_Powerpoint_2016

Create successful ePaper yourself
Turn your PDF publications into a flip-book with our unique Google optimized e-Paper software.
Using Animation and Multimedia 185<br />
Take Note<br />
Part of the clip’s appearance is the media control bar, or the thick gray bar that appears beneath the<br />
clip. If the presentation is self-running, you might prefer to hide that from the audience. To do so,<br />
clear the Show Media Controls check box on the Slide Show tab as you did in step 9.<br />
Sizing and Arranging Video or Audio Content<br />
Video clips (and audio clips that have a visible icon) can be sized and arranged like any other<br />
content on a slide. You can drag them to move or resize them or specify exact measurements. You<br />
can also align them with other content using the Align tools, which you learned about in Lesson<br />
8 when working with drawn shapes. In this exercise, you change the size of a video clip and align<br />
it on the slide using guides.<br />
STEP BY STEP<br />
Size and Arrange a Video Clip<br />
GET READY. USE the Lobby Final Version 3 presentation that is open from the previous<br />
exercise.<br />
1. On slide 10, select the video clip if it is not already selected.<br />
2. On the Video Tools Format tab, type 2.4 in the Height box and then click away from it.<br />
The value in the Width box changes proportionally.<br />
3. Click the video clip again to select it, if necessary.<br />
4. On the View tab, mark the Guides check box to turn on the guides. Drag the horizontal<br />
guide down so it aligns with the 1” mark on the vertical ruler above the midpoint.<br />
5. Move the text box containing the bullets up so its upper-left corner aligns with the<br />
intersection of the guides at the left side of the slide.<br />
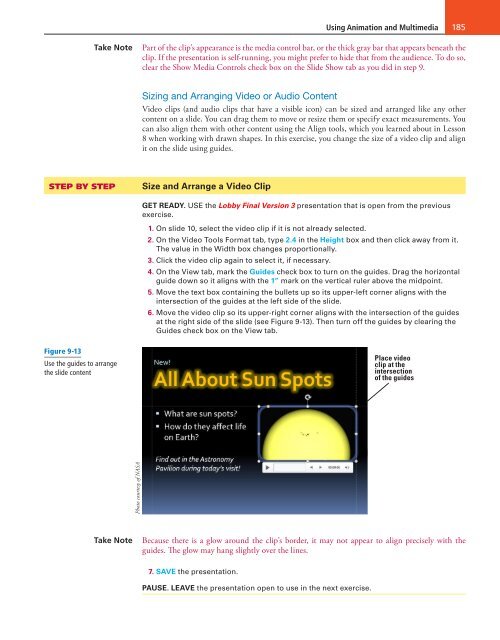
6. Move the video clip so its upper-right corner aligns with the intersection of the guides<br />
at the right side of the slide (see Figure 9-13). Then turn off the guides by clearing the<br />
Guides check box on the View tab.<br />
Figure 9-13<br />
Use the guides to arrange<br />
the slide content<br />
Place video<br />
clip at the<br />
intersection<br />
of the guides<br />
Photo courtesy of NASA<br />
Take Note<br />
Because there is a glow around the clip’s border, it may not appear to align precisely with the<br />
guides. The glow may hang slightly over the lines.<br />
7. SAVE the presentation.<br />
PAUSE. LEAVE the presentation open to use in the next exercise.

