

MOAC_Powerpoint_2016

You also want an ePaper? Increase the reach of your titles
YUMPU automatically turns print PDFs into web optimized ePapers that Google loves.
156<br />
Lesson 8<br />
2. Click any picture in the presentation to select it and then click the Picture Tools Format<br />
tab.<br />
3. Click Compress Pictures in the Adjust group. The Compress Pictures dialog box opens.<br />
4. Click the Email (96 ppi) option button.<br />
5. Clear the Apply only to this picture check box. If you wanted to compress only the<br />
selected picture, you would leave this option checked.<br />
6. Click OK.<br />
7. SAVE the presentation. PowerPoint applies the compression settings you selected.<br />
8. Repeat step 1 to recheck the presentation’s file size. You should notice that the file size<br />
is considerably smaller.<br />
PAUSE. LEAVE the presentation open to use in the next exercise.<br />
ADDING SHAPES TO SLIDES<br />
PowerPoint offers drawing tools that enable you to create both basic and complex drawings.<br />
Use line tools and shapes to construct the drawing. You can easily add text to shapes to identify<br />
them and format the drawing using familiar fill, outline, and effects options.<br />
Drawing Lines<br />
PowerPoint supplies a number of different line tools so you can draw horizontal, vertical, diagonal,<br />
or free-form lines.<br />
To draw a line, you select the Line tool, click where you want to begin the line, hold down the<br />
mouse button, and then drag to make the shape the desired size.<br />
You can use the Shift key to constrain some shapes to a specific appearance. For example, you<br />
can hold down Shift while drawing a line to constrain it to a vertical, horizontal, or 45-degree<br />
diagonal orientation.<br />
STEP BY STEP<br />
Draw Lines<br />
GET READY. USE the Exhibits Final Version 2 presentation that is open from the previous<br />
exercise.<br />
1. SAVE the file as Exhibits Final Version 3.<br />
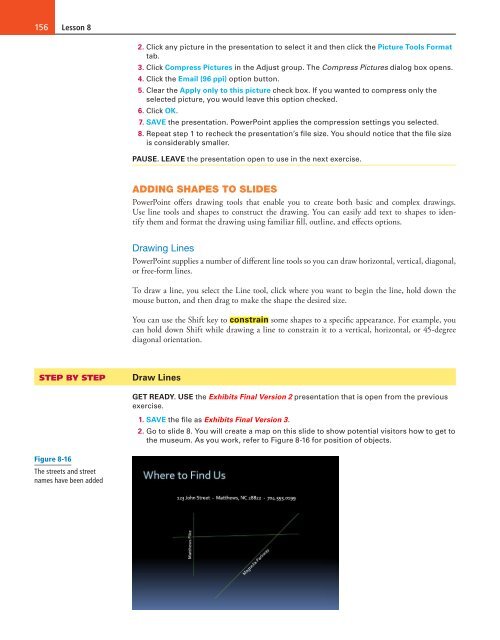
2. Go to slide 8. You will create a map on this slide to show potential visitors how to get to<br />
the museum. As you work, refer to Figure 8-16 for position of objects.<br />
Figure 8-16<br />
The streets and street<br />
names have been added

