MOAC_Powerpoint_2016
Create successful ePaper yourself
Turn your PDF publications into a flip-book with our unique Google optimized e-Paper software.
Securing and Sharing a Presentation 193<br />
STEP BY STEP<br />
Compare and Combine Presentations<br />
GET READY. USE the HR Review Final Version 1 presentation that is open from the<br />
previous exercise.<br />
1. SAVE the file as HR Review Final Version 2.<br />
2. On the Review tab, click Compare. The Choose File to Merge with Current Presentation<br />
dialog box opens.<br />
3. Navigate to the folder containing the data files for this lesson and select HR Summary.<br />
4. Click Merge. The presentation opens and the Comments and the Revisions task panes<br />
open. To toggle the Revisions task pane on and off, you can click the Reviewing Pane<br />
button on the Review tab of the Ribbon.<br />
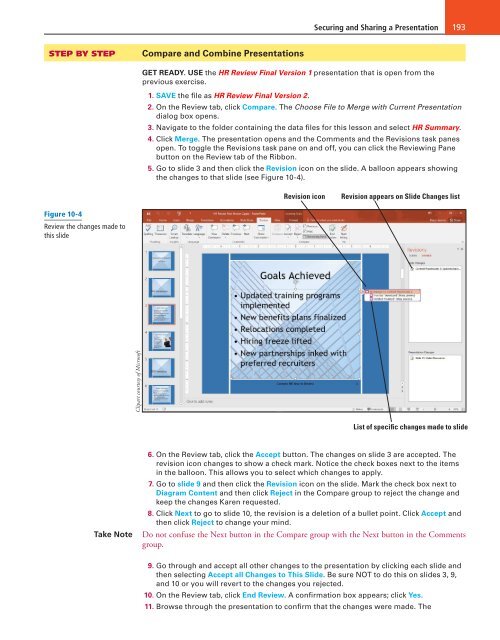
5. Go to slide 3 and then click the Revision icon on the slide. A balloon appears showing<br />
the changes to that slide (see Figure 10-4).<br />
Revision icon<br />
Revision appears on Slide Changes list<br />
Figure 10-4<br />
Review the changes made to<br />
this slide<br />
Clipart courtesy of Microsoft<br />
List of specific changes made to slide<br />
Take Note<br />
6. On the Review tab, click the Accept button. The changes on slide 3 are accepted. The<br />
revision icon changes to show a check mark. Notice the check boxes next to the items<br />
in the balloon. This allows you to select which changes to apply.<br />
7. Go to slide 9 and then click the Revision icon on the slide. Mark the check box next to<br />
Diagram Content and then click Reject in the Compare group to reject the change and<br />
keep the changes Karen requested.<br />
8. Click Next to go to slide 10, the revision is a deletion of a bullet point. Click Accept and<br />
then click Reject to change your mind.<br />
Do not confuse the Next button in the Compare group with the Next button in the Comments<br />
group.<br />
9. Go through and accept all other changes to the presentation by clicking each slide and<br />
then selecting Accept all Changes to This Slide. Be sure NOT to do this on slides 3, 9,<br />
and 10 or you will revert to the changes you rejected.<br />
10. On the Review tab, click End Review. A confirmation box appears; click Yes.<br />
11. Browse through the presentation to confirm that the changes were made. The


