

MOAC_Powerpoint_2016

Create successful ePaper yourself
Turn your PDF publications into a flip-book with our unique Google optimized e-Paper software.
Using Animation and Multimedia 171<br />
The Apply to All button copies the transition from the active slide to all other slides. To remove<br />
the transitions from all slides at once, first set one of the slides to have a transition of None, and<br />
then click Apply to All.<br />
STEP BY STEP<br />
Apply and Modify a Transition Effect<br />
GET READY. Before you begin these steps, make sure that your computer is on. Sign on, if<br />
necessary.<br />
1. START PowerPoint, if the program is not already running.<br />
2. OPEN the Lobby presentation from the data files for this lesson and then SAVE it as<br />
Lobby Final Version 1.<br />
3. Click Slide Sorter view on the View tab and then select slide 2.<br />
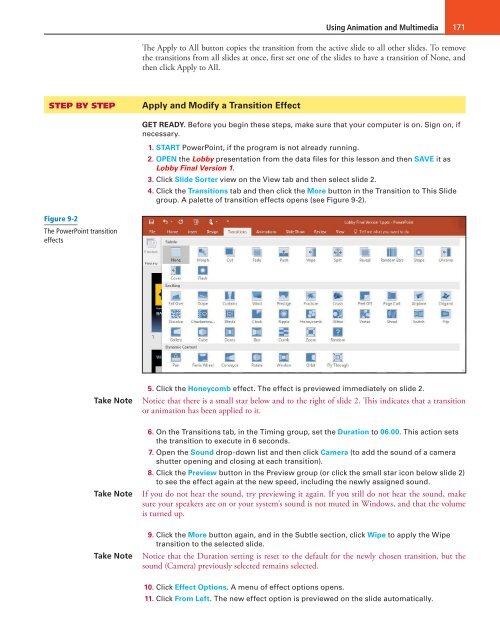
4. Click the Transitions tab and then click the More button in the Transition to This Slide<br />
group. A palette of transition effects opens (see Figure 9-2).<br />
Figure 9-2<br />
The PowerPoint transition<br />
effects<br />
Take Note<br />
5. Click the Honeycomb effect. The effect is previewed immediately on slide 2.<br />
Notice that there is a small star below and to the right of slide 2. This indicates that a transition<br />
or animation has been applied to it.<br />
Take Note<br />
6. On the Transitions tab, in the Timing group, set the Duration to 06.00. This action sets<br />
the transition to execute in 6 seconds.<br />
7. Open the Sound drop-down list and then click Camera (to add the sound of a camera<br />
shutter opening and closing at each transition).<br />
8. Click the Preview button in the Preview group (or click the small star icon below slide 2)<br />
to see the effect again at the new speed, including the newly assigned sound.<br />
If you do not hear the sound, try previewing it again. If you still do not hear the sound, make<br />
sure your speakers are on or your system’s sound is not muted in Windows, and that the volume<br />
is turned up.<br />
Take Note<br />
9. Click the More button again, and in the Subtle section, click Wipe to apply the Wipe<br />
transition to the selected slide.<br />
Notice that the Duration setting is reset to the default for the newly chosen transition, but the<br />
sound (Camera) previously selected remains selected.<br />
10. Click Effect Options. A menu of effect options opens.<br />
11. Click From Left. The new effect option is previewed on the slide automatically.

