Instructions for use: Ikus - Berlin Heart
Instructions for use: Ikus - Berlin Heart
Instructions for use: Ikus - Berlin Heart
You also want an ePaper? Increase the reach of your titles
YUMPU automatically turns print PDFs into web optimized ePapers that Google loves.
Start menu<br />
<strong>Instructions</strong> <strong>for</strong> <strong>use</strong>: <strong>Ikus</strong><br />
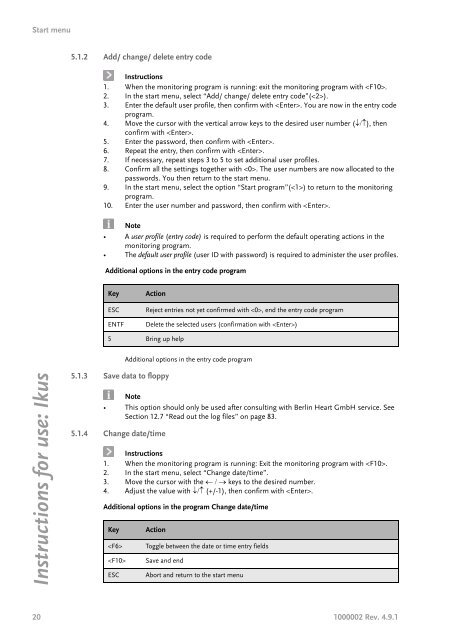
5.1.2 Add/ change/ delete entry code<br />
<strong>Instructions</strong><br />
1. When the monitoring program is running: exit the monitoring program with .<br />
2. In the start menu, select “Add/ change/ delete entry code”().<br />
3. Enter the default <strong>use</strong>r profile, then confirm with . You are now in the entry code<br />
program.<br />
4. Move the cursor with the vertical arrow keys to the desired <strong>use</strong>r number (↓/↑), then<br />
confirm with .<br />
5. Enter the password, then confirm with .<br />
6. Repeat the entry, then confirm with .<br />
7. If necessary, repeat steps 3 to 5 to set additional <strong>use</strong>r profiles.<br />
8. Confirm all the settings together with . The <strong>use</strong>r numbers are now allocated to the<br />
passwords. You then return to the start menu.<br />
9. In the start menu, select the option “Start program”() to return to the monitoring<br />
program.<br />
10. Enter the <strong>use</strong>r number and password, then confirm with .<br />
Note<br />
• A <strong>use</strong>r profile (entry code) is required to per<strong>for</strong>m the default operating actions in the<br />
monitoring program.<br />
• The default <strong>use</strong>r profile (<strong>use</strong>r ID with password) is required to administer the <strong>use</strong>r profiles.<br />
Additional options in the entry code program<br />
Key Action<br />
ESC Reject entries not yet confirmed with , end the entry code program<br />
ENTF Delete the selected <strong>use</strong>rs (confirmation with )<br />
5 Bring up help<br />
5.1.3 Save data to floppy<br />
Additional options in the entry code program<br />
Note<br />
• This option should only be <strong>use</strong>d after consulting with <strong>Berlin</strong> <strong>Heart</strong> GmbH service. See<br />
Section 12.7 “Read out the log files” on page 83.<br />
5.1.4 Change date/time<br />
<strong>Instructions</strong><br />
1. When the monitoring program is running: Exit the monitoring program with .<br />
2. In the start menu, select “Change date/time”.<br />
3. Move the cursor with the ← / → keys to the desired number.<br />
4. Adjust the value with ↓/↑ (+/-1), then confirm with .<br />
Additional options in the program Change date/time<br />
Key Action<br />
Toggle between the date or time entry fields<br />
Save and end<br />
ESC Abort and return to the start menu<br />
20 1000002 Rev. 4.9.1


