Instructions for use: Ikus - Berlin Heart
Instructions for use: Ikus - Berlin Heart
Instructions for use: Ikus - Berlin Heart
Create successful ePaper yourself
Turn your PDF publications into a flip-book with our unique Google optimized e-Paper software.
De-air the pump<br />
Implantation: Preparation in the operating room<br />
<strong>Instructions</strong><br />
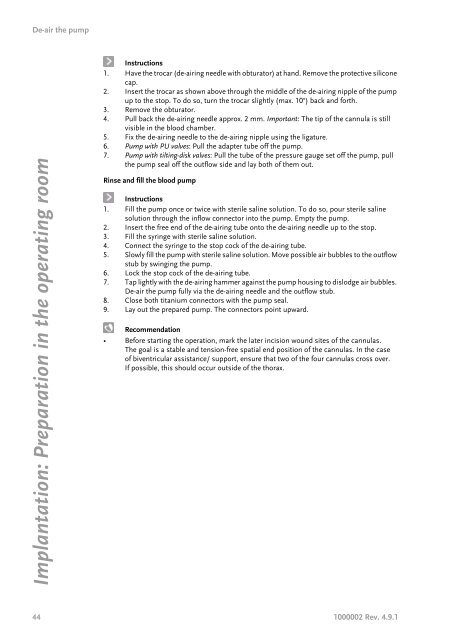
1. Have the trocar (de-airing needle with obturator) at hand. Remove the protective silicone<br />
cap.<br />
2. Insert the trocar as shown above through the middle of the de-airing nipple of the pump<br />
up to the stop. To do so, turn the trocar slightly (max. 10°) back and <strong>for</strong>th.<br />
3. Remove the obturator.<br />
4. Pull back the de-airing needle approx. 2 mm. Important: The tip of the cannula is still<br />
visible in the blood chamber.<br />
5. Fix the de-airing needle to the de-airing nipple using the ligature.<br />
6. Pump with PU valves: Pull the adapter tube off the pump.<br />
7. Pump with tilting-disk valves: Pull the tube of the pressure gauge set off the pump, pull<br />
the pump seal off the outflow side and lay both of them out.<br />
Rinse and fill the blood pump<br />
<strong>Instructions</strong><br />
1. Fill the pump once or twice with sterile saline solution. To do so, pour sterile saline<br />
solution through the inflow connector into the pump. Empty the pump.<br />
2. Insert the free end of the de-airing tube onto the de-airing needle up to the stop.<br />
3. Fill the syringe with sterile saline solution.<br />
4. Connect the syringe to the stop cock of the de-airing tube.<br />
5. Slowly fill the pump with sterile saline solution. Move possible air bubbles to the outflow<br />
stub by swinging the pump.<br />
6. Lock the stop cock of the de-airing tube.<br />
7. Tap lightly with the de-airing hammer against the pump housing to dislodge air bubbles.<br />
De-air the pump fully via the de-airing needle and the outflow stub.<br />
8. Close both titanium connectors with the pump seal.<br />
9. Lay out the prepared pump. The connectors point upward.<br />
Recommendation<br />
• Be<strong>for</strong>e starting the operation, mark the later incision wound sites of the cannulas.<br />
The goal is a stable and tension-free spatial end position of the cannulas. In the case<br />
of biventricular assistance/ support, ensure that two of the four cannulas cross over.<br />
If possible, this should occur outside of the thorax.<br />
44 1000002 Rev. 4.9.1


