Oracle Database Oracle Clusterware Installation Guide for HP-UX
Oracle Database Oracle Clusterware Installation Guide for HP-UX
Oracle Database Oracle Clusterware Installation Guide for HP-UX
Create successful ePaper yourself
Turn your PDF publications into a flip-book with our unique Google optimized e-Paper software.
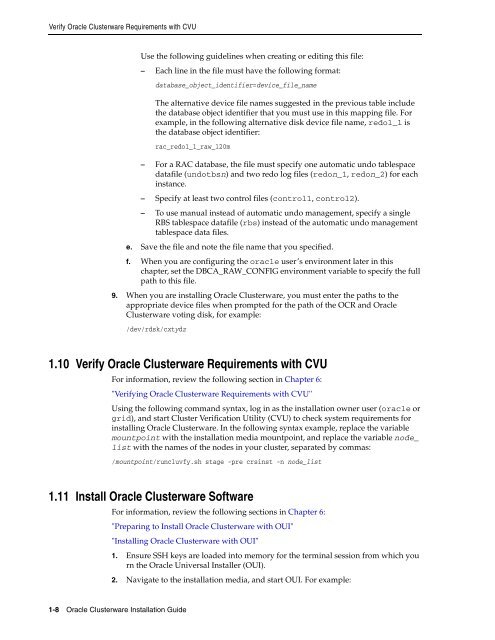
Verify <strong>Oracle</strong> <strong>Clusterware</strong> Requirements with CVU<br />
1-8 <strong>Oracle</strong> <strong>Clusterware</strong> <strong>Installation</strong> <strong>Guide</strong><br />
Use the following guidelines when creating or editing this file:<br />
– Each line in the file must have the following <strong>for</strong>mat:<br />
database_object_identifier=device_file_name<br />
The alternative device file names suggested in the previous table include<br />
the database object identifier that you must use in this mapping file. For<br />
example, in the following alternative disk device file name, redo1_1 is<br />
the database object identifier:<br />
rac_redo1_1_raw_120m<br />
– For a RAC database, the file must specify one automatic undo tablespace<br />
datafile (undotbsn) and two redo log files (redon_1, redon_2) <strong>for</strong> each<br />
instance.<br />
– Specify at least two control files (control1, control2).<br />
– To use manual instead of automatic undo management, specify a single<br />
RBS tablespace datafile (rbs) instead of the automatic undo management<br />
tablespace data files.<br />
e. Save the file and note the file name that you specified.<br />
f. When you are configuring the oracle user’s environment later in this<br />
chapter, set the DBCA_RAW_CONFIG environment variable to specify the full<br />
path to this file.<br />
9. When you are installing <strong>Oracle</strong> <strong>Clusterware</strong>, you must enter the paths to the<br />
appropriate device files when prompted <strong>for</strong> the path of the OCR and <strong>Oracle</strong><br />
<strong>Clusterware</strong> voting disk, <strong>for</strong> example:<br />
/dev/rdsk/cxtydz<br />
1.10 Verify <strong>Oracle</strong> <strong>Clusterware</strong> Requirements with CVU<br />
For in<strong>for</strong>mation, review the following section in Chapter 6:<br />
"Verifying <strong>Oracle</strong> <strong>Clusterware</strong> Requirements with CVU"<br />
Using the following command syntax, log in as the installation owner user (oracle or<br />
grid), and start Cluster Verification Utility (CVU) to check system requirements <strong>for</strong><br />
installing <strong>Oracle</strong> <strong>Clusterware</strong>. In the following syntax example, replace the variable<br />
mountpoint with the installation media mountpoint, and replace the variable node_<br />
list with the names of the nodes in your cluster, separated by commas:<br />
/mountpoint/runcluvfy.sh stage -pre crsinst -n node_list<br />
1.11 Install <strong>Oracle</strong> <strong>Clusterware</strong> Software<br />
For in<strong>for</strong>mation, review the following sections in Chapter 6:<br />
"Preparing to Install <strong>Oracle</strong> <strong>Clusterware</strong> with OUI"<br />
"Installing <strong>Oracle</strong> <strong>Clusterware</strong> with OUI"<br />
1. Ensure SSH keys are loaded into memory <strong>for</strong> the terminal session from which you<br />
rn the <strong>Oracle</strong> Universal Installer (OUI).<br />
2. Navigate to the installation media, and start OUI. For example:


