Kaspersky Internet Security 2012
Kaspersky Internet Security 2012
Kaspersky Internet Security 2012

Create successful ePaper yourself
Turn your PDF publications into a flip-book with our unique Google optimized e-Paper software.
U S E R G U I D E<br />
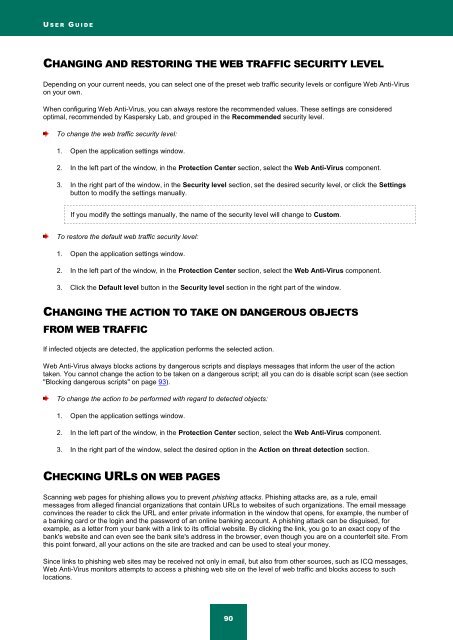
CHANGING AND RESTORING THE WEB TRAFFIC SECURITY LEVEL<br />
Depending on your current needs, you can select one of the preset web traffic security levels or configure Web Anti-Virus<br />
on your own.<br />
When configuring Web Anti-Virus, you can always restore the recommended values. These settings are considered<br />
optimal, recommended by <strong>Kaspersky</strong> Lab, and grouped in the Recommended security level.<br />
To change the web traffic security level:<br />
1. Open the application settings window.<br />
2. In the left part of the window, in the Protection Center section, select the Web Anti-Virus component.<br />
3. In the right part of the window, in the <strong>Security</strong> level section, set the desired security level, or click the Settings<br />
button to modify the settings manually.<br />
If you modify the settings manually, the name of the security level will change to Custom.<br />
To restore the default web traffic security level:<br />
1. Open the application settings window.<br />
2. In the left part of the window, in the Protection Center section, select the Web Anti-Virus component.<br />
3. Click the Default level button in the <strong>Security</strong> level section in the right part of the window.<br />
CHANGING THE ACTION TO TAKE ON DANGEROUS OBJECTS<br />
FROM WEB TRAFFIC<br />
If infected objects are detected, the application performs the selected action.<br />
Web Anti-Virus always blocks actions by dangerous scripts and displays messages that inform the user of the action<br />
taken. You cannot change the action to be taken on a dangerous script; all you can do is disable script scan (see section<br />
"Blocking dangerous scripts" on page 93).<br />
To change the action to be performed with regard to detected objects:<br />
1. Open the application settings window.<br />
2. In the left part of the window, in the Protection Center section, select the Web Anti-Virus component.<br />
3. In the right part of the window, select the desired option in the Action on threat detection section.<br />
CHECKING URLS ON WEB PAGES<br />
Scanning web pages for phishing allows you to prevent phishing attacks. Phishing attacks are, as a rule, email<br />
messages from alleged financial organizations that contain URLs to websites of such organizations. The email message<br />
convinces the reader to click the URL and enter private information in the window that opens, for example, the number of<br />
a banking card or the login and the password of an online banking account. A phishing attack can be disguised, for<br />
example, as a letter from your bank with a link to its official website. By clicking the link, you go to an exact copy of the<br />
bank's website and can even see the bank site's address in the browser, even though you are on a counterfeit site. From<br />
this point forward, all your actions on the site are tracked and can be used to steal your money.<br />
Since links to phishing web sites may be received not only in email, but also from other sources, such as ICQ messages,<br />
Web Anti-Virus monitors attempts to access a phishing web site on the level of web traffic and blocks access to such<br />
locations.<br />
90