TVG-Series System Guide v1-4 - SerVision
TVG-Series System Guide v1-4 - SerVision
TVG-Series System Guide v1-4 - SerVision

Create successful ePaper yourself
Turn your PDF publications into a flip-book with our unique Google optimized e-Paper software.
<strong>SerVision</strong><br />
<strong>TVG</strong> <strong>System</strong> <strong>Guide</strong><br />
• Field<br />
Brightness<br />
Contrast<br />
Saturation<br />
• Description<br />
Adjust the default brightness of the camera. Range: 1–100. These values are used when the<br />
<strong>TVG</strong> unit is started.<br />
Note: You can also adjust the brightness in the client or in a CCTV monitor (with the<br />
touch/mouse enabled) as you view the video stream (see page 83 ).<br />
Adjust the default contrast of the camera. Range: 1–100. These values are used when the<br />
<strong>TVG</strong> unit is started.<br />
Note: You can also adjust the contrast in the client or in a CCTV monitor (with the<br />
touch/mouse enabled) as you view the video stream (see page 83 ).<br />
Adjust the default saturation of the camera. Range: 1–100. Higher saturation produces more<br />
vivid colors.<br />
Note: Changes to brightness, contrast, and saturation are implemented immediately when Update is clicked.<br />
4. If the camera has PTZ features, and you want to use them to control the camera remotely through a client<br />
application, under Camera Control (PTZ), select Enabled. Then follow the instructions below<br />
(Configuring PTZ, page 87).<br />
5. Under Audio, select one of the following:<br />
•• None: Do not link any audio to the video from this camera.<br />
•• Channel 1: Link the audio from the microphone connected to Ain1 to the video from this camera.<br />
• Channel 2: Link the audio from the microphone connected to Ain2 to the video from this camera<br />
(HVG, MVG, UVG only).<br />
Note: In HVG units that only support one microphone, you will either see Channel 1 or Channel 2 in the<br />
dropdown list, depending on which one was activated. For additional information, see the description of the<br />
Input Volume Ch 1 / Input Volume Ch 2 field (page 22).<br />
If you selected None, skip to step 8.<br />
If you selected either Channel 1 or Channel 2, audio from the selected microphone is available whenever<br />
you view live video in a client application. In addition, the fields required to configure recording of audio with<br />
recorded video from this camera are added to the screen, and a message appears indicating that audio<br />
recording is enabled. This means that audio from the selected microphone is incorporated with all video<br />
recorded from the camera.<br />
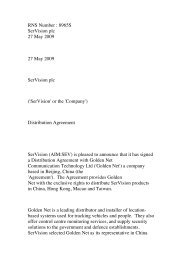
Figure 96: A udio recording settings<br />
Figure 97: A udio-recording-enabled message<br />
6. In the audio-recording-enabled message, click OK.<br />
Configuring Camera Settings 86