

Download Adept Cobra PLC600 User's Guide - pulsar.com.tr
Download Adept Cobra PLC600 User's Guide - pulsar.com.tr
Download Adept Cobra PLC600 User's Guide - pulsar.com.tr

Create successful ePaper yourself
Turn your PDF publications into a flip-book with our unique Google optimized e-Paper software.
Maintenance<br />
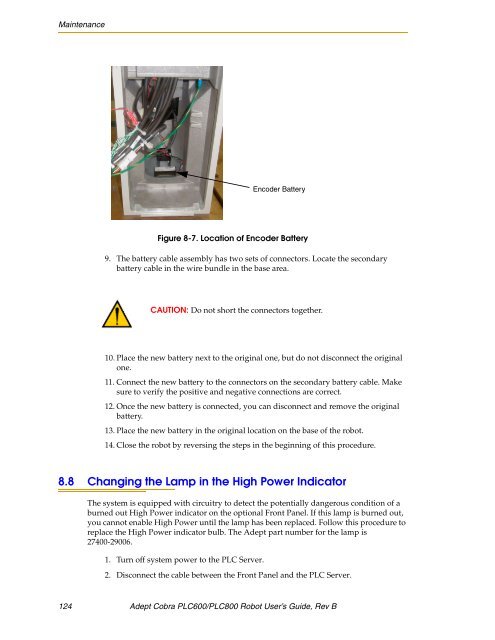
Encoder Battery<br />
Figure 8-7. Location of Encoder Battery<br />
9. The battery cable assembly has two sets of connectors. Locate the secondary<br />
battery cable in the wire bundle in the base area.<br />
CAUTION: Do not short the connectors together.<br />
10. Place the new battery next to the original one, but do not disconnect the original<br />
one.<br />
11. Connect the new battery to the connectors on the secondary battery cable. Make<br />
sure to verify the positive and negative connections are correct.<br />
12. Once the new battery is connected, you can disconnect and remove the original<br />
battery.<br />
13. Place the new battery in the original location on the base of the robot.<br />
14. Close the robot by reversing the steps in the beginning of this procedure.<br />
8.8 Changing the Lamp in the High Power Indicator<br />
The system is equipped with circui<strong>tr</strong>y to detect the potentially dangerous condition of a<br />
burned out High Power indicator on the optional Front Panel. If this lamp is burned out,<br />
you cannot enable High Power until the lamp has been replaced. Follow this procedure to<br />
replace the High Power indicator bulb. The <s<strong>tr</strong>ong>Adept</s<strong>tr</strong>ong> part number for the lamp is<br />
27400-29006.<br />
1. Turn off system power to the PLC Server.<br />
2. Disconnect the cable between the Front Panel and the PLC Server.<br />
124 <s<strong>tr</strong>ong>Adept</s<strong>tr</strong>ong> <s<strong>tr</strong>ong>Cobra</s<strong>tr</strong>ong> <s<strong>tr</strong>ong>PLC600</s<strong>tr</strong>ong>/PLC800 Robot User’s <s<strong>tr</strong>ong>Guide</s<strong>tr</strong>ong>, Rev B


