- Page 1 and 2:
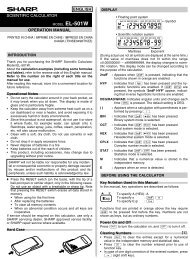
OPERATION GUIDE Search based on wha
- Page 3 and 4:
Conserve Copy on both sides of the
- Page 5 and 6:
Make a copy of this type of origina
- Page 7 and 8:
Add the date or page numbers 2012/0
- Page 9 and 10:
Other convenient functions Function
- Page 11 and 12:
Conserve Print on both sides of the
- Page 13 and 14:
Print attractive output Print match
- Page 15 and 16:
Print on this type of paper Envelop
- Page 17 and 18:
Other convenient functions Correct
- Page 19 and 20:
Conserve Send when the rate is lowe
- Page 21 and 22:
Prevent transmission to the wrong d
- Page 23 and 24:
Save trouble 1 2 3 Store frequently
- Page 25 and 26:
Other convenient functions Convenie
- Page 27 and 28:
Send a clear image Adjust the contr
- Page 29 and 30:
Prevent transmission to the wrong d
- Page 31 and 32:
Save trouble 1 2 3 Store frequently
- Page 33 and 34:
SAVE A JOB AND REUSE IT LATER Searc
- Page 35 and 36:
Organize my files Delete a file Del
- Page 37 and 38:
Clean the machine Clean the documen
- Page 39 and 40:
HOW TO USE THIS MANUAL Click a butt
- Page 41 and 42:
ABOUT OPERATION MANUAL This manual
- Page 43 and 44:
BEFORE USING THE MACHINE BEFORE USI
- Page 45 and 46:
BEFORE USING THE MACHINE INTERIOR (
- Page 47 and 48:
BEFORE USING THE MACHINE SIDE AND B
- Page 49 and 50:
BEFORE USING THE MACHINE (10) (11)
- Page 51 and 52:
BEFORE USING THE MACHINE Example 4
- Page 53 and 54:
BEFORE USING THE MACHINE SYSTEM BAR
- Page 55 and 56:
BEFORE USING THE MACHINE TURNING TH
- Page 57 and 58:
BEFORE USING THE MACHINE USER AUTHE
- Page 59 and 60:
BEFORE USING THE MACHINE AUTHENTICA
- Page 61 and 62:
BEFORE USING THE MACHINE User Authe
- Page 63 and 64:
BEFORE USING THE MACHINE REMOTE OPE
- Page 65 and 66:
BEFORE USING THE MACHINE No. Item n
- Page 67 and 68:
BEFORE USING THE MACHINE ABOUT THE
- Page 69 and 70:
BEFORE USING THE MACHINE LOADING PA
- Page 71 and 72:
BEFORE USING THE MACHINE Print side
- Page 73 and 74:
BEFORE USING THE MACHINE Gently pus
- Page 75 and 76:
BEFORE USING THE MACHINE IMPORTANT
- Page 77 and 78:
BEFORE USING THE MACHINE ORIGINALS
- Page 79 and 80:
BEFORE USING THE MACHINE PLACING TH
- Page 81 and 82:
BEFORE USING THE MACHINE PERIPHERAL
- Page 83 and 84:
BEFORE USING THE MACHINE FINISHER T
- Page 85 and 86:
BEFORE USING THE MACHINE 6 Replace
- Page 87 and 88:
BEFORE USING THE MACHINE Select Ext
- Page 89 and 90:
BEFORE USING THE MACHINE MAINTENANC
- Page 91 and 92:
BEFORE USING THE MACHINE CLEANING T
- Page 93 and 94:
BEFORE USING THE MACHINE Open the f
- Page 95 and 96:
BEFORE USING THE MACHINE REPLACING
- Page 97 and 98:
BEFORE USING THE MACHINE Key Descri
- Page 99 and 100:
CHAPTER 2 COPIER This chapter provi
- Page 101 and 102:
COPIER BEFORE USING THE MACHINE AS
- Page 103 and 104:
COPIER Customizing displayed keys S
- Page 105 and 106:
COPIER Output settings Output Offse
- Page 107 and 108:
COPIER ORIGINALS CHECKING THE ORIGI
- Page 109 and 110:
COPIER PAPER TRAYS The machine is s
- Page 111 and 112:
COPIER Special Modes 7 Set the numb
- Page 113 and 114:
COPIER Special Modes 7 Set the numb
- Page 115 and 116:
COPIER 4 Exposure Auto Copy Ratio 1
- Page 117 and 118:
COPIER 2-Sided Copy (1) (2) OK Sele
- Page 119 and 120:
COPIER CHANGING THE EXPOSURE AND OR
- Page 121 and 122:
COPIER REDUCTION/ENLARGEMENT/ZOOM A
- Page 123 and 124:
COPIER Copy Ratio OK Touch the [OK]
- Page 125 and 126:
COPIER ORIGINAL SIZES SPECIFYING TH
- Page 127 and 128:
COPIER Original Custom Size X254 Y2
- Page 129 and 130:
COPIER OUTPUT To select output func
- Page 131 and 132:
COPIER Staple sort function The sta
- Page 133 and 134:
COPIER MAKING COPIES USING THE BYPA
- Page 135 and 136:
COPIER (1) (2) Select the bypass tr
- Page 137 and 138:
COPIER Special modes menu (2nd scre
- Page 139 and 140:
COPIER ADDING MARGINS (Margin Shift
- Page 141 and 142:
COPIER ERASING PERIPHERAL SHADOWS (
- Page 143 and 144:
COPIER COPYING EACH FACING PAGE OF
- Page 145 and 146:
COPIER MAKING COPIES IN PAMPHLET FO
- Page 147 and 148:
COPIER Special Modes OK Touch the [
- Page 149 and 150:
COPIER 3 Press the [START] key to s
- Page 151 and 152:
COPIER USING TWO MACHINES TO MAKE A
- Page 153 and 154:
COPIER In this situation... If a ma
- Page 155 and 156:
COPIER INSERTING COVERS IN COPIES (
- Page 157 and 158:
COPIER Special Modes OK Touch the [
- Page 159 and 160:
COPIER 4 Covers/Inserts Insertion T
- Page 161 and 162:
COPIER Special Modes OK Touch the [
- Page 163 and 164:
COPIER Example: Touch insert A at p
- Page 165 and 166:
COPIER ADDING INSERTS WHEN COPYING
- Page 167 and 168:
COPIER COPYING MULTIPLE ORIGINALS O
- Page 169 and 170:
COPIER COPYING A PAMPHLET (Book Cop
- Page 171 and 172:
COPIER Special Modes Book Copy Canc
- Page 173 and 174:
1 COPIER COPYING CAPTIONS ONTO TAB
- Page 175 and 176:
COPIER COPYING BOTH SIDES OF A CARD
- Page 177 and 178:
COPIER • The original must be pla
- Page 179 and 180:
COPIER GENERAL PROCEDURE FOR USING
- Page 181 and 182:
COPIER 7 Press the [START] key. Cop
- Page 183 and 184:
COPIER Stamp Date Cancel OK Select
- Page 185 and 186:
COPIER Stamp Stamp Cancel OK Touch
- Page 187 and 188:
COPIER Stamp Page Numbering Cancel
- Page 189 and 190:
COPIER • When Page Numbering is s
- Page 191 and 192:
COPIER Stamp Text Cancel OK Select
- Page 193 and 194:
COPIER Stamp Touch the [Back] key.
- Page 195 and 196:
COPIER Stamp Move Select the locati
- Page 197 and 198:
COPIER Stamp Watermark Cancel OK To
- Page 199 and 200:
COPIER REPEATING PHOTOS ON A COPY (
- Page 201 and 202:
COPIER CREATING A LARGE POSTER (Mul
- Page 203 and 204:
COPIER Image Edit OK Touch the [OK]
- Page 205 and 206:
COPIER COPYING IN THE CENTRE OF THE
- Page 207 and 208:
COPIER ADJUSTING THE SHARPNESS OF A
- Page 209 and 210:
COPIER 4 Plain A4 Special Modes 2-S
- Page 211 and 212:
COPIER CHECKING THE NUMBER OF SCANN
- Page 213 and 214:
COPIER Insert the originals face up
- Page 215 and 216:
COPIER COPYING THIN ORIGINALS (Slow
- Page 217 and 218:
COPIER CONVENIENT COPY FUNCTIONS Th
- Page 219 and 220:
COPIER CHECKING A PREVIEW IMAGE OF
- Page 221 and 222:
COPIER PREVIEW SCREEN The preview s
- Page 223 and 224:
COPIER JOB QUEUE SCREEN AND COMPLET
- Page 225 and 226:
COPIER CANCELLING A JOB THAT IS WAI
- Page 227 and 228:
COPIER CHECKING INFORMATION ON A CO
- Page 229 and 230:
COPIER STORING (EDITING/DELETING) A
- Page 231 and 232:
43 21 COPIER APPENDIX Examples of c
- Page 233 and 234:
43 65 21 54 312 43 65 21 65 21 43 2
- Page 235 and 236:
21 43 65 21 43 65 413 65 43 65 21 2
- Page 237 and 238:
CHAPTER 3 PRINTER This chapter prov
- Page 239 and 240:
PRINTER PRINTER FUNCTION OF THE MAC
- Page 241 and 242:
PRINTER (1) (2) Select print settin
- Page 243 and 244:
PRINTER PRINTING ON ENVELOPES The b
- Page 245 and 246:
PRINTER (1) (2) Enter your login na
- Page 247 and 248:
PRINTER VIEWING PRINTER DRIVER HELP
- Page 249 and 250:
PRINTER (1) (2) Check and save the
- Page 251 and 252:
PRINTER CHANGING THE PRINTER DRIVER
- Page 253 and 254:
PRINTER PRINTING FROM A MACINTOSH B
- Page 255 and 256:
PRINTER SELECTING THE PAPER This se
- Page 257 and 258:
PRINTER PRINTING WHEN THE USER AUTH
- Page 259 and 260:
PRINTER FREQUENTLY USED FUNCTIONS T
- Page 261 and 262:
PRINTER TWO-SIDED PRINTING The mach
- Page 263 and 264:
PRINTER FITTING THE PRINT IMAGE TO
- Page 265 and 266:
PRINTER Windows (1) (1) Configure t
- Page 267 and 268:
PRINTER Windows (1) (3) (2) (1) Con
- Page 269 and 270:
PRINTER Macintosh (1) (2) (1) Selec
- Page 271 and 272:
PRINTER CREATING A LARGE POSTER (Po
- Page 273 and 274:
PRINTER ENLARGING/REDUCING THE PRIN
- Page 275 and 276:
B PRINTER REVERSING THE IMAGE (Mirr
- Page 277 and 278:
PRINTER PRINTING FAINT TEXT AND LIN
- Page 279 and 280:
PRINTER PRINTING AN IMAGE OVER THE
- Page 281 and 282:
PRINTER PRINT FUNCTIONS FOR SPECIAL
- Page 283 and 284:
PRINTER ADDING INSERTS WHEN PRINTIN
- Page 285 and 286:
PRINTER PRINTING TEXT ON TABS OF TA
- Page 287 and 288:
PRINTER TWO-SIDED PRINTING WITH SPE
- Page 289 and 290:
PRINTER SAVING AND USING PRINT FILE
- Page 291 and 292:
PRINTER PRINTING WITHOUT THE PRINTE
- Page 293 and 294:
PRINTER Print Cancel Print the sele
- Page 295 and 296:
PRINTER Remove the USB memory devic
- Page 297 and 298:
PRINTER Select workgroup. Search Ac
- Page 299 and 300:
PRINTER DIRECTLY PRINTING FROM A CO
- Page 301 and 302:
PRINTER CHECKING THE PRINT STATUS J
- Page 303 and 304:
PRINTER Job key display Each job ke
- Page 305 and 306:
PRINTER GIVING A PRINT JOB PRIORITY
- Page 307 and 308:
PRINTER CHANGING TO ANOTHER PAPER S
- Page 309 and 310:
PRINTER Special functions Functions
- Page 311 and 312:
CHAPTER 4 FACSIMILE This chapter pr
- Page 313 and 314:
FACSIMILE USING AN EXTENSION PHONE
- Page 315 and 316:
FACSIMILE SETTING THE TELEPHONE LIN
- Page 317 and 318:
FACSIMILE BASE SCREEN OF FAX MODE T
- Page 319 and 320:
FACSIMILE (15) / / key When "Hold S
- Page 321 and 322:
FACSIMILE ADDRESS BOOK SCREEN This
- Page 323 and 324:
FACSIMILE Index display Indexes mak
- Page 325 and 326:
FACSIMILE Select image settings. Sc
- Page 327 and 328:
FACSIMILE ENTERING DESTINATIONS Thi
- Page 329 and 330:
FACSIMILE RETRIEVING A STORED DESTI
- Page 331 and 332:
FACSIMILE USING A SEARCH NUMBER TO
- Page 333 and 334:
FACSIMILE (2) (1) Select the destin
- Page 335 and 336:
FACSIMILE CHAIN DIALLING Number seq
- Page 337 and 338:
FACSIMILE To fax thick originals or
- Page 339 and 340:
FACSIMILE TRANSMITTABLE ORIGINAL SI
- Page 341 and 342:
FACSIMILE FAX DESTINATION CONFIRMAT
- Page 343 and 344:
FACSIMILE USING THE AUTOMATIC DOCUM
- Page 345 and 346:
FACSIMILE USING THE DOCUMENT GLASS
- Page 347 and 348:
FACSIMILE USING THE DOCUMENT GLASS
- Page 349 and 350:
FACSIMILE TRANSMISSION USING THE SP
- Page 351 and 352:
FACSIMILE (2) Enter the destination
- Page 353 and 354:
FACSIMILE Resending to unsuccessful
- Page 355 and 356:
FACSIMILE SENDING A FAX DIRECTLY FR
- Page 357 and 358:
FACSIMILE AUTOMATICALLY SCANNING BO
- Page 359 and 360:
FACSIMILE Specifying the original s
- Page 361 and 362:
FACSIMILE Specifying the original s
- Page 363 and 364:
FACSIMILE Specifying the send size
- Page 365 and 366:
FACSIMILE CHANGING THE EXPOSURE The
- Page 367 and 368:
FACSIMILE CHECKING THE IMAGE TO BE
- Page 369 and 370:
FACSIMILE FAX RECEPTION This sectio
- Page 371 and 372:
FACSIMILE RECEIVING A FAX MANUALLY
- Page 373 and 374:
FACSIMILE CHECKING THE IMAGE BEFORE
- Page 375 and 376:
FACSIMILE 5 10 15 To Cc Start forwa
- Page 377 and 378:
FACSIMILE FORWARDING RECEIVED FAXES
- Page 379 and 380:
FACSIMILE 3 (2) (3) (4) (8) (7) (6)
- Page 381 and 382:
FACSIMILE SPECIAL MODES This sectio
- Page 383 and 384:
FACSIMILE STORING FAX OPERATIONS (P
- Page 385 and 386:
FACSIMILE ERASING PERIPHERAL SHADOW
- Page 387 and 388:
FACSIMILE TRANSMITTING AN ORIGINAL
- Page 389 and 390:
FACSIMILE SENDING A FAX AT A SPECIF
- Page 391 and 392:
FACSIMILE SENDING TWO PAGES AS A SI
- Page 393 and 394:
FACSIMILE • Transmission is not p
- Page 395 and 396:
FACSIMILE (1) (A) (B) (2) Specify t
- Page 397 and 398:
FACSIMILE SENDING A LARGE NUMBER OF
- Page 399 and 400:
FACSIMILE TRANSMITTING ORIGINALS OF
- Page 401 and 402:
FACSIMILE FAXING THIN ORIGINALS (Sl
- Page 403 and 404:
FACSIMILE CHECKING THE NUMBER OF SC
- Page 405 and 406:
FACSIMILE STAMPING SCANNED ORIGINAL
- Page 407 and 408:
FACSIMILE CHANGING THE PRINT SETTIN
- Page 409 and 410:
FACSIMILE ADDING YOUR SENDER INFORM
- Page 411 and 412:
FACSIMILE CALLING A FAX MACHINE AND
- Page 413 and 414:
FACSIMILE INITIATING POLLING RECEPT
- Page 415 and 416:
FACSIMILE SCANNING A DOCUMENT INTO
- Page 417 and 418:
FACSIMILE CHECKING THE DOCUMENT IN
- Page 419 and 420:
FACSIMILE PERFORMING F-CODE COMMUNI
- Page 421 and 422:
FACSIMILE CONFIDENTIAL COMMUNICATIO
- Page 423 and 424:
FACSIMILE CHECKING FAXES RECEIVED B
- Page 425 and 426:
FACSIMILE POLLING RECEPTION USING F
- Page 427 and 428:
FACSIMILE POLLING MEMORY TRANSMISSI
- Page 429 and 430:
FACSIMILE 7 Press the [START] key.
- Page 431 and 432:
FACSIMILE DELETING A DOCUMENT STORE
- Page 433 and 434:
FACSIMILE 2 5 10 15 Condition Setti
- Page 435 and 436:
FACSIMILE USING AN EXTENSION PHONE
- Page 437 and 438:
FACSIMILE CHECKING THE STATUS OF FA
- Page 439 and 440:
FACSIMILE Job key display The follo
- Page 441 and 442:
FACSIMILE OPERATION WHEN A JOB IN T
- Page 443 and 444:
FACSIMILE CHECKING COMPLETED JOBS Y
- Page 445 and 446:
FACSIMILE GIVING PRIORITY TO A RESE
- Page 447 and 448:
FACSIMILE INFORMATION APPEARING IN
- Page 449 and 450:
CHAPTER 5 SCANNER/INTERNET FAX This
- Page 451 and 452:
SCANNER/INTERNET FAX BEFORE USING T
- Page 453 and 454:
SCANNER/INTERNET FAX PREPARATIONS F
- Page 455 and 456:
SCANNER/INTERNET FAX STORING A DEST
- Page 457 and 458:
SCANNER/INTERNET FAX BASE SCREEN Sc
- Page 459 and 460:
SCANNER/INTERNET FAX Customizing di
- Page 461 and 462:
SCANNER/INTERNET FAX • Icons appe
- Page 463 and 464:
SCANNER/INTERNET FAX SCAN SEND SEQU
- Page 465 and 466:
SCANNER/INTERNET FAX ORIGINAL SIZES
- Page 467 and 468:
SCANNER/INTERNET FAX RETRIEVING A D
- Page 469 and 470:
SCANNER/INTERNET FAX USING A SEARCH
- Page 471 and 472:
SCANNER/INTERNET FAX SPECIFYING A N
- Page 473 and 474:
SCANNER/INTERNET FAX RETRIEVING A D
- Page 475 and 476:
SCANNER/INTERNET FAX USING THE RESE
- Page 477 and 478:
SCANNER/INTERNET FAX (4) (3) (2) Sp
- Page 479 and 480:
SCANNER/INTERNET FAX Place next ori
- Page 481 and 482:
SCANNER/INTERNET FAX Send Settings
- Page 483 and 484:
SCANNER/INTERNET FAX SENDING AN IMA
- Page 485 and 486:
SCANNER/INTERNET FAX Press the [STA
- Page 487 and 488:
SCANNER/INTERNET FAX SPECIFY THE FO
- Page 489 and 490:
SCANNER/INTERNET FAX SENDING A FAX
- Page 491 and 492:
SCANNER/INTERNET FAX Place next ori
- Page 493 and 494:
SCANNER/INTERNET FAX Send Settings
- Page 495 and 496:
SCANNER/INTERNET FAX SENDING THE SA
- Page 497 and 498:
SCANNER/INTERNET FAX 5 Press the [S
- Page 499 and 500:
SCANNER/INTERNET FAX 3 Address Star
- Page 501 and 502:
SCANNER/INTERNET FAX IMAGE SETTINGS
- Page 503 and 504:
SCANNER/INTERNET FAX SPECIFYING THE
- Page 505 and 506:
SCANNER/INTERNET FAX Specifying the
- Page 507 and 508:
SCANNER/INTERNET FAX Specifying the
- Page 509 and 510:
SCANNER/INTERNET FAX CHANGING THE E
- Page 511 and 512:
SCANNER/INTERNET FAX CHANGING THE R
- Page 513 and 514:
SCANNER/INTERNET FAX Set the format
- Page 515 and 516:
SCANNER/INTERNET FAX Changing the f
- Page 517 and 518:
SCANNER/INTERNET FAX CHECKING THE I
- Page 519 and 520:
SCANNER/INTERNET FAX SPECIAL MODES
- Page 521 and 522:
SCANNER/INTERNET FAX STORING SCAN O
- Page 523 and 524:
SCANNER/INTERNET FAX ERASING PERIPH
- Page 525 and 526:
SCANNER/INTERNET FAX SCANNING AN OR
- Page 527 and 528:
SCANNER/INTERNET FAX SENDING AN IMA
- Page 529 and 530:
SCANNER/INTERNET FAX WHITENING FAIN
- Page 531 and 532:
SCANNER/INTERNET FAX SCANNING BOTH
- Page 533 and 534:
SCANNER/INTERNET FAX Place next ori
- Page 535 and 536:
SCANNER/INTERNET FAX (1) (2) Select
- Page 537 and 538:
SCANNER/INTERNET FAX (1) (2) Select
- Page 539 and 540:
SCANNER/INTERNET FAX (1) (2) Select
- Page 541 and 542:
SCANNER/INTERNET FAX 5 Press the [S
- Page 543 and 544:
SCANNER/INTERNET FAX (2) (1) (3) Se
- Page 545 and 546:
SCANNER/INTERNET FAX (1) (2) Set bl
- Page 547 and 548:
SCANNER/INTERNET FAX Select the spe
- Page 549 and 550:
SCANNER/INTERNET FAX CHANGING THE P
- Page 551 and 552:
SCANNER/INTERNET FAX CHECKING THE S
- Page 553 and 554:
SCANNER/INTERNET FAX Job key displa
- Page 555 and 556:
SCANNER/INTERNET FAX OPERATION WHEN
- Page 557 and 558:
SCANNER/INTERNET FAX STOPPING A SCA
- Page 559 and 560:
SCANNER/INTERNET FAX CHECKING THE I
- Page 561 and 562:
SCANNER/INTERNET FAX MANUALLY RECEI
- Page 563 and 564:
SCANNER/INTERNET FAX CHECKING THE I
- Page 565 and 566:
SCANNER/INTERNET FAX 5 10 15 To Cc
- Page 567 and 568:
SCANNER/INTERNET FAX 2 Storing send
- Page 569 and 570:
SCANNER/INTERNET FAX 4 (2) Specifyi
- Page 571 and 572:
SCANNER/INTERNET FAX [At your compu
- Page 573 and 574:
SCANNER/INTERNET FAX 7 Select scann
- Page 575 and 576:
SCANNER/INTERNET FAX METADATA DELIV
- Page 577 and 578:
SCANNER/INTERNET FAX TRANSMITTING M
- Page 579 and 580:
SCANNER/INTERNET FAX METADATA FIELD
- Page 581 and 582:
CHAPTER 6 DOCUMENT FILING This func
- Page 583 and 584:
DOCUMENT FILING USES OF DOCUMENT FI
- Page 585 and 586:
DOCUMENT FILING Approximate number
- Page 587 and 588:
DOCUMENT FILING Files When a file i
- Page 589 and 590:
DOCUMENT FILING Scan to HDD mode Th
- Page 591 and 592:
DOCUMENT FILING SAVING FILES WITH D
- Page 593 and 594:
DOCUMENT FILING SAVING A FILE WITH
- Page 595 and 596:
DOCUMENT FILING FILE INFORMATION Th
- Page 597 and 598:
DOCUMENT FILING Storing a file as a
- Page 599 and 600:
DOCUMENT FILING [Original] key When
- Page 601 and 602:
DOCUMENT FILING Special modes scree
- Page 603 and 604: DOCUMENT FILING PERFORMING "Scan to
- Page 605 and 606: DOCUMENT FILING Select the file tha
- Page 607 and 608: DOCUMENT FILING FILE SELECTION SCRE
- Page 609 and 610: DOCUMENT FILING SELECTING A FILE Th
- Page 611 and 612: DOCUMENT FILING PRINTING A STORED F
- Page 613 and 614: DOCUMENT FILING MULTI-FILE PRINTING
- Page 615 and 616: DOCUMENT FILING Batch printing All
- Page 617 and 618: DOCUMENT FILING SENDING A STORED FI
- Page 619 and 620: DOCUMENT FILING PROPERTIES OF STORE
- Page 621 and 622: DOCUMENT FILING MOVING A STORED FIL
- Page 623 and 624: DOCUMENT FILING DELETING A STORED F
- Page 625 and 626: DOCUMENT FILING IMAGE CHECK SCREEN
- Page 627 and 628: DOCUMENT FILING SEARCHING FOR A STO
- Page 629 and 630: DOCUMENT FILING Search User Name Na
- Page 631 and 632: DOCUMENT FILING 4 (C) User Name 6 1
- Page 633 and 634: CHAPTER 7 SYSTEM SETTINGS This chap
- Page 635 and 636: SYSTEM SETTINGS SYSTEM SETTINGS Sys
- Page 637 and 638: Tray Paper Settings Condition Print
- Page 639 and 640: SYSTEM SETTINGS Paper Tray Settings
- Page 641 and 642: SYSTEM SETTINGS Document Filing Con
- Page 643 and 644: SYSTEM SETTINGS Default Settings Th
- Page 645 and 646: SYSTEM SETTINGS Paper Tray Settings
- Page 647 and 648: SYSTEM SETTINGS Paper Type Registra
- Page 649 and 650: SYSTEM SETTINGS Settings Item Items
- Page 651 and 652: SYSTEM SETTINGS Touch the [Address
- Page 653: SYSTEM SETTINGS Program If you freq
- Page 657 and 658: SYSTEM SETTINGS Document Filing Con
- Page 659 and 660: SYSTEM SETTINGS SYSTEM SETTINGS (AD
- Page 661 and 662: SYSTEM SETTINGS Login by user numbe
- Page 663 and 664: SYSTEM SETTINGS Energy save Item Fa
- Page 665 and 666: SYSTEM SETTINGS Operation from Spe
- Page 667 and 668: SYSTEM SETTINGS Item Factory defaul
- Page 669 and 670: SYSTEM SETTINGS Item Factory defaul
- Page 671 and 672: SYSTEM SETTINGS Item Factory defaul
- Page 673 and 674: SYSTEM SETTINGS Item Factory defaul
- Page 675 and 676: SYSTEM SETTINGS Enable/Disable Sett
- Page 677 and 678: SYSTEM SETTINGS Product Key Item Fa
- Page 679 and 680: SYSTEM SETTINGS Other Settings Acti
- Page 681 and 682: SYSTEM SETTINGS Item E-mail Address
- Page 683 and 684: SYSTEM SETTINGS Pages Limit Group U
- Page 685 and 686: SYSTEM SETTINGS Authority Group Lis
- Page 687 and 688: SYSTEM SETTINGS Item Description Pr
- Page 689 and 690: SYSTEM SETTINGS My Menu List Home s
- Page 691 and 692: SYSTEM SETTINGS Card area settings
- Page 693 and 694: SYSTEM SETTINGS Preheat Mode Settin
- Page 695 and 696: SYSTEM SETTINGS Disabling of Clock
- Page 697 and 698: SYSTEM SETTINGS My Menu Settings Us
- Page 699 and 700: SYSTEM SETTINGS Device Control Thes
- Page 701 and 702: SYSTEM SETTINGS Disabling of Device
- Page 703 and 704: SYSTEM SETTINGS Other Settings Copy
- Page 705 and 706:
SYSTEM SETTINGS Network Settings Ne
- Page 707 and 708:
SYSTEM SETTINGS Interface Settings
- Page 709 and 710:
SYSTEM SETTINGS Must Input Next Add
- Page 711 and 712:
SYSTEM SETTINGS Own Name and Destin
- Page 713 and 714:
SYSTEM SETTINGS Maximum Size of E-m
- Page 715 and 716:
SYSTEM SETTINGS Activity Report Pri
- Page 717 and 718:
SYSTEM SETTINGS Letter Size RX Redu
- Page 719 and 720:
SYSTEM SETTINGS Scan Complete Sound
- Page 721 and 722:
SYSTEM SETTINGS List Print (Adminis
- Page 723 and 724:
SYSTEM SETTINGS Enable/Disable Sett
- Page 725 and 726:
SYSTEM SETTINGS Disable Registering
- Page 727 and 728:
SYSTEM SETTINGS Data Backup Setting
- Page 729 and 730:
SYSTEM SETTINGS Sharp OSA Settings
- Page 731 and 732:
SYSTEM SETTINGS Address Control Add
- Page 733 and 734:
SYSTEM SETTINGS F-Code Memory Box T
- Page 735 and 736:
SYSTEM SETTINGS Fax Data Receive/Fo
- Page 737 and 738:
SYSTEM SETTINGS Transaction Report
- Page 739 and 740:
SYSTEM SETTINGS Original Print on T
- Page 741 and 742:
SYSTEM SETTINGS Recall in Case of L
- Page 743 and 744:
SYSTEM SETTINGS Letter Size RX Redu
- Page 745 and 746:
SYSTEM SETTINGS SYSTEM SETTINGS MEN
- Page 747 and 748:
CHAPTER 8 TROUBLESHOOTING This chap
- Page 749 and 750:
TROUBLESHOOTING FREQUENTLY ASKED QU
- Page 751 and 752:
TROUBLESHOOTING Printing on an enve
- Page 753 and 754:
TROUBLESHOOTING Adjusting the volum
- Page 755 and 756:
TROUBLESHOOTING PAPER MISFEED ILLUS
- Page 757 and 758:
TROUBLESHOOTING Gently pull the tra
- Page 759 and 760:
TROUBLESHOOTING 5 Lower the lever a
- Page 761 and 762:
TROUBLESHOOTING Problem Point to ch
- Page 763 and 764:
TROUBLESHOOTING PRINTING PROBLEMS R
- Page 765 and 766:
TROUBLESHOOTING Problem Point to ch
- Page 767 and 768:
TROUBLESHOOTING Problem Point to ch
- Page 769 and 770:
TROUBLESHOOTING PROBLEMS RELATED TO
- Page 771 and 772:
TROUBLESHOOTING Problem Point to ch
- Page 773 and 774:
TROUBLESHOOTING PROBLEMS RELATED TO
- Page 775 and 776:
TROUBLESHOOTING Problem Point to ch
- Page 777 and 778:
TROUBLESHOOTING Problem Point to ch
- Page 779 and 780:
TROUBLESHOOTING Problem Point to ch
- Page 781 and 782:
TROUBLESHOOTING Problem Point to ch
- Page 783 and 784:
TROUBLESHOOTING GENERAL PROBLEMS PR
- Page 785 and 786:
TROUBLESHOOTING PROBLEMS RELATED TO
- Page 787 and 788:
TROUBLESHOOTING PROBLEMS RELATED TO
- Page 789 and 790:
TROUBLESHOOTING PROBLEMS RELATED TO
- Page 791 and 792:
TROUBLESHOOTING PROBLEMS RELATED TO
- Page 793 and 794:
TROUBLESHOOTING OTHER PROBLEMS Prob