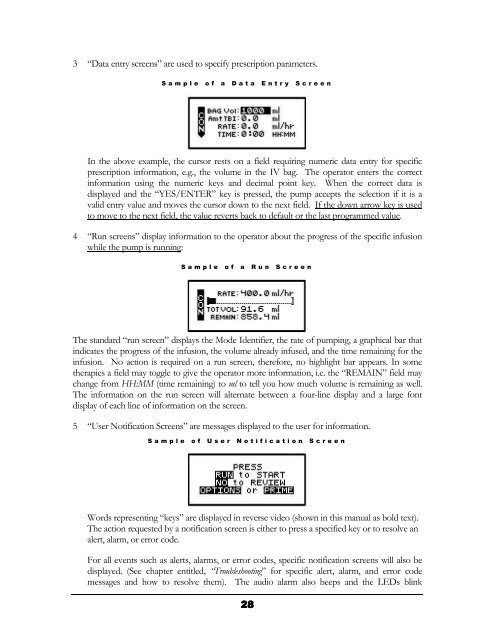
3 “Data entry screens” are used to specify prescription parameters.Sample of a Data Entry ScreenIn the above example, the cursor rests on a field requiring numeric data entry for specificprescription information, e.g., the volume in the IV bag. The operator enters the correctinformation using the numeric keys and decimal point key. When the correct data isdisplayed and the “YES/ENTER” key is pressed, the pump accepts the selection if it is avalid entry value and moves the cursor down to the next field. If the down arrow key is usedto move to the next field, the value reverts back to default or the last programmed value.4 “Run screens” display information to the operator about the progress of the specific infusionwhile the pump is running:Sample of a Run ScreenThe standard “run screen” displays the Mode Identifier, the rate of pumping, a graphical bar thatindicates the progress of the infusion, the volume already infused, and the time remaining for theinfusion. No action is required on a run screen, therefore, no highlight bar appears. In sometherapies a field may toggle to give the operator more information, i.e. the “REMAIN” field maychange from HH:MM (time remaining) to ml to tell you how much volume is remaining as well.The information on the run screen will alternate between a four-line display and a large fontdisplay of each line of information on the screen.5 “<strong>User</strong> Notification Screens” are messages displayed to the user for information.Sample of <strong>User</strong> Notification ScreenWords representing “keys” are displayed in reverse video (shown in this manual as bold text).The action requested by a notification screen is either to press a specified key or to resolve analert, alarm, or error code.For all events such as alerts, alarms, or error codes, specific notification screens will also bedisplayed. (See chapter entitled, “Troubleshooting” for specific alert, alarm, and error codemessages and how to resolve them). The audio alarm also beeps and the LEDs blink28
whenever an alarm or error code occurs. In the event of an error code, user directions will bedisplayed on the screen, most often, this will require turning the pump off and back on again.Using “Help”Help screens are available for data entry/selection screens, during “action field” screens, and atthe “infusion complete” screen. To access help, press the “HELP” key. Use the arrow keys toscroll through the help message, and then press the “HELP” key again to exit help. When ahelp screen is displayed and there is more text to read which is not currently on the screen, a smallup ( ) or down ( ) arrow indicator will appear to let you know you can scroll up or down toread the complete help message.Starting the PumpStart the pump by pushing the blue “ON” key. The following screen displays:Welcome ScreenThe above “Welcome” screen gives the date, time, and a message that the pump is performing aself-diagnostic test. If the numbers on the date field are displayed as zeros, the system clock willneed to be set using the BIOMED Set Up. (See “BIOMED SETUP” section.) The display alsolists the software revision number for this pump.During this test, you will hear three beeps as each of the LED indicators blink. If any one of thegreen, yellow, or red LED lights fails to light or to blink, return the pump for service. If the selftestfails, the alarm will sound, and a new screen will appear stating: “ERROR CODE:#” or“SYSTEM ERR:#” (See “Troubleshooting” chapter for a list of error notices and how to resolvethem). The error notice will include a numeric code. At any error notice, the only user option isto turn the pump OFF.Basics ProgrammingIMPORTANTINFORMATIONIf, at any time, there is indication of pump damage, error code, ormessages requiring the pump to be turned off, call the healthcareagency or facility as directed to report the condition.Note: If an error notice appears, turn the pump off and back on again. If the pump passes itsstart-up diagnostics tests, you can safely resume the therapy. If the error notice recurs,however, turn the pump off and notify the healthcare agency responsible for monitoringthe pump. Some error notices may reset the pump back to it’s default settings andtherefore will require reprogramming.29
- Page 1 and 2: CURLIN MEDICALUser’s Manualfor us
- Page 3 and 4: TABLE OF CONTENTSEntering or Changi
- Page 5 and 6: TABLE OF CONTENTSPrime.............
- Page 7 and 8: IntroductionChapter1IntroductionThe
- Page 9 and 10: • Retained memory features that a
- Page 11 and 12: CAUTIONS• U.S. federal law restri
- Page 13 and 14: • This equipment generates, uses,
- Page 15 and 16: Serial Number LabelIntroductionBatt
- Page 17 and 18: Preparing Medication for Infusion/C
- Page 19 and 20: Opening and Closing the Pump DoorTh
- Page 21 and 22: Air DetectorNote: Open theslide cla
- Page 23 and 24: Installing the Batteries and Using
- Page 25 and 26: IMPORTANTINFORMATIONWhenever an ext
- Page 27 and 28: IntroductionLocking SleeveTwo-Pin A
- Page 29 and 30: Chapter2Learning Pump FeaturesLearn
- Page 31 and 32: LED Light IndicatorsThis “three-l
- Page 33: Chapter3Basics of ProgrammingThe Cu
- Page 37 and 38: Access CodeClinician Access Code Sc
- Page 39 and 40: to all pump functions. Each level h
- Page 41 and 42: 8 PRINT PATIENT HISTORY: To print t
- Page 43 and 44: a. Time Format: You have the option
- Page 45 and 46: If only one therapy is programmed a
- Page 47 and 48: Chapter4Continuous TherapyContinuou
- Page 49 and 50: If the KVO rate is set to 0, the pu
- Page 51 and 52: 6 DONE?: If any changes are to be m
- Page 53 and 54: The following screen displays the C
- Page 55 and 56: detects in-line pressures at 400 mm
- Page 57 and 58: In CMS-enabled pumps, the graphic b
- Page 59 and 60: . If the incomplete therapy is to b
- Page 61 and 62: PCA TherapyChapter5PCA TherapyPCA o
- Page 63 and 64: a. MxRATE (Maximum Rate) limits: Us
- Page 65 and 66: using the numeric keys and, when co
- Page 67 and 68: Note. After the infusion has starte
- Page 69 and 70: d. To exit the shift total feature
- Page 71 and 72: pressures at 400 mmHg ±150 (8 ±3
- Page 73 and 74: This screen will continue to displa
- Page 75 and 76: When the program is accepted, the d
- Page 77: which therapy to repeat by moving t
- Page 80 and 81: The time format (12 hr AM/PM or 24
- Page 82 and 83: time period using the numeric keys,
- Page 84 and 85:
7 To continue priming, press the PR
- Page 86 and 87:
Note: Whatever Down Ramp time was a
- Page 88 and 89:
1 The first field displays the “R
- Page 90 and 91:
. If the incomplete therapy is to b
- Page 95 and 96:
IMPORTANTINFORMATIONDuring the dela
- Page 97 and 98:
10 DONE?: If there are any changes
- Page 99 and 100:
The following screen displays the I
- Page 101 and 102:
This message alerts you to the Air-
- Page 103 and 104:
Intermittent Information ScreensInt
- Page 105 and 106:
Intermittent Dosing ScheduleThe dos
- Page 107 and 108:
This screen displays:1 “INFUSION
- Page 109 and 110:
CHAPTER8Variable TherapyThis therap
- Page 111 and 112:
During the delay start period, if t
- Page 113 and 114:
5 NEXT?: If there are any changes t
- Page 115 and 116:
7 To continue priming, press the PR
- Page 117 and 118:
4 DN Occlu (Down Occlusion): This f
- Page 119 and 120:
Variable Run Screen 2This screen di
- Page 121 and 122:
stop the auto-advance function by p
- Page 123 and 124:
The pump will then display the prog
- Page 125 and 126:
TroubleshootingChapter9Troubleshoot
- Page 127 and 128:
LCD Display:Alert:Cause:Resolution:
- Page 129 and 130:
If it is not necessary to preserve
- Page 131 and 132:
Resolution:LCD Display:Alert:Cause:
- Page 133 and 134:
LCD Display: ALERT NEW DOSE IS LESS
- Page 135 and 136:
LCD Display:Alert:Cause:Resolution:
- Page 137 and 138:
ALARMSAlarms are conditions that re
- Page 139 and 140:
LCD Display:Alarm:Cause:Resolution:
- Page 141 and 142:
ERROR CODESIf a pump goes into an e
- Page 143 and 144:
ErrorCodeLCD DisplayedMessage162 St
- Page 145 and 146:
ChapterAccessories10There are a num
- Page 147 and 148:
AccessoriesFigure 10.3 Safety Shell
- Page 149 and 150:
Keypad CoversThese accessories are
- Page 151 and 152:
Chapter11Cleaning, EnvironmentalCon
- Page 153 and 154:
1 PARTIES COVERED BY THIS WARRANTY:
- Page 155 and 156:
d Program the following CONTINUOUS
- Page 157 and 158:
Chapter12TechnicalSpecificationsThe
- Page 159 and 160:
ITEMDown Occlusion Detection TimeMi
- Page 161 and 162:
Curlin pump inusing at .1 ml/hr w i
- Page 163 and 164:
Percent Error, Curlin Pump infusing
- Page 165 and 166:
Clinician Information andAccess Cod