Voicemail Pro installation - IP Office Info
Voicemail Pro installation - IP Office Info
Voicemail Pro installation - IP Office Info
You also want an ePaper? Increase the reach of your titles
YUMPU automatically turns print PDFs into web optimized ePapers that Google loves.
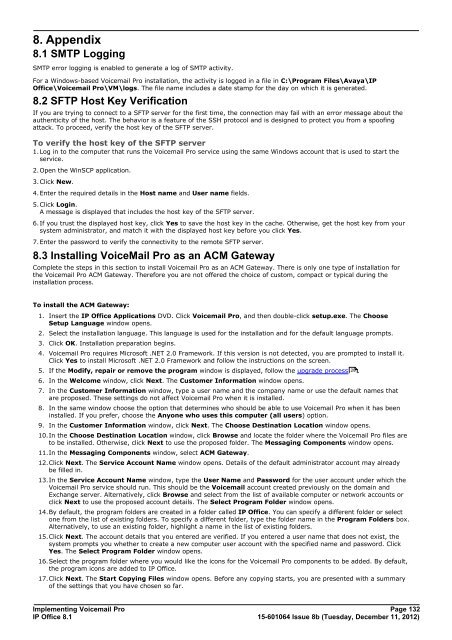
8. Appendix<br />
8.1 SMTP Logging<br />
SMTP error logging is enabled to generate a log of SMTP activity.<br />
For a Windows-based <strong>Voicemail</strong> <strong>Pro</strong> <strong>installation</strong>, the activity is logged in a file in C:\<strong>Pro</strong>gram Files\Avaya\<strong>IP</strong><br />
<strong>Office</strong>\<strong>Voicemail</strong> <strong>Pro</strong>\VM\logs. The file name includes a date stamp for the day on which it is generated.<br />
8.2 SFTP Host Key Verification<br />
If you are trying to connect to a SFTP server for the first time, the connection may fail with an error message about the<br />
authenticity of the host. The behavior is a feature of the SSH protocol and is designed to protect you from a spoofing<br />
attack. To proceed, verify the host key of the SFTP server.<br />
To verify the host key of the SFTP server<br />
1.Log in to the computer that runs the <strong>Voicemail</strong> <strong>Pro</strong> service using the same Windows account that is used to start the<br />
service.<br />
2.Open the WinSCP application.<br />
3.Click New.<br />
4.Enter the required details in the Host name and User name fields.<br />
5.Click Login.<br />
A message is displayed that includes the host key of the SFTP server.<br />
6.If you trust the displayed host key, click Yes to save the host key in the cache. Otherwise, get the host key from your<br />
system administrator, and match it with the displayed host key before you click Yes.<br />
7.Enter the password to verify the connectivity to the remote SFTP server.<br />
8.3 Installing VoiceMail <strong>Pro</strong> as an ACM Gateway<br />
Complete the steps in this section to install <strong>Voicemail</strong> <strong>Pro</strong> as an ACM Gateway. There is only one type of <strong>installation</strong> for<br />
the <strong>Voicemail</strong> <strong>Pro</strong> ACM Gateway. Therefore you are not offered the choice of custom, compact or typical during the<br />
<strong>installation</strong> process.<br />
To install the ACM Gateway:<br />
1. Insert the <strong>IP</strong> <strong>Office</strong> Applications DVD. Click <strong>Voicemail</strong> <strong>Pro</strong>, and then double-click setup.exe. The Choose<br />
Setup Language window opens.<br />
2. Select the <strong>installation</strong> language. This language is used for the <strong>installation</strong> and for the default language prompts.<br />
3. Click OK. Installation preparation begins.<br />
4. <strong>Voicemail</strong> <strong>Pro</strong> requires Microsoft .NET 2.0 Framework. If this version is not detected, you are prompted to install it.<br />
Click Yes to install Microsoft .NET 2.0 Framework and follow the instructions on the screen.<br />
5. If the Modify, repair or remove the program window is displayed, follow the upgrade process 29<br />
.<br />
6. In the Welcome window, click Next. The Customer <strong>Info</strong>rmation window opens.<br />
7. In the Customer <strong>Info</strong>rmation window, type a user name and the company name or use the default names that<br />
are proposed. These settings do not affect <strong>Voicemail</strong> <strong>Pro</strong> when it is installed.<br />
8. In the same window choose the option that determines who should be able to use <strong>Voicemail</strong> <strong>Pro</strong> when it has been<br />
installed. If you prefer, choose the Anyone who uses this computer (all users) option.<br />
9. In the Customer <strong>Info</strong>rmation window, click Next. The Choose Destination Location window opens.<br />
10.In the Choose Destination Location window, click Browse and locate the folder where the <strong>Voicemail</strong> <strong>Pro</strong> files are<br />
to be installed. Otherwise, click Next to use the proposed folder. The Messaging Components window opens.<br />
11.In the Messaging Components window, select ACM Gateway.<br />
12.Click Next. The Service Account Name window opens. Details of the default administrator account may already<br />
be filled in.<br />
13.In the Service Account Name window, type the User Name and Password for the user account under which the<br />
<strong>Voicemail</strong> <strong>Pro</strong> service should run. This should be the <strong>Voicemail</strong> account created previously on the domain and<br />
Exchange server. Alternatively, click Browse and select from the list of available computer or network accounts or<br />
click Next to use the proposed account details. The Select <strong>Pro</strong>gram Folder window opens.<br />
14.By default, the program folders are created in a folder called <strong>IP</strong> <strong>Office</strong>. You can specify a different folder or select<br />
one from the list of existing folders. To specify a different folder, type the folder name in the <strong>Pro</strong>gram Folders box.<br />
Alternatively, to use an existing folder, highlight a name in the list of existing folders.<br />
15.Click Next. The account details that you entered are verified. If you entered a user name that does not exist, the<br />
system prompts you whether to create a new computer user account with the specified name and password. Click<br />
Yes. The Select <strong>Pro</strong>gram Folder window opens.<br />
16.Select the program folder where you would like the icons for the <strong>Voicemail</strong> <strong>Pro</strong> components to be added. By default,<br />
the program icons are added to <strong>IP</strong> <strong>Office</strong>.<br />
17.Click Next. The Start Copying Files window opens. Before any copying starts, you are presented with a summary<br />
of the settings that you have chosen so far.<br />
Implementing <strong>Voicemail</strong> <strong>Pro</strong> Page 132<br />
<strong>IP</strong> <strong>Office</strong> 8.1<br />
15-601064 Issue 8b (Tuesday, December 11, 2012)


