Voicemail Pro installation - IP Office Info
Voicemail Pro installation - IP Office Info
Voicemail Pro installation - IP Office Info
Create successful ePaper yourself
Turn your PDF publications into a flip-book with our unique Google optimized e-Paper software.
Installation: Server/Client Installation<br />
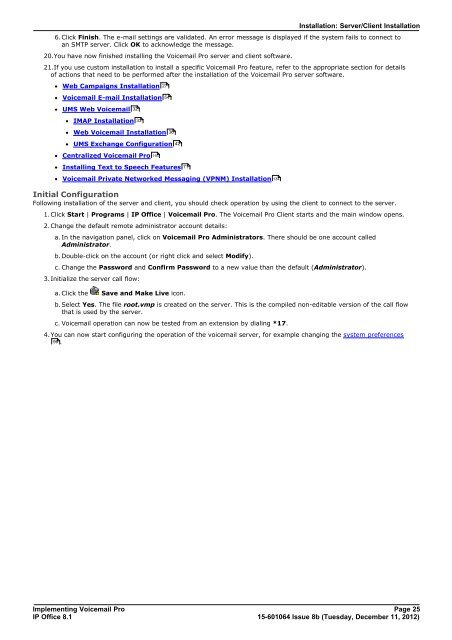
6.Click Finish. The e-mail settings are validated. An error message is displayed if the system fails to connect to<br />
an SMTP server. Click OK to acknowledge the message.<br />
20.You have now finished installing the <strong>Voicemail</strong> <strong>Pro</strong> server and client software.<br />
21.If you use custom <strong>installation</strong> to install a specific <strong>Voicemail</strong> <strong>Pro</strong> feature, refer to the appropriate section for details<br />
of actions that need to be performed after the <strong>installation</strong> of the <strong>Voicemail</strong> <strong>Pro</strong> server software.<br />
· Web Campaigns Installation<br />
· <strong>Voicemail</strong> E-mail Installation<br />
· UMS Web <strong>Voicemail</strong><br />
· IMAP Installation<br />
· Web <strong>Voicemail</strong> Installation<br />
· UMS Exchange Configuration<br />
· Centralized <strong>Voicemail</strong> <strong>Pro</strong><br />
· Installing Text to Speech Features<br />
· <strong>Voicemail</strong> Private Networked Messaging (VPNM) Installation<br />
Initial Configuration<br />
Following <strong>installation</strong> of the server and client, you should check operation by using the client to connect to the server.<br />
1.Click Start | <strong>Pro</strong>grams | <strong>IP</strong> <strong>Office</strong> | <strong>Voicemail</strong> <strong>Pro</strong>. The <strong>Voicemail</strong> <strong>Pro</strong> Client starts and the main window opens.<br />
2.Change the default remote administrator account details:<br />
a. In the navigation panel, click on <strong>Voicemail</strong> <strong>Pro</strong> Administrators. There should be one account called<br />
Administrator.<br />
b. Double-click on the account (or right click and select Modify).<br />
c. Change the Password and Confirm Password to a new value than the default (Administrator).<br />
3.Initialize the server call flow:<br />
a. Click the Save and Make Live icon.<br />
32<br />
33<br />
116<br />
27<br />
54<br />
36<br />
b. Select Yes. The file root.vmp is created on the server. This is the compiled non-editable version of the call flow<br />
that is used by the server.<br />
c. <strong>Voicemail</strong> operation can now be tested from an extension by dialing *17.<br />
42<br />
71<br />
4.You can now start configuring the operation of the voicemail server, for example changing the system preferences<br />
96<br />
.<br />
Implementing <strong>Voicemail</strong> <strong>Pro</strong> Page 25<br />
<strong>IP</strong> <strong>Office</strong> 8.1<br />
15-601064 Issue 8b (Tuesday, December 11, 2012)<br />
134


