Voicemail Pro installation - IP Office Info
Voicemail Pro installation - IP Office Info
Voicemail Pro installation - IP Office Info

Create successful ePaper yourself
Turn your PDF publications into a flip-book with our unique Google optimized e-Paper software.
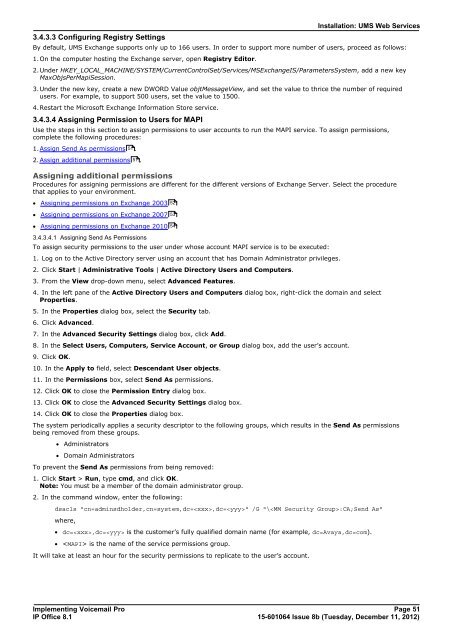
3.4.3.3 Configuring Registry Settings<br />
Installation: UMS Web Services<br />
By default, UMS Exchange supports only up to 166 users. In order to support more number of users, proceed as follows:<br />
1.On the computer hosting the Exchange server, open Registry Editor.<br />
2.Under HKEY_LOCAL_MACHINE/SYSTEM/CurrentControlSet/Services/MSExchangeIS/ParametersSystem, add a new key<br />
MaxObjsPerMapiSession.<br />
3.Under the new key, create a new DWORD Value objtMessageView, and set the value to thrice the number of required<br />
users. For example, to support 500 users, set the value to 1500.<br />
4.Restart the Microsoft Exchange <strong>Info</strong>rmation Store service.<br />
3.4.3.4 Assigning Permission to Users for MAPI<br />
Use the steps in this section to assign permissions to user accounts to run the MAPI service. To assign permissions,<br />
complete the following procedures:<br />
1.Assign Send As permissions 51 .<br />
2.Assign additional permissions 51 .<br />
Assigning additional permissions<br />
<strong>Pro</strong>cedures for assigning permissions are different for the different versions of Exchange Server. Select the procedure<br />
that applies to your environment.<br />
· Assigning permissions on Exchange 2003<br />
· Assigning permissions on Exchange 2007<br />
· Assigning permissions on Exchange 2010<br />
3.4.3.4.1 Assigning Send As Permissions<br />
To assign security permissions to the user under whose account MAPI service is to be executed:<br />
1. Log on to the Active Directory server using an account that has Domain Administrator privileges.<br />
2. Click Start | Administrative Tools | Active Directory Users and Computers.<br />
3. From the View drop-down menu, select Advanced Features.<br />
4. In the left pane of the Active Directory Users and Computers dialog box, right-click the domain and select<br />
<strong>Pro</strong>perties.<br />
5. In the <strong>Pro</strong>perties dialog box, select the Security tab.<br />
6. Click Advanced.<br />
7. In the Advanced Security Settings dialog box, click Add.<br />
8. In the Select Users, Computers, Service Account, or Group dialog box, add the user’s account.<br />
9. Click OK.<br />
10. In the Apply to field, select Descendant User objects.<br />
11. In the Permissions box, select Send As permissions.<br />
12. Click OK to close the Permission Entry dialog box.<br />
13. Click OK to close the Advanced Security Settings dialog box.<br />
14. Click OK to close the <strong>Pro</strong>perties dialog box.<br />
The system periodically applies a security descriptor to the following groups, which results in the Send As permissions<br />
being removed from these groups.<br />
· Administrators<br />
· Domain Administrators<br />
To prevent the Send As permissions from being removed:<br />
1. Click Start > Run, type cmd, and click OK.<br />
Note: You must be a member of the domain administrator group.<br />
2. In the command window, enter the following:<br />
dsacls "cn=adminsdholder,cn=system,dc=,dc=" /G "\:CA;Send As"<br />
where,<br />
· dc=,dc= is the customer’s fully qualified domain name (for example, dc=Avaya,dc=com).<br />
· is the name of the service permissions group.<br />
52<br />
53<br />
54<br />
It will take at least an hour for the security permissions to replicate to the user’s account.<br />
Implementing <strong>Voicemail</strong> <strong>Pro</strong> Page 51<br />
<strong>IP</strong> <strong>Office</strong> 8.1<br />
15-601064 Issue 8b (Tuesday, December 11, 2012)