

TROLL 9500 Operator's Manual - Geotech Environmental Equipment
TROLL 9500 Operator's Manual - Geotech Environmental Equipment
TROLL 9500 Operator's Manual - Geotech Environmental Equipment

Create successful ePaper yourself
Turn your PDF publications into a flip-book with our unique Google optimized e-Paper software.
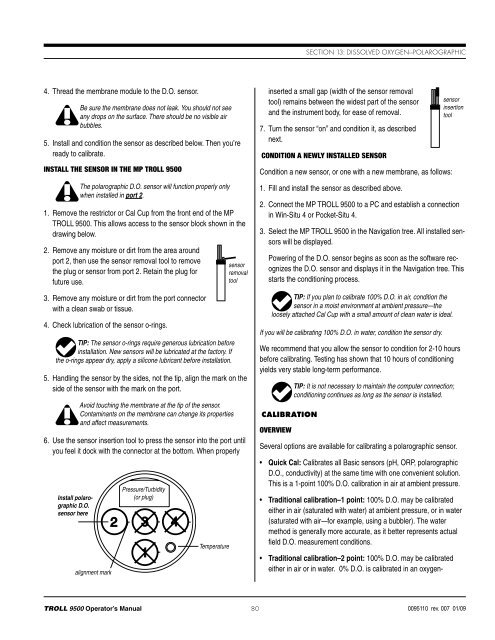
Section 13: Dissolved Oxygen—Polarographic4. Thread the membrane module to the D.O. sensor.Be sure the membrane does not leak. You should not seeany drops on the surface. There should be no visible airbubbles.5. Install and condition the sensor as described below. Then you’reready to calibrate.Install the Sensor in the MP <strong>TROLL</strong> <strong>9500</strong>The polarographic D.O. sensor will function properly onlywhen installed in port 2.1. Remove the restrictor or Cal Cup from the front end of the MP<strong>TROLL</strong> <strong>9500</strong>. This allows access to the sensor block shown in thedrawing below.2. Remove any moisture or dirt from the area aroundport 2, then use the sensor removal tool to removethe plug or sensor from port 2. Retain the plug forfuture use.3. Remove any moisture or dirt from the port connectorwith a clean swab or tissue.4. Check lubrication of the sensor o-rings.TIP: The sensor o-rings require generous lubrication beforeinstallation. New sensors will be lubricated at the factory. Ifthe o-rings appear dry, apply a silicone lubricant before installation.5. Handling the sensor by the sides, not the tip, align the mark on theside of the sensor with the mark on the port.Avoid touching the membrane at the tip of the sensor.Contaminants on the membrane can change its propertiesand affect measurements.6. Use the sensor insertion tool to press the sensor into the port untilyou feel it dock with the connector at the bottom. When properlyInstall polarographicD.O.sensor herealignment markPressure/Turbidity(or plug)Temperature• Traditional calibration–2 point: 100% D.O. may be calibratedeither in air or in water. 0% D.O. is calibrated in an oxygensensorremovaltoolinserted a small gap (width of the sensor removaltool) remains between the widest part of the sensorand the instrument body, for ease of removal.7. Turn the sensor “on” and condition it, as describednext.Condition a Newly Installed SensorCondition a new sensor, or one with a new membrane, as follows:1. Fill and install the sensor as described above.2. Connect the MP <strong>TROLL</strong> <strong>9500</strong> to a PC and establish a connectionin Win-Situ 4 or Pocket-Situ 4.3. Select the MP <strong>TROLL</strong> <strong>9500</strong> in the Navigation tree. All installed sensorswill be displayed.Powering of the D.O. sensor begins as soon as the software recognizesthe D.O. sensor and displays it in the Navigation tree. Thisstarts the conditioning process.TIP: If you plan to calibrate 100% D.O. in air, condition thesensor in a moist environment at ambient pressure—theloosely attached Cal Cup with a small amount of clean water is ideal.If you will be calibrating 100% D.O. in water, condition the sensor dry.We recommend that you allow the sensor to condition for 2-10 hoursbefore calibrating. Testing has shown that 10 hours of conditioningyields very stable long-term performance.CalibrationOverviewsensorinsertiontoolTIP: It is not necessary to maintain the computer connection;conditioning continues as long as the sensor is installed.Several options are available for calibrating a polarographic sensor.• Quick Cal: Calibrates all Basic sensors (pH, ORP, polarographicD.O., conductivity) at the same time with one convenient solution.This is a 1-point 100% D.O. calibration in air at ambient pressure.• Traditional calibration–1 point: 100% D.O. may be calibratedeither in air (saturated with water) at ambient pressure, or in water(saturated with air—for example, using a bubbler). The watermethod is generally more accurate, as it better represents actualfield D.O. measurement conditions.<strong>TROLL</strong> <strong>9500</strong> Operator’s <strong>Manual</strong> 800095110 rev. 007 01/09


