

Contents - Volkspage
Contents - Volkspage
Contents - Volkspage

You also want an ePaper? Increase the reach of your titles
YUMPU automatically turns print PDFs into web optimized ePapers that Google loves.
Cooling, heating and ventilation systems 3.3<br />
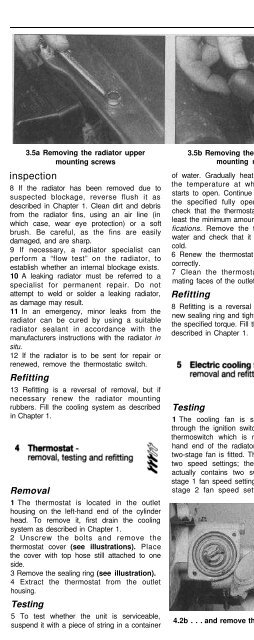
3.5a Removing the radiator upper<br />
mounting screws<br />
inspection<br />
8 If the radiator has been removed due to<br />
suspected blockage, reverse flush it as<br />
described in Chapter 1. Clean dirt and debris<br />
from the radiator fins, using an air line (in<br />
which case, wear eye protection) or a soft<br />
brush. Be careful, as the fins are easily<br />
damaged, and are sharp.<br />
9 If necessary, a radiator specialist can<br />
perform a “flow test” on the radiator, to<br />
establish whether an internal blockage exists.<br />
10 A leaking radiator must be referred to a<br />
specialist for permanent repair. Do not<br />
attempt to weld or solder a leaking radiator,<br />
as damage may result.<br />
11 In an emergency, minor leaks from the<br />
radiator can be cured by using a suitable<br />
radiator sealant in accordance with the<br />
manufacturers instructions with the radiator in<br />
situ.<br />
12 If the radiator is to be sent for repair or<br />
renewed, remove the thermostatic switch.<br />
Refitting<br />
13 Refitting is a reversal of removal, but if<br />
necessary renew the radiator mounting<br />
rubbers. Fill the cooling system as described<br />
in Chapter 1.<br />
Removal<br />
1 The thermostat is located in the outlet<br />
housing on the left-hand end of the cylinder<br />
head. To remove it, first drain the cooling<br />
system as described in Chapter 1.<br />
2 Unscrew the bolts and remove the<br />
thermostat cover (see illustrations). Place<br />
the cover with top hose still attached to one<br />
side.<br />
3 Remove the sealing ring (see illustration).<br />
4 Extract the thermostat from the outlet<br />
housing.<br />
Testing<br />
5 To test whether the unit is serviceable,<br />
suspend it with a piece of string in a container<br />
3.5b Removing the radiator upper<br />
mounting rubbers<br />
of water. Gradually heat the water and note<br />
the temperature at which the thermostat<br />
starts to open. Continue heating the water to<br />
the specified fully open temperature then<br />
check that the thermostat has opened by at<br />
least the minimum amount given in the Specifications.<br />
Remove the thermostat from the<br />
water and check that it is fully closed when<br />
cold.<br />
6 Renew the thermostat if it fails to operate<br />
correctly.<br />
7 Clean the thermostat seating and the<br />
mating faces of the outlet housing and cover.<br />
Refitting<br />
8 Refitting is a reversal of removal, but fit a<br />
new sealing ring and tighten the cover bolts to<br />
the specified torque. Fill the cooling system as<br />
described in Chapter 1.<br />
Testing<br />
1 The cooling fan is supplied with current<br />
through the ignition switch, fuse and radiator<br />
thermoswitch which is mounted in the lefthand<br />
end of the radiator. Either a single- or<br />
two-stage fan is fitted. The two-stage fan has<br />
two speed settings; the thermostatic switch<br />
actually contains two switches one for the<br />
stage 1 fan speed setting and another for the<br />
stage 2 fan speed setting. Testing of the<br />
4.2a Unscrew the socket head bolts. . .<br />
cooling fan circuit is as follows noting that<br />
where applicable the following check should<br />
be carried out on both the stage 1 speed<br />
circuit and the stage 2 speed circuit (see<br />
wiring diagrams at the end of Chapter 12).<br />
2 If the fan does not work, first check the<br />
fuses. If they are good, run the engine until<br />
normal operating temperature is reached,<br />
then allow it to idle. If the fan does not cut in<br />
within a few minutes, switch off the ignition<br />
and disconnect the wiring plug from the<br />
cooling fan thermoswitch. Bridge the relevant<br />
two contacts in the wiring plug using a length<br />
of spare wire, and switch on the ignition. If the<br />
fan now operates, the switch is probably<br />
faulty and should be renewed.<br />
3 If the switch appears to work, the motor<br />
can be checked by disconnecting the motor<br />
wiring connector and connecting a 12 volt<br />
supply directly to the motor terminals.<br />
4 If the fan still fails to operate, check the<br />
cooling fan circuit wiring with reference to<br />
Chapter 12. Check each wire for continuity<br />
and make sure all connections are clean and<br />
free from corrosion. If the motor is faulty, it<br />
must be renewed, as no spares are available.<br />
Removal<br />
5 Disconnect the battery negative lead. Note:<br />
Make sure you know the anti-theft code for<br />
the radio so that it can be re-activated when<br />
the battery is reconnected.<br />
6 Disconnect the wiring from the cooling fan<br />
motor.<br />
7 Remove the four screws and lift the cowling<br />
together with the cooling fan and motor from<br />
the radiator.<br />
4.2b . . . and remove the thermostat cover 4.3 Removing the thermostat cover<br />
sealing ring


