

Contents - Volkspage
Contents - Volkspage
Contents - Volkspage

Create successful ePaper yourself
Turn your PDF publications into a flip-book with our unique Google optimized e-Paper software.
11.10 Bodywork and fittings<br />
bolts and withdraw the boot lid. Recover the<br />
spacer where fitted.<br />
3 The boot lock and striker are each secured<br />
by two cross-head screws, but when<br />
removing the lock it will be necessary to<br />
unhook the connecting rod.<br />
Refitting<br />
4 Refitting is a reversal of removal, but make<br />
sure that the boot lid is central within the<br />
aperture and adjust its position on the hinge<br />
bolts. If necessary, adjust the bootlid rubber<br />
buffers by screwing them in or out. To adjust<br />
the boot lock striker, loosen the mounting<br />
screws then tighten them just sufficiently to<br />
hold the striker in position. Close and re-open<br />
the boot lid and fully tighten the screws.<br />
Adjust the stop rubbers if necessary.<br />
Removal<br />
Boot lid lock<br />
1 Open up the boot, then undo the lock<br />
retaining screws. Remove the lock, and<br />
detach it from the link rod as it is withdrawn.<br />
Recover the plastic cap.<br />
Boot lid lock cylinder<br />
2 Where necessary remove the trim/cover<br />
from the inside of the boot for access to the<br />
rear of the lock.<br />
3 Unclip the link rod from the lock cylinder.<br />
4 Undo the two retaining screws and remove<br />
the lock cylinder assembly from the boot lid.<br />
Recover the lock cylinder sealing ring.<br />
5 It is not possible to separate the cylinder<br />
from the assembly.’<br />
6 Inspect the sealing ring for signs of wear or<br />
damage and renew if necessary.<br />
Refitting<br />
Boot lid lock<br />
7 Attach the link rod, then seat the lock and<br />
plastic cap in the boot lid and securely tighten<br />
its retaining bolts.<br />
Boot lid lock cylinder<br />
8 Fit the sealing ring to the lock cylinder<br />
assembly. Insert the assembly into the boot<br />
lid and refit the retaining screws tightening<br />
them securely.<br />
9 Clip the link rod on the lock cylinder and<br />
where necessary refit the trim/cover.<br />
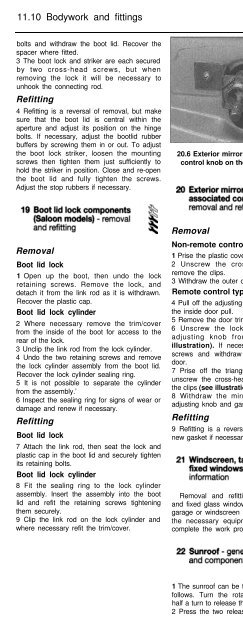
20.6 Exterior mirror control locknut and<br />
control knob on the inside of the door<br />
Removal<br />
Non-remote control type<br />
1 Prise the plastic cover from inside the door.<br />
2 Unscrew the cross-head screws and<br />
remove the clips.<br />
3 Withdraw the outer cover and mirror.<br />
Remote control type<br />
4 Pull off the adjusting knob and bellows from<br />
the inside door pull.<br />
5 Remove the door trim panel (Section 13).<br />
6 Unscrew the locknut and remove the<br />
adjusting knob from the bracket (see<br />
illustration). If necessary also remove the<br />
screws and withdraw the bracket from the<br />
door.<br />
7 Prise off the triangular plastic cover then<br />
unscrew the cross-head screws and remove<br />
the clips (see illustration).<br />
8 Withdraw the mirror together with the<br />
adjusting knob and gasket.<br />
Refitting<br />
9 Refitting is a reversal of removal, but fit a<br />
new gasket if necessary.<br />
Removal and refitting of the windscreen<br />
and fixed glass windows is best left to a VW<br />
garage or windscreen specialist who will have<br />
the necessary equipment and expertise to<br />
complete the work properly.<br />
1 The sunroof can be taken out completely as<br />
follows. Turn the rotary knob anti-clockwise<br />
half a turn to release the tension.<br />
2 Press the two release buttons on the knob<br />
20.7 Removing the triangular plastic cover<br />
to reveal the mirror mounting screws<br />
housing, then lift the rear of the sunroof and<br />
move it rearwards from the front hinges. Stow<br />
the sunroof safely in the luggage compartment.<br />
3 Due to the complexity of the sunroof<br />
mechanism, considerable expertise is needed<br />
to repair, replace or adjust the sunroof<br />
components successfully. Removal of the roof<br />
first requires the headlining to be removed,<br />
which is a complex and tedious operation,<br />
and is not a task to be undertaken lightly.<br />
Therefore, any problems with the sunroof<br />
should be referred to a VW dealer.<br />
Removal<br />
Wheel arch liners<br />
and body under-panels<br />
1 The various plastic covers fitted to the<br />
underside of the vehicle are secured in<br />
position by screws, nuts or retaining clips and<br />
removal will be fairly obvious on inspection,<br />
Work methodically around the panel removing<br />
its retaining screws and releasing its retaining<br />
clips until the panel is free and can be<br />
removed from the underside of the vehicle.<br />
Most clips used on the vehicle, except for the<br />
fasteners which are used to secure the<br />
wheelarch liners in position, are simply prised<br />
out of position. The wheelarch liner clips are<br />
released by pressing out their centre pins and<br />
then removing the outer section of the clip;<br />
new clips will be required on refitting if the<br />
centre pins are not recovered.<br />
Body trim strips and badges<br />
2 The various body trim strips and badges<br />
are held in position with special adhesive tape<br />
or pop rivets. Removal of trim attached with<br />
tape requires the trim/badge to be heated, to<br />
soften the adhesive, and then cut away from<br />
the surface. Due to the high risk of damage to<br />
the vehicle’s paintwork during this operation,<br />
it is recommended that this task should be<br />
entrusted to a VW dealer. Removal of trim<br />
secured with pop rivets requires the heads of<br />
the rivets to be removed using a drill of<br />
suitable diameter.


