

Contents - Volkspage
Contents - Volkspage
Contents - Volkspage

You also want an ePaper? Increase the reach of your titles
YUMPU automatically turns print PDFs into web optimized ePapers that Google loves.
1.8 Every 12 months - regardless of mileage<br />
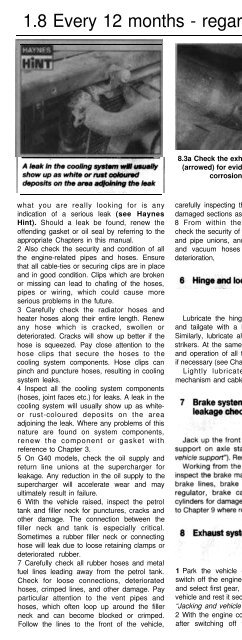
8.3a Check the exhaust pipe connections<br />
(arrowed) for evidence of leaks, severe<br />
corrosion and damage<br />
8.3b Make sure that all brackets and /<br />
mountings (arrowed) are in good condition<br />
what you are really looking for is any<br />
indication of a serious leak (see Haynes<br />
Hint). Should a leak be found, renew the<br />
offending gasket or oil seal by referring to the<br />
appropriate Chapters in this manual.<br />
2 Also check the security and condition of all<br />
the engine-related pipes and hoses. Ensure<br />
that all cable-ties or securing clips are in place<br />
and in good condition. Clips which are broken<br />
or missing can lead to chafing of the hoses,<br />
pipes or wiring, which could cause more<br />
serious problems in the future.<br />
3 Carefully check the radiator hoses and<br />
heater hoses along their entire length. Renew<br />
any hose which is cracked, swollen or<br />
deteriorated. Cracks will show up better if the<br />
hose is squeezed. Pay close attention to the<br />
hose clips that secure the hoses to the<br />
cooling system components. Hose clips can<br />
pinch and puncture hoses, resulting in cooling<br />
system leaks.<br />
4 Inspect all the cooling system components<br />
(hoses, joint faces etc.) for leaks. A leak in the<br />
cooling system will usually show up as whiteor<br />
rust-coloured deposits on the area<br />
adjoining the leak. Where any problems of this<br />
nature are found on system components,<br />
renew the component or gasket with<br />
reference to Chapter 3.<br />
5 On G40 models, check the oil supply and<br />
return line unions at the supercharger for<br />
leakage. Any reduction in the oil supply to the<br />
supercharger will accelerate wear and may<br />
ultimately result in failure.<br />
6 With the vehicle raised, inspect the petrol<br />
tank and filler neck for punctures, cracks and<br />
other damage. The connection between the<br />
filler neck and tank is especially critical.<br />
Sometimes a rubber filler neck or connecting<br />
hose will leak due to loose retaining clamps or<br />
deteriorated rubber.<br />
7 Carefully check all rubber hoses and metal<br />
fuel lines leading away from the petrol tank.<br />
Check for loose connections, deteriorated<br />
hoses, crimped lines, and other damage. Pay<br />
particular attention to the vent pipes and<br />
hoses, which often loop up around the filler<br />
neck and can become blocked or crimped.<br />
Follow the lines to the front of the vehicle,<br />
carefully inspecting them all the way. Renew<br />
damaged sections as necessary.<br />
8 From within the engine compartment,<br />
check the security of all fuel hose attachments<br />
and pipe unions, and inspect the fuel hoses<br />
and vacuum hoses for kinks, chafing and<br />
deterioration,<br />
Lubricate the hinges of the bonnet, doors<br />
and tailgate with a light general-purpose oil.<br />
Similarly, lubricate all latches, locks and lock<br />
strikers. At the same time, check the security<br />
and operation of all the locks, adjusting them<br />
if necessary (see Chapter 11).<br />
Lightly lubricate the bonnet release<br />
mechanism and cable with a suitable grease.<br />
1 Park the vehicle on a level surface and<br />
switch off the engine. Chock the front wheels<br />
and select first gear, then raise the rear of the<br />
vehicle and rest it securely on axle stands (see<br />
“Jacking and vehicle support”).<br />
2 With the engine cold (wait at least an hour<br />
after switching off the engine), check the<br />
complete exhaust system from the engine to<br />
the end of the tailpipe.<br />
3 Check the exhaust pipes and connections<br />
for evidence of leaks, severe corrosion and<br />
damage. Make sure that all brackets and<br />
mountings are in good condition, and that all<br />
relevant nuts and bolts are tight. Leakage at<br />
any of the joints or in other parts of the system<br />
will usually show up as a black sooty stain in<br />
the vicinity of the leak (see illustrations).<br />
4 Rattles and other noises can often be<br />
traced to the exhaust system, especially the<br />
brackets and mountings. Try to move the<br />
pipes and silencers. If the components are<br />
able to come into contact with the body or<br />
suspension parts, secure the system with new<br />
mountings. Otherwise, with reference to<br />
Chapter 4C, loosen the joints between<br />
adjacent sections of the exhaust pipe by<br />
slackening the clamps (where possible) and<br />
twist the pipes as necessary to provide<br />
additional clearance. Re-tighten the exhaust<br />
pipe clamps on completion.<br />
suspension and steering<br />
1 Raise the front of the vehicle, and securely<br />
support it on axle stands (see jacking and<br />
vehicle support”).<br />
2 Visually inspect the balljoint dust covers<br />
and the steering rack-and-pinion gaiters for<br />
splits, chafing or deterioration. Any wear of<br />
these components will cause loss of lubricant,<br />
together with dirt and water entry, resulting in<br />
rapid deterioration of the balljoints or steering<br />
gear.<br />
3 On vehicles with power steering, check the<br />
fluid hoses for chafing or deterioration, and<br />
the pipe and hose unions for fluid leaks. Also<br />
check for signs of fluid leakage under<br />
pressure from the steering gear rubber<br />
gaiters, which would indicate failed fluid seals<br />
within the steering gear.


