

Contents - Volkspage
Contents - Volkspage
Contents - Volkspage

Create successful ePaper yourself
Turn your PDF publications into a flip-book with our unique Google optimized e-Paper software.
Bodywork and fittings 11.9<br />
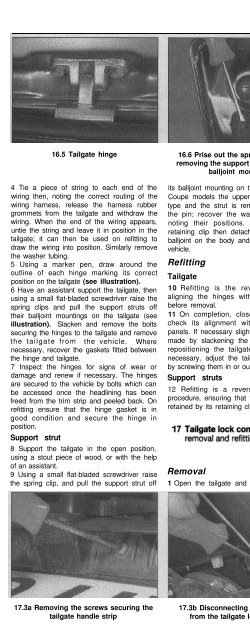
16.5 Tailgate hinge<br />
4 Tie a piece of string to each end of the<br />
wiring then, noting the correct routing of the<br />
wiring harness, release the harness rubber<br />
grommets from the tailgate and withdraw the<br />
wiring. When the end of the wiring appears,<br />
untie the string and leave it in position in the<br />
tailgate; it can then be used on refitting to<br />
draw the wiring into position. Similarly remove<br />
the washer tubing.<br />
5 Using a marker pen, draw around the<br />
outline of each hinge marking its correct<br />
position on the tailgate (see illustration).<br />
6 Have an assistant support the tailgate, then<br />
using a small flat-bladed screwdriver raise the<br />
spring clips and pull the support struts off<br />
their balljoint mountings on the tailgate (see<br />
illustration). Slacken and remove the bolts<br />
securing the hinges to the tailgate and remove<br />
the tailgate from the vehicle. Where<br />
necessary, recover the gaskets fitted between<br />
the hinge and tailgate.<br />
7 Inspect the hinges for signs of wear or<br />
damage and renew if necessary. The hinges<br />
are secured to the vehicle by bolts which can<br />
be accessed once the headlining has been<br />
freed from the trim strip and peeled back. On<br />
refitting ensure that the hinge gasket is in<br />
good condition and secure the hinge in<br />
position.<br />
Support strut<br />
8 Support the tailgate in the open position,<br />
using a stout piece of wood, or with the help<br />
of an assistant.<br />
9 Using a small flat-bladed screwdriver raise<br />
the spring clip, and pull the support strut off<br />
16.6 Prise out the spring clips before<br />
removing the support struts from their<br />
balljoint mountings<br />
its balljoint mounting on the tailgate. Note on<br />
Coupe models the upper mounting is of pin<br />
type and the strut is removed by sliding off<br />
the pin; recover the washers and spacers<br />
noting their positions. Raise the second<br />
retaining clip then detach the strut from the<br />
balljoint on the body and remove it from the<br />
vehicle.<br />
Refitting<br />
Tailgate<br />
10 Refitting is the reverse of removal,<br />
aligning the hinges with the marks made<br />
before removal.<br />
11 On completion, close the tailgate and<br />
check its alignment with the surrounding<br />
panels. If necessary slight adjustment can be<br />
made by slackening the retaining bolts and<br />
repositioning the tailgate on its hinges. If<br />
necessary, adjust the tailgate rubber buffers<br />
by screwing them in or out.<br />
Support struts<br />
12 Refitting is a reverse of the removal<br />
procedure, ensuring that the strut is securely<br />
retained by its retaining clips.<br />
Removal<br />
1 Open the tailgate and using an Allen key<br />
17.1 Using an Allen key to unscrew the<br />
tailgate lock retaining screws<br />
unscrew the two lock retaining screws (see<br />
illustration). Withdraw the lock and<br />
disconnect the wiring and link rod.<br />
2 To remove the lock cylinder first remove the<br />
trim from the inside of the tailgate, then<br />
working through the aperture extract the<br />
circlip from the inner end of the lock cylinder.<br />
Insert the key then push out the cylinder from<br />
inside and remove from the tailgate.<br />
3 The lock cylinder housing can be removed<br />
with the inner trim removed, by removing the<br />
handle strip then disconnecting the control<br />
rod and pressing out the locking lugs (see<br />
illustrations). The housing can then be<br />
removed from the tailgate.<br />
4 The lock striker can be removed by<br />
unscrewing it (see illustration).<br />
Refitting<br />
5 Refitting is a reversal of removal, but before<br />
fully tightening the striker, close and open the<br />
tailgate two or three times to centralise it.<br />
Tighten the lock retaining screws to the<br />
specified torque.<br />
1 Open the boot lid and mark the position of<br />
the hinges with a pencil or marker pen.<br />
2 With the help of an assistant unscrew the<br />
17.3a Removing the screws securing the<br />
tailgate handle strip<br />
17.3b Disconnecting the control rod<br />
from the tailgate lock cylinder<br />
17.4 Removing the tailgate lock striker


