MOSAIQ User's Guide - UCSF Radiation Oncology
MOSAIQ User's Guide - UCSF Radiation Oncology
MOSAIQ User's Guide - UCSF Radiation Oncology
You also want an ePaper? Increase the reach of your titles
YUMPU automatically turns print PDFs into web optimized ePapers that Google loves.
<strong>MOSAIQ</strong> User’s <strong>Guide</strong><br />
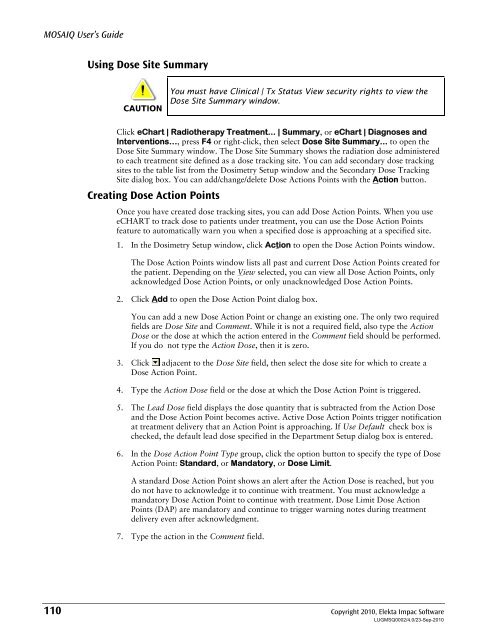
Using Dose Site Summary<br />
CAUTION<br />
You must have Clinical | Tx Status View security rights to view the<br />
Dose Site Summary window.<br />
Click eChart | Radiotherapy Treatment... | Summary, or eChart | Diagnoses and<br />
Interventions…, press F4 or right-click, then select Dose Site Summary... to open the<br />
Dose Site Summary window. The Dose Site Summary shows the radiation dose administered<br />
to each treatment site defined as a dose tracking site. You can add secondary dose tracking<br />
sites to the table list from the Dosimetry Setup window and the Secondary Dose Tracking<br />
Site dialog box. You can add/change/delete Dose Actions Points with the Action button.<br />
Creating Dose Action Points<br />
Once you have created dose tracking sites, you can add Dose Action Points. When you use<br />
eCHART to track dose to patients under treatment, you can use the Dose Action Points<br />
feature to automatically warn you when a specified dose is approaching at a specified site.<br />
1. In the Dosimetry Setup window, click Action to open the Dose Action Points window.<br />
The Dose Action Points window lists all past and current Dose Action Points created for<br />
the patient. Depending on the View selected, you can view all Dose Action Points, only<br />
acknowledged Dose Action Points, or only unacknowledged Dose Action Points.<br />
2. Click Add to open the Dose Action Point dialog box.<br />
You can add a new Dose Action Point or change an existing one. The only two required<br />
fields are Dose Site and Comment. While it is not a required field, also type the Action<br />
Dose or the dose at which the action entered in the Comment field should be performed.<br />
If you do not type the Action Dose, then it is zero.<br />
3. Click adjacent to the Dose Site field, then select the dose site for which to create a<br />
Dose Action Point.<br />
4. Type the Action Dose field or the dose at which the Dose Action Point is triggered.<br />
5. The Lead Dose field displays the dose quantity that is subtracted from the Action Dose<br />
and the Dose Action Point becomes active. Active Dose Action Points trigger notification<br />
at treatment delivery that an Action Point is approaching. If Use Default check box is<br />
checked, the default lead dose specified in the Department Setup dialog box is entered.<br />
6. In the Dose Action Point Type group, click the option button to specify the type of Dose<br />
Action Point: Standard, or Mandatory, or Dose Limit.<br />
A standard Dose Action Point shows an alert after the Action Dose is reached, but you<br />
do not have to acknowledge it to continue with treatment. You must acknowledge a<br />
mandatory Dose Action Point to continue with treatment. Dose Limit Dose Action<br />
Points (DAP) are mandatory and continue to trigger warning notes during treatment<br />
delivery even after acknowledgment.<br />
7. Type the action in the Comment field.<br />
110 Copyright 2010, Elekta Impac Software<br />
LUGMSQ0002/4.0/23-Sep-2010


