CANoe DENoe - KEMT FEI TUKE
CANoe DENoe - KEMT FEI TUKE
CANoe DENoe - KEMT FEI TUKE

You also want an ePaper? Increase the reach of your titles
YUMPU automatically turns print PDFs into web optimized ePapers that Google loves.
After then select + and Setup from the configuration dialog for the first controller CAN<br />
1 and type in the value for the baudrate 100kBaud.This makes sense for both highspeed<br />
and low-speed buses. After you activate the [Update] button, <strong>CANoe</strong> recommends<br />
default values for the controller registers, which you accept with [OK]. When<br />
you do this - besides the transmission speed of 100 kBaud - you also implicitly define<br />
other controller parameters (Sampling point, BTL cycles, and synchronization jump<br />
width). For the overall system to function properly, the same exact values must be<br />
assumed for the second controller CAN2. When you exit the dialog, <strong>CANoe</strong> asks you<br />
whether the parameters should be accepted. Answer with YES.<br />
1.3.3 Transmitting Data<br />
Since your current test setup still does not have a data source, your first task is to set<br />
up a data source in <strong>CANoe</strong> which places information on the bus cyclically.<br />
Unit 1: Configure <strong>CANoe</strong> so that - after the measurement start - a CAN message<br />
with identifier 64 (hex) is placed on the bus every 100 milliseconds. In this<br />
case the message should contain exactly four data bytes with the values<br />
D8 (hex), D6 (hex), 37 (hex) and 0.<br />
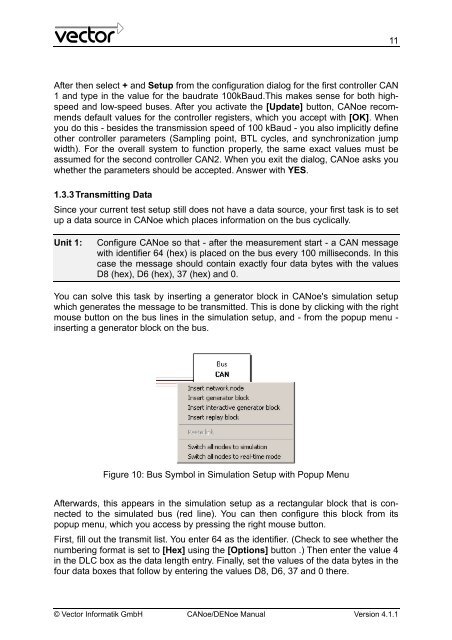
You can solve this task by inserting a generator block in <strong>CANoe</strong>'s simulation setup<br />
which generates the message to be transmitted. This is done by clicking with the right<br />
mouse button on the bus lines in the simulation setup, and - from the popup menu -<br />
inserting a generator block on the bus.<br />
Figure 10: Bus Symbol in Simulation Setup with Popup Menu<br />
Afterwards, this appears in the simulation setup as a rectangular block that is connected<br />
to the simulated bus (red line). You can then configure this block from its<br />
popup menu, which you access by pressing the right mouse button.<br />
First, fill out the transmit list. You enter 64 as the identifier. (Check to see whether the<br />
numbering format is set to [Hex] using the [Options] button .) Then enter the value 4<br />
in the DLC box as the data length entry. Finally, set the values of the data bytes in the<br />
four data boxes that follow by entering the values D8, D6, 37 and 0 there.<br />
© Vector Informatik GmbH <strong>CANoe</strong>/<strong>DENoe</strong> Manual Version 4.1.1<br />
11