Introduction to the Agilent 7100 Capillary Electrophoresis System
Introduction to the Agilent 7100 Capillary Electrophoresis System
Introduction to the Agilent 7100 Capillary Electrophoresis System
You also want an ePaper? Increase the reach of your titles
YUMPU automatically turns print PDFs into web optimized ePapers that Google loves.
Maintenance 8<br />
Maintenance of <strong>the</strong> Replenishment <strong>System</strong><br />
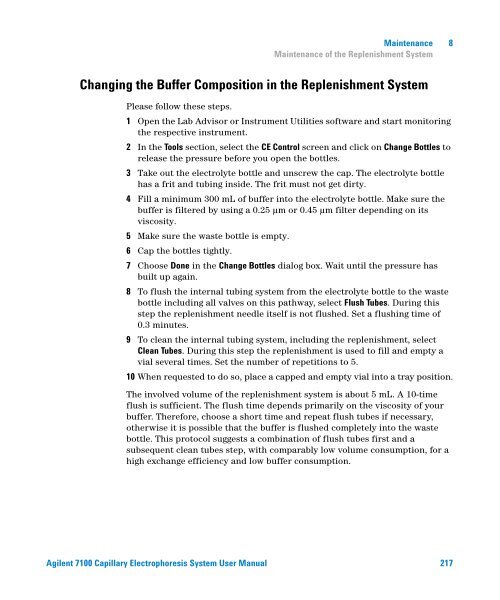
Changing <strong>the</strong> Buffer Composition in <strong>the</strong> Replenishment <strong>System</strong><br />
Please follow <strong>the</strong>se steps.<br />
1 Open <strong>the</strong> Lab Advisor or Instrument Utilities software and start moni<strong>to</strong>ring<br />
<strong>the</strong> respective instrument.<br />
2 In <strong>the</strong> Tools section, select <strong>the</strong> CE Control screen and click on Change Bottles <strong>to</strong><br />
release <strong>the</strong> pressure before you open <strong>the</strong> bottles.<br />
3 Take out <strong>the</strong> electrolyte bottle and unscrew <strong>the</strong> cap. The electrolyte bottle<br />
has a frit and tubing inside. The frit must not get dirty.<br />
4 Fill a minimum 300 mL of buffer in<strong>to</strong> <strong>the</strong> electrolyte bottle. Make sure <strong>the</strong><br />
buffer is filtered by using a 0.25 µm or 0.45 µm filter depending on its<br />
viscosity.<br />
5 Make sure <strong>the</strong> waste bottle is empty.<br />
6 Cap <strong>the</strong> bottles tightly.<br />
7 Choose Done in <strong>the</strong> Change Bottles dialog box. Wait until <strong>the</strong> pressure has<br />
built up again.<br />
8 To flush <strong>the</strong> internal tubing system from <strong>the</strong> electrolyte bottle <strong>to</strong> <strong>the</strong> waste<br />
bottle including all valves on this pathway, select Flush Tubes. During this<br />
step <strong>the</strong> replenishment needle itself is not flushed. Set a flushing time of<br />
0.3 minutes.<br />
9 To clean <strong>the</strong> internal tubing system, including <strong>the</strong> replenishment, select<br />
Clean Tubes. During this step <strong>the</strong> replenishment is used <strong>to</strong> fill and empty a<br />
vial several times. Set <strong>the</strong> number of repetitions <strong>to</strong> 5.<br />
10 When requested <strong>to</strong> do so, place a capped and empty vial in<strong>to</strong> a tray position.<br />
The involved volume of <strong>the</strong> replenishment system is about 5 mL. A 10-time<br />
flush is sufficient. The flush time depends primarily on <strong>the</strong> viscosity of your<br />
buffer. Therefore, choose a short time and repeat flush tubes if necessary,<br />
o<strong>the</strong>rwise it is possible that <strong>the</strong> buffer is flushed completely in<strong>to</strong> <strong>the</strong> waste<br />
bottle. This pro<strong>to</strong>col suggests a combination of flush tubes first and a<br />
subsequent clean tubes step, with comparably low volume consumption, for a<br />
high exchange efficiency and low buffer consumption.<br />
<strong>Agilent</strong> <strong>7100</strong> <strong>Capillary</strong> <strong>Electrophoresis</strong> <strong>System</strong> User Manual 217


