How To Rebuild Your Ford V-8 351C-351M-400-429-460.pdf - Index of
How To Rebuild Your Ford V-8 351C-351M-400-429-460.pdf - Index of
How To Rebuild Your Ford V-8 351C-351M-400-429-460.pdf - Index of
You also want an ePaper? Increase the reach of your titles
YUMPU automatically turns print PDFs into web optimized ePapers that Google loves.
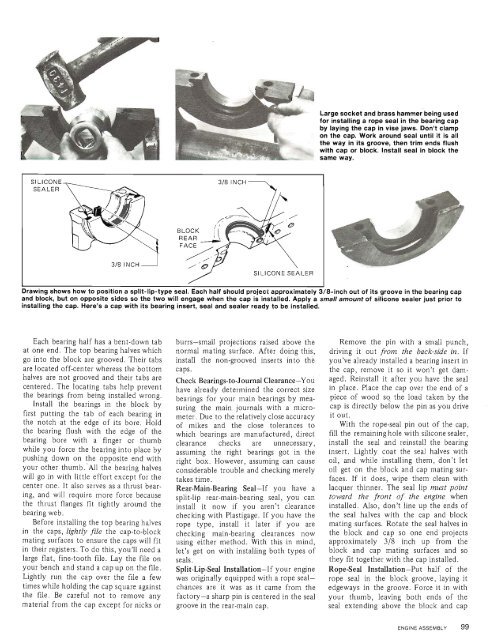
Large socket and brass hammer being used<br />
for installing a rope seal in the bearing cap<br />
by laying the cap in vise jaws. Don't clamp<br />
on the cap. Work around seal until it is all<br />
the way in its groove, then trim ends flush<br />
with cap or block, Install seal in block the<br />
same way.<br />
SILICONE<br />
SEALER<br />
I<br />
Sl LICONE SEALER<br />
Drawing shows how to position a split-lip-type seal. Each half should project approximately 3/8-inch out <strong>of</strong> its groove in the bearing cap<br />
and block, but on opposite sides so the two will engage when the cap is installed. Apply a small amount <strong>of</strong> silicone sealer just prior to<br />
installing the cap. Here's a cap with its bearing insert, seal and sealer ready to be installed.<br />
Each bearing half has a bent-down tab<br />
at one end. The top bearing halves which<br />
go into the block are grooved. Their tabs<br />
are located <strong>of</strong>f-center whereas the bottom<br />
halves are not grooved and their tabs are<br />
centered. The locating tabs help prevent<br />
the bearings from being installed wrong.<br />
Install the bearings in the block by<br />
first putting the tab <strong>of</strong> each bearing in<br />
the notch at the edge <strong>of</strong> its bore. Hold<br />
the bearing flush with the edge <strong>of</strong> the<br />
bearing bore with a finger or thumb<br />
while you force the bearing into place by<br />
pushing down on the opposite end with<br />
your other thumb.-All the bearing halves<br />
will go in with little effort except for the<br />
center one. It also serves as a thrust bearing,<br />
and will require more force because<br />
the thrust flanges fit tightly around the<br />
bearing web.<br />
Before installing the top bearing halves<br />
in the caps, lightly file the cap-to-block<br />
mating surfaces to ensure the caps will fit<br />
in their registers. <strong>To</strong> do this, you'll need a<br />
large flat, fine-tooth file. Lay the file on<br />
your bench and stand a cap up on the file.<br />
Lightly run the cap over the file a few<br />
times while holding the cap square against<br />
the file. Be careful not to remove any<br />
material from the cap except for nicks or<br />
burrs-small projections raised above the<br />
normal mating surface. After doing this,<br />
install the non-grooved inserts into the<br />
caps.<br />
Check Bearings-to-Journal Clearance-You<br />
have already determined the correct size<br />
bearings for your main bearings by measuring<br />
the main journals with a micrometer.<br />
Due to the relatively close accuracy<br />
<strong>of</strong> mikes and the close tolerances to<br />
which bearings are manufactured, direct<br />
clearance checks are unnecessary,<br />
assuming the right bearings got in the<br />
right box. <strong>How</strong>ever, assuming can cause<br />
considerable trouble and checking merely<br />
takes time.<br />
Rear-Main-Bearing Seal-If you have a<br />
split-lip rear-main-bearing seal, you can<br />
install it now if you aren't clearance<br />
checking with Plastigage. If you have the<br />
rope type, install it later if you are<br />
checking main-bearing clearances now<br />
using either method. With this in mind,<br />
let's get on with installing both types <strong>of</strong><br />
seals.<br />
Split-Lip-Seal Installation-If your engine<br />
was originally equipped with a rope sealchances<br />
are it was as it came from the<br />
factory-a sharp pin is centered in the seal<br />
groove in the rear-main cap.<br />
Remove the pin with a small punch,<br />
driving it out from the back-side in. If<br />
you've already installed a bearing insert in<br />
the cap, remove it so it won't get damaged.<br />
Reinstall it after you have the seal<br />
in place. Place the cap over the end <strong>of</strong> a<br />
piece <strong>of</strong> wood so the load taken by the<br />
cap is directly below the pin as you drive<br />
it out.<br />
With the rope-seal pin out <strong>of</strong> the cap,<br />
fill the rernaininghole with silicone sealer,<br />
install the seal and reinstall the bearing<br />
insert. Lightly coat the seal halves with<br />
oil, and while installing them, don't let<br />
oil get on the block and cap mating surfaces.<br />
If it does, wipe them clean with<br />
lacquer thinner. The seal lip must point<br />
toward the front <strong>of</strong> the engine when<br />
installed. Also, don't line up the ends <strong>of</strong><br />
the seal halves with the cap and block<br />
mating surfaces. Rotate the seal halves in<br />
the block and cap so one end projects<br />
approximately 318 inch up from the<br />
block and cap mating surfaces and so<br />
they fit together with the cap installed.<br />
RopeSeal Installation-Put half <strong>of</strong> the<br />
rope seal in the block groove, laying it<br />
edgeways in the groove. Force it in with<br />
your thumb, leaving both ends <strong>of</strong> the<br />
seal extending above the block and cap<br />
ENGINE ASSEMBLY 99


