How To Rebuild Your Ford V-8 351C-351M-400-429-460.pdf - Index of
How To Rebuild Your Ford V-8 351C-351M-400-429-460.pdf - Index of
How To Rebuild Your Ford V-8 351C-351M-400-429-460.pdf - Index of
You also want an ePaper? Increase the reach of your titles
YUMPU automatically turns print PDFs into web optimized ePapers that Google loves.
-<br />
R<br />
ENGINE INSTALLATION 153<br />
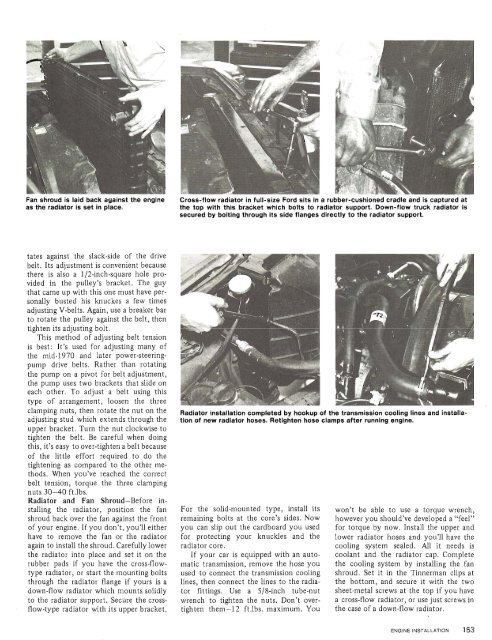
~ Cross- 1 radiator in - ~ a rubber-cushioned cradle ant<br />
-<br />
the top wlth this bracket which bolts to radiator support. Down-flow truck radiator is<br />
secured by bolting through its side flanges directly to the radiator support.<br />
tates against the slack-side <strong>of</strong> the drive<br />
belt. Its adjustment is convenient because<br />
there is also a 112-inch-square hole provided<br />
in the pulley's bracket. The guy<br />
that came up with this one must have personally<br />
busted his knuckes a few times<br />
adjusting V-belts. Again, use a breaker bar<br />
to rotate the pulley against the belt, then<br />
tighten its adjusting bolt.<br />
This method <strong>of</strong> adjusting belt tension<br />
is best: It's used for adjusting many <strong>of</strong><br />
the mid-1970 and later power-steeringpump<br />
drive belts. Rather than rotating<br />
the pump on a pivot for belt adjustment,<br />
the pump uses two brackets that slide on<br />
each other. <strong>To</strong> adjust a belt using this<br />
type <strong>of</strong> arrangement, loosen the three<br />
then the nut On the Radiator installation completed by hookup <strong>of</strong> the transmission cooling lines and installaadjusting<br />
stud which extends through the tion <strong>of</strong> new radlator hoses. Retighten hose clamps after running engine.<br />
upper bracket. Turn the nut clockwise to<br />
tighten the belt. Be careful when doing<br />
this, it's easy to over-tighten a belt because<br />
<strong>of</strong> the little effort required to do the<br />
tightening as compared to the other methods.<br />
When you've reached the correct<br />
belt tension, torque the three clamping<br />
nuts 30-40 ft.lbs.<br />
Radiator and Fan Shroud-Before installing<br />
the radiator, position the fan For the solid-mounted type, install its won't be able to use a torque wrench,<br />
shroud back over the fan against the front remaining bolts at the core's sides. Now however you should've developed a "feel"<br />
<strong>of</strong> your engine. If you don't, you'll either you can slip out the cardboard you used for torque by now. Install the upper and<br />
have to remove the fan or the radiator for protecting your knuckles and the lower radiator hoses and you'll have the<br />
again to install the shroud. Carefully lower radiator core. cooling system sealed. All it needs is<br />
the radiator into place and set it on the If your car is equipped with an auto- coolant and the radiator cap. Complete<br />
rubber pads if you have the cross-flow- matic transmission, remove the hose you the cooling system by installing the fan<br />
type radiator, or start the mounting bolts used to connect the transmission cooling shroud. Set it in the Tinnerman clips at<br />
through the radiator flange if yours is a lines, then connect the lines to the radia- the bottom, and secure it with the two<br />
down-flow radiator which mounts solidly tor fittings. Use a 518-inch tube-nut sheet-metal screws at the top if you have<br />
to the radiator support. Secure the cross- wrench to tighten the nuts. Don't over- a cross-flow radiator, or use just screws in<br />
flow-type radiator with its upper bracket. tighten them-12 ft.lbs. maximum. You the case <strong>of</strong> a down-flow radiator.


