

How To Rebuild Your Ford V-8 351C-351M-400-429-460.pdf - Index of
How To Rebuild Your Ford V-8 351C-351M-400-429-460.pdf - Index of
How To Rebuild Your Ford V-8 351C-351M-400-429-460.pdf - Index of

You also want an ePaper? Increase the reach of your titles
YUMPU automatically turns print PDFs into web optimized ePapers that Google loves.
Tearing down your engine is the first<br />
rebuilding step. What you find through<br />
close inspection <strong>of</strong> your engine's components<br />
will "tell" you which parts have<br />
to be replaced, or to what extent they<br />
must be reconditioned. It also gives<br />
you a first-hand look at how engine servicing<br />
and operation affected internal<br />
wear. Don't look at the engine teardown<br />
phase as merely involving getting your<br />
engine apart.<br />
REMOVE EXTERNAL HARDWARE<br />
While your engine is still "on the<br />
hook" after being lifted out <strong>of</strong> its engine<br />
compartment, remove as much external<br />
hardware as possible before setting it<br />
down. It will be more convenient to do<br />
it now, rather than after it's on the floor<br />
or a workbench. Another tip: Use small<br />
boxes or cans for storing fasteners and<br />
small parts. Store them in groups according<br />
to their function. For example,<br />
keep the exhaust-manifold bolts in the<br />
same container rather than in different<br />
boxes containing some oil-pan, valvecover<br />
bolts and the like.<br />
Mark the Distributor-Put a scribe mark<br />
or scratch on the distributor housing and<br />
one on the engine block to match it. Or<br />
simply remember the vacuum diaphragm<br />
points approximately straight ahead in<br />
the installed position. This provides a<br />
reference for positioning the distributor<br />
when you reinstall it. Disconnect the<br />
spark-plug and coil wires, then remove<br />
the distributor cap with the wires. Remove<br />
the distributor after removing the<br />
hold-down clamp and disconnecting the<br />
vacuum-advance hosels.<br />
Fuel Pump-Remove the fuel-pump-tocarburetor<br />
line by disconnecting the<br />
rubber hose at the carburetor fuel filter,<br />
then unthreading the line's tube nut from<br />
the pump. The pump is secured to the<br />
side <strong>of</strong> the <strong>351C</strong>, <strong>351M</strong> and <strong>400</strong> engines'<br />
integral front cover by a bolt at the top<br />
and a stud and nut at the bottom.<br />
Remove the bolt first, then the nut to<br />
remove the pump. On <strong>429</strong>1460 engines<br />
the pump is secured to the aluminum<br />
front cover by two bolts at the pump's<br />
sides.<br />
Carburetor-Disconnect the heat tube<br />
from the automatic choke plus any additional<br />
wiring-harness and vacuum-tube<br />
connections that may still run to the<br />
carburetor. Label everything so you can<br />
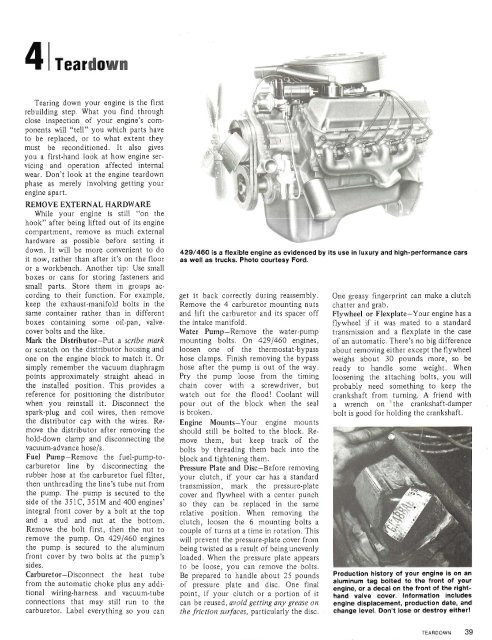
<strong>429</strong>/460 is a flexible engine as evidenced by its use in luxury and hlgh-performance cars<br />
as well as trucks. Photo courtesy <strong>Ford</strong>.<br />
get it back correctly during reassembly.<br />
Remove the 4 carburetor mounting nuts<br />
and lift the carburetor and its spacer <strong>of</strong>f<br />
the intake manifold.<br />
Water Pump-Remove the water-pump<br />
mounting bolts. On <strong>429</strong>1460 engines,<br />
loosen one <strong>of</strong> the thermostat-bypass<br />
hose clamps. Finish removing the bypass<br />
hose after the pump is out <strong>of</strong> the way.<br />
Pry the pump loose from the timing<br />
chain cover with a screwdriver, but<br />
watch out for the flood! Coolant will<br />
pour out <strong>of</strong> the block when the seal<br />
is broken.<br />
Engine Mounts-<strong>Your</strong> engine mounts<br />
should still be bolted to the block. Remove<br />
them, but keep track <strong>of</strong> the<br />
bolts by threading them back into the<br />
block and tightening them.<br />
Pressure Plate and Disc-Before removing<br />
your clutch, if your car has a standard<br />
transmission, mark the pressure-plate<br />
cover and flywheel with a center punch<br />
so they can be replaced in the same<br />
relative position. When removing the<br />
clutch, loosen the 6 mounting bolts a<br />
couple <strong>of</strong> turns at a time in rotation. This<br />
will prevent the pressure-plate cover from<br />
being twisted as a result <strong>of</strong> being unevenly<br />
loaded. When the pressure plate appears<br />
to be loose, you can remove the bolts.<br />
Be prepared to handle about 25 pounds<br />
<strong>of</strong> pressure plate and disc. One final<br />
point, if your clutch or a portion <strong>of</strong> it<br />
can be reused, avoid getting any grease on<br />
the friction surfaces, particularly the disc.<br />
One greasy fingerprint can make a clutch<br />
chatter and grab.<br />
Flywheel or Flexplate-<strong>Your</strong> engine has a<br />
flywheel if it was mated to a standard<br />
transmission and a flexplate in the case<br />
<strong>of</strong> an automatic. There's no big difference<br />
about removing either except the flywheel<br />
weighs about 30 pounds more, so be<br />
ready to handle some weight. When<br />
loosening the attaching bolts, you will<br />
probably need something to keep the<br />
crankshaft from turning. A friend with<br />
a wrench on 'the crankshaft-damper<br />
bolt is good for holding the crankshaft.<br />
Production history <strong>of</strong> your engine is on an<br />
aluminum tag bolted to the front <strong>of</strong> your<br />
engine, or a decal on the front <strong>of</strong> the righthand<br />
valve cover. Information includes<br />
engine displacement, production date, and<br />
change level. Don't lose or destroy either1


