<strong>DS7200V2</strong>-<strong>EXP</strong> | Installation Guide | 2. System Installation and Setup EN | 402.14 Installer ModeUse of the Installer PIN might be restricted.See Keypad Response Options on page74 for information on enabling/restrictingthe Installer PIN.When all areas configured in the control panel aredisarmed, the Installer Menu can be accessed from anyLCD keypad by entering [Installer PIN][#][4][1] or[#][4][1][Installer PIN].The default Installer PIN is 9876.Close the Installer Switch when using an InstallerKeypad.If any area configured in the control panel is armed,only the Installer Keypad can access the InstallerMenu. After 20 min. of inactivity, the Installer Menu isautomatically exited. The control panel resets if it wasin programming mode.If the Installer Switch is closed when the control panelpowers up, the control panel completes its power up.It then checks if there is an Installer Keypad. If not, itfinds the text keypad with the lowest address. The firstkeypad found is placed in the Installer Menu withinstaller rights, and the 20-minute timer is started.If [8] is pressed to enter keypad programming, thecontrol panel enters keypad programming even ifkeypad programming is disabled. When the InstallerMenu is exited, the control panel reverts to normaloperation.2.15 Installer MenuThe Installer Menu consists of the following choices(the numbers preceding the descriptions represent thekeypad number key to press):1: Bell Test2: Strobe Test3: Battery Test4: Test Report5: Zone Status6: Output Test7: RF Menu8: Keypad Program9: Program Key (PK32)0: Call for ServiceThe following sections explain each menu choice.2.15.1 Bell TestPress [1] to initiate a Bell Test.The control panel activates the Bell Time (OutputFunction Type 1|5) and Alarm Output (OutputFunction Types 1|8 to 1|12, and 8|8) functions for 3 sec.For a complete description of output functions, seeOutput Parameters on page 85.2.15.2 Strobe TestPress [2] to initiate a strobe test.The control panel activates the Strobe Output functionsand waits for the installer to press [#] to end the test. Ifthe installer fails to press [#] within 20 min., the controlpanel automatically terminates the strobe test.2.15.3 Battery TestPress [3] to initiate a battery test.The battery test causes the system to run on battery for4 min.. If the battery voltage falls below 12.1 V duringthe 4-minute test, or if the battery is missing, the systemrestores AC power and displays a system trouble at allkeypads.2.15.4 Test ReportPress [4] to send a test report.The control panel attempts to send a test report. Ifthere is a system trouble at the time of the test, thecontrol panel sends a “Test, Off Normal” report.If the test communication is unsuccessful, the controlpanel creates a system trouble and a communicationfailure.2.15.5 Zone StatusPress [5] to display zone/sensor loop status for the firstlocation in the system.The location, zone number and electrical status (Open,Short, Normal, or Fault) are shown. See Zone Parameterson page 79 for a complete description of therelationship between locations, areas and zones.Press [*] to advance to the status for the next zone.Press [#] to exit the Zone Status mode.A closed DACM door contact displays as“Normal.” If “Use Tamper-WiredProcessing” is enabled in DACM GlobalOptions (page 106), an open door contactdisplays as “Fault.” If this option isdisabled, an open door contact displays as“Short.”Bosch Security Systems, Inc. | 2/09 | 4998153893-03
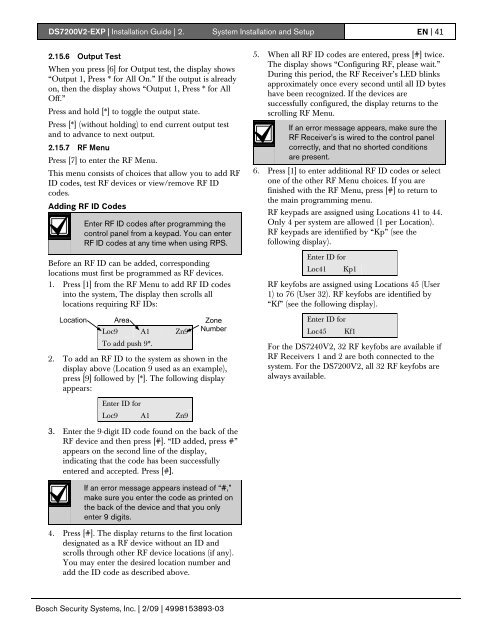
<strong>DS7200V2</strong>-<strong>EXP</strong> | Installation Guide | 2. System Installation and Setup EN | 412.15.6 Output TestWhen you press [6] for Output test, the display shows“Output 1, Press * for All On.” If the output is alreadyon, then the display shows “Output 1, Press * for AllOff.”Press and hold [*] to toggle the output state.Press [*] (without holding) to end current output testand to advance to next output.2.15.7 RF MenuPress [7] to enter the RF Menu.This menu consists of choices that allow you to add RFID codes, test RF devices or view/remove RF IDcodes.Adding RF ID CodesEnter RF ID codes after programming thecontrol panel from a keypad. You can enterRF ID codes at any time when using RPS.Before an RF ID can be added, correspondinglocations must first be programmed as RF devices.1. Press [1] from the RF Menu to add RF ID codesinto the system, The display then scrolls alllocations requiring RF IDs:Location Area ZoneLoc9 A1 Zn9 NumberTo add push 9*.2. To add an RF ID to the system as shown in thedisplay above (Location 9 used as an example),press [9] followed by [*]. The following displayappears:5. When all RF ID codes are entered, press [#] twice.The display shows “Configuring RF, please wait.”During this period, the RF Receiver’s LED blinksapproximately once every second until all ID byteshave been recognized. If the devices aresuccessfully configured, the display returns to thescrolling RF Menu.If an error message appears, make sure theRF Receiver’s is wired to the control panelcorrectly, and that no shorted conditionsare present.6. Press [1] to enter additional RF ID codes or selectone of the other RF Menu choices. If you arefinished with the RF Menu, press [#] to return tothe main programming menu.RF keypads are assigned using Locations 41 to 44.Only 4 per system are allowed (1 per Location).RF keypads are identified by “Kp” (see thefollowing display).Enter ID forLoc41 Kp1RF keyfobs are assigned using Locations 45 (User1) to 76 (User 32). RF keyfobs are identified by“Kf” (see the following display).Enter ID forLoc45 Kf1For the DS7240V2, 32 RF keyfobs are available ifRF Receivers 1 and 2 are both connected to thesystem. For the <strong>DS7200V2</strong>, all 32 RF keyfobs arealways available.Enter ID forLoc9 A1 Zn93. Enter the 9-digit ID code found on the back of theRF device and then press [#]. “ID added, press #”appears on the second line of the display,indicating that the code has been successfullyentered and accepted. Press [#].If an error message appears instead of “#,”make sure you enter the code as printed onthe back of the device and that you onlyenter 9 digits.4. Press [#]. The display returns to the first locationdesignated as a RF device without an ID andscrolls through other RF device locations (if any).You may enter the desired location number andadd the ID code as described above.Bosch Security Systems, Inc. | 2/09 | 4998153893-03


