

Adept Cobra s600/s800 Robot User's Guide - pulsar.com.tr
Adept Cobra s600/s800 Robot User's Guide - pulsar.com.tr
Adept Cobra s600/s800 Robot User's Guide - pulsar.com.tr

You also want an ePaper? Increase the reach of your titles
YUMPU automatically turns print PDFs into web optimized ePapers that Google loves.
Installing Cable Seal Assembly<br />
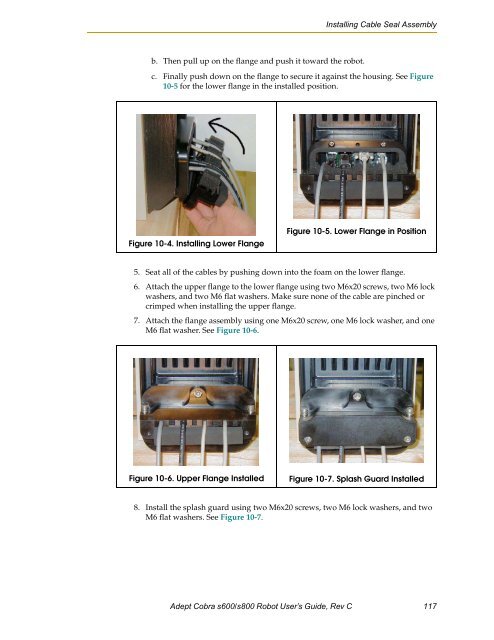
b. Then pull up on the flange and push it toward the robot.<br />
c. Finally push down on the flange to secure it against the housing. See Figure<br />
10-5 for the lower flange in the installed position.<br />
Figure 10-4. Installing Lower Flange<br />
Figure 10-5. Lower Flange in Position<br />
5. Seat all of the cables by pushing down into the foam on the lower flange.<br />
6. Attach the upper flange to the lower flange using two M6x20 screws, two M6 lock<br />
washers, and two M6 flat washers. Make sure none of the cable are pinched or<br />
crimped when installing the upper flange.<br />
7. Attach the flange assembly using one M6x20 screw, one M6 lock washer, and one<br />
M6 flat washer. See Figure 10-6.<br />
Figure 10-6. Upper Flange Installed<br />
Figure 10-7. Splash Guard Installed<br />
8. Install the splash guard using two M6x20 screws, two M6 lock washers, and two<br />
M6 flat washers. See Figure 10-7.<br />
<s<strong>tr</strong>ong>Adept</s<strong>tr</strong>ong> <s<strong>tr</strong>ong>Cobra</s<strong>tr</strong>ong> <s<strong>tr</strong>ong>s600</s<strong>tr</strong>ong>/<s<strong>tr</strong>ong>s800</s<strong>tr</strong>ong> <s<strong>tr</strong>ong>Robot</s<strong>tr</strong>ong> User’s <s<strong>tr</strong>ong>Guide</s<strong>tr</strong>ong>, Rev C 117


