

Adept Cobra s600/s800 Robot User's Guide - pulsar.com.tr
Adept Cobra s600/s800 Robot User's Guide - pulsar.com.tr
Adept Cobra s600/s800 Robot User's Guide - pulsar.com.tr

You also want an ePaper? Increase the reach of your titles
YUMPU automatically turns print PDFs into web optimized ePapers that Google loves.
<s<strong>tr</strong>ong>Robot</s<strong>tr</strong>ong> Outer Link Cover Removal and Replacement<br />
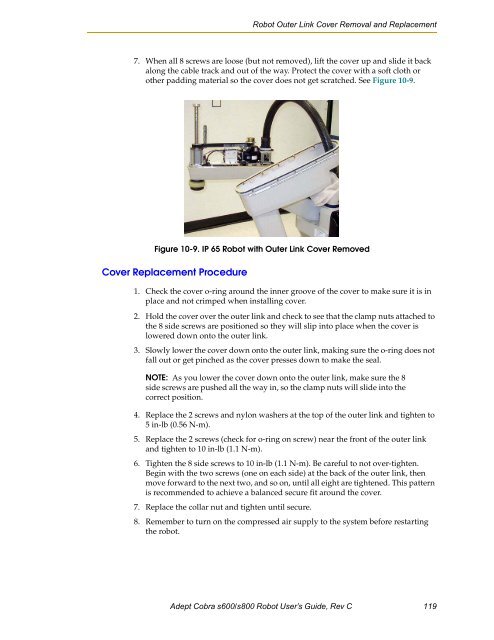
7. When all 8 screws are loose (but not removed), lift the cover up and slide it back<br />
along the cable <strong>tr</strong>ack and out of the way. Protect the cover with a soft cloth or<br />
other padding material so the cover does not get scratched. See Figure 10-9.<br />
Figure 10-9. IP 65 <s<strong>tr</strong>ong>Robot</s<strong>tr</strong>ong> with Outer Link Cover Removed<br />
Cover Replacement Procedure<br />
1. Check the cover o-ring around the inner groove of the cover to make sure it is in<br />
place and not crimped when installing cover.<br />
2. Hold the cover over the outer link and check to see that the clamp nuts attached to<br />
the 8 side screws are positioned so they will slip into place when the cover is<br />
lowered down onto the outer link.<br />
3. Slowly lower the cover down onto the outer link, making sure the o-ring does not<br />
fall out or get pinched as the cover presses down to make the seal.<br />
NOTE: As you lower the cover down onto the outer link, make sure the 8<br />
side screws are pushed all the way in, so the clamp nuts will slide into the<br />
correct position.<br />
4. Replace the 2 screws and nylon washers at the top of the outer link and tighten to<br />
5 in-lb (0.56 N-m).<br />
5. Replace the 2 screws (check for o-ring on screw) near the front of the outer link<br />
and tighten to 10 in-lb (1.1 N-m).<br />
6. Tighten the 8 side screws to 10 in-lb (1.1 N-m). Be careful to not over-tighten.<br />
Begin with the two screws (one on each side) at the back of the outer link, then<br />
move forward to the next two, and so on, until all eight are tightened. This pattern<br />
is re<s<strong>tr</strong>ong>com</s<strong>tr</strong>ong>mended to achieve a balanced secure fit around the cover.<br />
7. Replace the collar nut and tighten until secure.<br />
8. Remember to turn on the <s<strong>tr</strong>ong>com</s<strong>tr</strong>ong>pressed air supply to the system before restarting<br />
the robot.<br />
<s<strong>tr</strong>ong>Adept</s<strong>tr</strong>ong> <s<strong>tr</strong>ong>Cobra</s<strong>tr</strong>ong> <s<strong>tr</strong>ong>s600</s<strong>tr</strong>ong>/<s<strong>tr</strong>ong>s800</s<strong>tr</strong>ong> <s<strong>tr</strong>ong>Robot</s<strong>tr</strong>ong> User’s <s<strong>tr</strong>ong>Guide</s<strong>tr</strong>ong>, Rev C 119


