Adept Cobra s600/s800 Robot User's Guide - pulsar.com.tr
Adept Cobra s600/s800 Robot User's Guide - pulsar.com.tr
Adept Cobra s600/s800 Robot User's Guide - pulsar.com.tr
You also want an ePaper? Increase the reach of your titles
YUMPU automatically turns print PDFs into web optimized ePapers that Google loves.
Replacing the SmartAmp AIB Chassis<br />
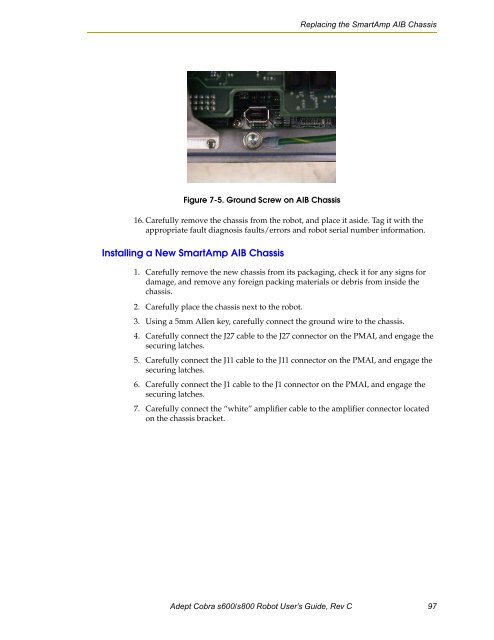
Figure 7-5. Ground Screw on AIB Chassis<br />
16. Carefully remove the chassis from the robot, and place it aside. Tag it with the<br />
appropriate fault diagnosis faults/errors and robot serial number information.<br />
Installing a New SmartAmp AIB Chassis<br />
1. Carefully remove the new chassis from its packaging, check it for any signs for<br />
damage, and remove any foreign packing materials or debris from inside the<br />
chassis.<br />
2. Carefully place the chassis next to the robot.<br />
3. Using a 5mm Allen key, carefully connect the ground wire to the chassis.<br />
4. Carefully connect the J27 cable to the J27 connector on the PMAI, and engage the<br />
securing latches.<br />
5. Carefully connect the J11 cable to the J11 connector on the PMAI, and engage the<br />
securing latches.<br />
6. Carefully connect the J1 cable to the J1 connector on the PMAI, and engage the<br />
securing latches.<br />
7. Carefully connect the “white” amplifier cable to the amplifier connector located<br />
on the chassis bracket.<br />
<s<strong>tr</strong>ong>Adept</s<strong>tr</strong>ong> <s<strong>tr</strong>ong>Cobra</s<strong>tr</strong>ong> <s<strong>tr</strong>ong>s600</s<strong>tr</strong>ong>/<s<strong>tr</strong>ong>s800</s<strong>tr</strong>ong> <s<strong>tr</strong>ong>Robot</s<strong>tr</strong>ong> User’s <s<strong>tr</strong>ong>Guide</s<strong>tr</strong>ong>, Rev C 97


