
You also want an ePaper? Increase the reach of your titles
YUMPU automatically turns print PDFs into web optimized ePapers that Google loves.
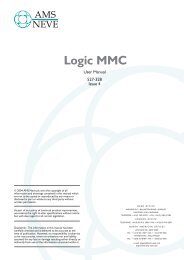
▶ For later LCR/Stereo channel strips, you can send all of the Channel<br />
Inputs (or MON Returns) to the Left and Right of the Main Mix buss by<br />
clicking the MIX L/R after selecting the CHANNELS tab (or MONITOR<br />
tab) button (see image to the left). For earlier stereo other types of<br />
channel strips, you can send all of the Channel Inputs (or DAW Returns) to<br />
the Left and Right of the Main Mix buss by clicking the CH MIX (or MON<br />
MIX) button.<br />
When routing to the 8T busses on earlier stereo modules it is only possible<br />
to feed the channel path, monitor path or a split of the 8T fed from the<br />
channel or monitor path at one time.<br />
See >8T in the channel strip section of this manual.<br />
On the 8T routing display, it should be noted that 8T routing is only<br />
possible from the channel tab with stereo modules, as the feed to the 8T<br />
busses is swapped over pre the routing matrix, fed from CHAN or MON<br />
path. However, when routing to the 8T busses on later LCR modules, then<br />
routing from the channel or the monitor path can happen simultaneously,<br />
enabling 8T routing to be selected from the channel tab or the monitor<br />
tab.<br />
See routing screen display (shown left)<br />
A yellow block indicates the presence of a route, while the large digit to<br />
the right of the screen indicates to which path the routing refers to.<br />
On consoles with more than 16 Channel Strips, a scrollbar becomes<br />
available to move the channel routing display left and right.<br />
By pressing LOCK and RTE SEL together, you will put the console and<br />
Monitor Panel into Master SEL mode (the RTE SEL button will start to<br />
flash).<br />
It will then be possible to set up the Monitor, Cue and 2T mix functions in<br />
Master SEL mode, along with the Channels and Revs.<br />
When you enter Master SEL Mode, the RTE SEL button will start to flash<br />
to indicate you are in Master SEL Mode.<br />
When you exit Master SEL Mode, any changes made will be saved, and the<br />
buttons, audio and display screen will revert to their last selection.<br />
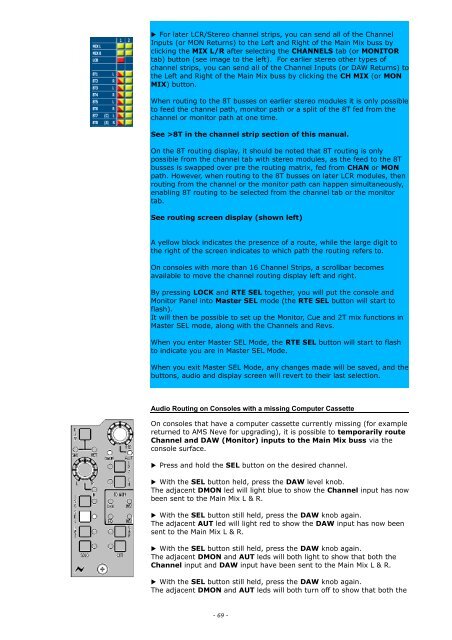
Audio Routing on Consoles with a missing Computer Cassette<br />
On consoles that have a computer cassette currently missing (for example<br />
returned to <strong>AMS</strong> <strong>Neve</strong> for upgrading), it is possible to temporarily route<br />
Channel and DAW (Monitor) inputs to the Main Mix buss via the<br />
console surface.<br />
▶ Press and hold the SEL button on the desired channel.<br />
▶ With the SEL button held, press the DAW level knob.<br />
The adjacent DMON led will light blue to show the Channel input has now<br />
been sent to the Main Mix L & R.<br />
▶ With the SEL button still held, press the DAW knob again.<br />
The adjacent AUT led will light red to show the DAW input has now been<br />
sent to the Main Mix L & R.<br />
▶ With the SEL button still held, press the DAW knob again.<br />
The adjacent DMON and AUT leds will both light to show that both the<br />
Channel input and DAW input have been sent to the Main Mix L & R.<br />
▶ With the SEL button still held, press the DAW knob again.<br />
The adjacent DMON and AUT leds will both turn off to show that both the<br />
- 69 -