

Manual - 8500A Series Peak Power Meter - Giga-tronics
Manual - 8500A Series Peak Power Meter - Giga-tronics
Manual - 8500A Series Peak Power Meter - Giga-tronics

Create successful ePaper yourself
Turn your PDF publications into a flip-book with our unique Google optimized e-Paper software.
<strong>Series</strong> <strong>8500A</strong> <strong>Peak</strong> <strong>Power</strong> <strong>Meter</strong>s<br />
5.3.9 A5 Digital Delay Board<br />
A. Delay Oscillator Adjust.<br />
1. Connect the Frequency Counter common lead to A5TP3 (5 V common)<br />
2. Connect the Frequency Counter test lead to A5TP5.<br />
3. Adjust A5C79 for 39.062500 MHz ±100 Hz.<br />
4. Disconnect the Frequency Counter test lead.<br />
B. Vernier Delay Adjust.<br />
☛ NOTE: This adjustment requires the use of the high speed (15 ns) detector. Do not attempt<br />
it with a low speed (750 ns) detector.<br />
1. Connect the detector to the signal generator (use channel A if the unit is a 8502A).<br />
2. Place the PPM in the Graph mode by pressing [GRAPH].<br />
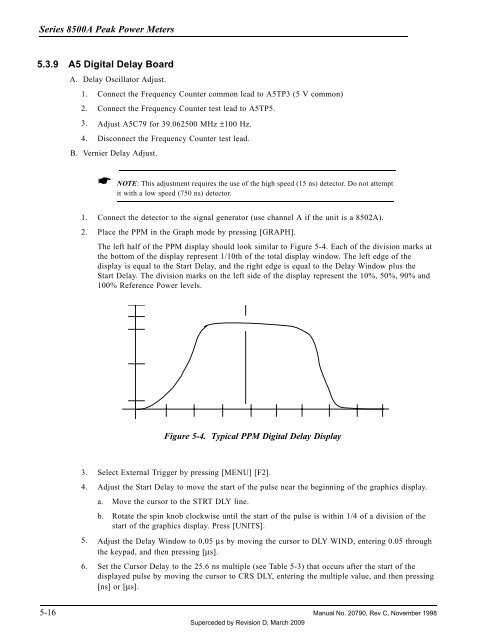
The left half of the PPM display should look similar to Figure 5-4. Each of the division marks at<br />
the bottom of the display represent 1/10th of the total display window. The left edge of the<br />
display is equal to the Start Delay, and the right edge is equal to the Delay Window plus the<br />
Start Delay. The division marks on the left side of the display represent the 10%, 50%, 90% and<br />
100% Reference <strong>Power</strong> levels.<br />
Figure 5-4. Typical PPM Digital Delay Display<br />
3. Select External Trigger by pressing [MENU] [F2].<br />
4. Adjust the Start Delay to move the start of the pulse near the beginning of the graphics display.<br />
a. Move the cursor to the STRT DLY line.<br />
b. Rotate the spin knob clockwise until the start of the pulse is within 1/4 of a division of the<br />
start of the graphics display. Press [UNITS].<br />
5. Adjust the Delay Window to 0.05 µs by moving the cursor to DLY WIND, entering 0.05 through<br />
the keypad, and then pressing [µs].<br />
6. Set the Cursor Delay to the 25.6 ns multiple (see Table 5-3) that occurs after the start of the<br />
displayed pulse by moving the cursor to CRS DLY, entering the multiple value, and then pressing<br />
[ns] or [µs].<br />
5-16 <strong>Manual</strong> No. 20790, Rev C, November 1998<br />
Superceded by Revision D, March 2009


