

Manual - 8500A Series Peak Power Meter - Giga-tronics
Manual - 8500A Series Peak Power Meter - Giga-tronics
Manual - 8500A Series Peak Power Meter - Giga-tronics

Create successful ePaper yourself
Turn your PDF publications into a flip-book with our unique Google optimized e-Paper software.
Operation<br />
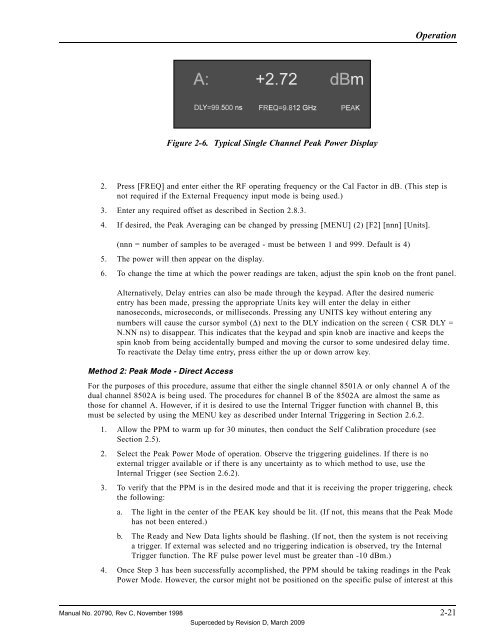
Figure 2-6. Typical Single Channel <strong>Peak</strong> <strong>Power</strong> Display<br />
2. Press [FREQ] and enter either the RF operating frequency or the Cal Factor in dB. (This step is<br />
not required if the External Frequency input mode is being used.)<br />
3. Enter any required offset as described in Section 2.8.3.<br />
4. If desired, the <strong>Peak</strong> Averaging can be changed by pressing [MENU] (2) [F2] [nnn] [Units].<br />
(nnn = number of samples to be averaged - must be between 1 and 999. Default is 4)<br />
5. The power will then appear on the display.<br />
6. To change the time at which the power readings are taken, adjust the spin knob on the front panel.<br />
Alternatively, Delay entries can also be made through the keypad. After the desired numeric<br />
entry has been made, pressing the appropriate Units key will enter the delay in either<br />
nanoseconds, microseconds, or milliseconds. Pressing any UNITS key without entering any<br />
numbers will cause the cursor symbol (∆) next to the DLY indication on the screen ( CSR DLY =<br />
N.NN ns) to disappear. This indicates that the keypad and spin knob are inactive and keeps the<br />
spin knob from being accidentally bumped and moving the cursor to some undesired delay time.<br />
To reactivate the Delay time entry, press either the up or down arrow key.<br />
Method 2: <strong>Peak</strong> Mode - Direct Access<br />
For the purposes of this procedure, assume that either the single channel 8501A or only channel A of the<br />
dual channel 8502A is being used. The procedures for channel B of the 8502A are almost the same as<br />
those for channel A. However, if it is desired to use the Internal Trigger function with channel B, this<br />
must be selected by using the MENU key as described under Internal Triggering in Section 2.6.2.<br />
1. Allow the PPM to warm up for 30 minutes, then conduct the Self Calibration procedure (see<br />
Section 2.5).<br />
2. Select the <strong>Peak</strong> <strong>Power</strong> Mode of operation. Observe the triggering guidelines. If there is no<br />
external trigger available or if there is any uncertainty as to which method to use, use the<br />
Internal Trigger (see Section 2.6.2).<br />
3. To verify that the PPM is in the desired mode and that it is receiving the proper triggering, check<br />
the following:<br />
a. The light in the center of the PEAK key should be lit. (If not, this means that the <strong>Peak</strong> Mode<br />
has not been entered.)<br />
b. The Ready and New Data lights should be flashing. (If not, then the system is not receiving<br />
a trigger. If external was selected and no triggering indication is observed, try the Internal<br />
Trigger function. The RF pulse power level must be greater than -10 dBm.)<br />
4. Once Step 3 has been successfully accomplished, the PPM should be taking readings in the <strong>Peak</strong><br />
<strong>Power</strong> Mode. However, the cursor might not be positioned on the specific pulse of interest at this<br />
<strong>Manual</strong> No. 20790, Rev C, November 1998 2-21<br />
Superceded by Revision D, March 2009


