Apple MainStage 3 Instruments - MainStage 3 Instruments
Apple MainStage 3 Instruments - MainStage 3 Instruments
Apple MainStage 3 Instruments - MainStage 3 Instruments
You also want an ePaper? Increase the reach of your titles
YUMPU automatically turns print PDFs into web optimized ePapers that Google loves.
Before you begin, it should be stressed that the examples discussed in the subtopics provide<br />
one or two approaches to the task at hand. There are many ways to model each component of<br />
the sound. With this in mind, consider the following:<br />
••<br />
Experiment with the suggested parameters to create your own versions of sounds. Use your<br />
own parameter values if the supplied values don’t match your ideal bass sound, for example.<br />
••<br />
Subtle changes—particularly to Keyscale parameters—result in more controlled sounds.<br />
Take your time, and try everything as you follow the examples.<br />
••<br />
Make use of other user settings, and the factory settings—either as a starting point for your<br />
own sounds or as an object of study. Looking at existing settings provides an insight into<br />
how the sound was created. Enable and disable different parameters to see what each does.<br />
Have fun and take risks—you can’t break anything.<br />
Acoustic instrument programming examples<br />
The tasks below provide programming guidelines, tips, tricks, and information to assist you in<br />
creating particular types of acoustic instrument sounds in Sculpture.<br />
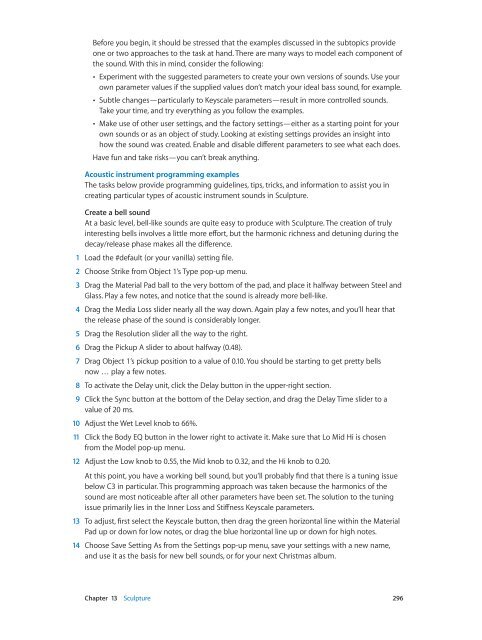
Create a bell sound<br />
At a basic level, bell-like sounds are quite easy to produce with Sculpture. The creation of truly<br />
interesting bells involves a little more effort, but the harmonic richness and detuning during the<br />
decay/release phase makes all the difference.<br />
1 Load the #default (or your vanilla) setting file.<br />
2 Choose Strike from Object 1’s Type pop-up menu.<br />
3 Drag the Material Pad ball to the very bottom of the pad, and place it halfway between Steel and<br />
Glass. Play a few notes, and notice that the sound is already more bell-like.<br />
4 Drag the Media Loss slider nearly all the way down. Again play a few notes, and you’ll hear that<br />
the release phase of the sound is considerably longer.<br />
5 Drag the Resolution slider all the way to the right.<br />
6 Drag the Pickup A slider to about halfway (0.48).<br />
7 Drag Object 1’s pickup position to a value of 0.10. You should be starting to get pretty bells<br />
now … play a few notes.<br />
8 To activate the Delay unit, click the Delay button in the upper-right section.<br />
9 Click the Sync button at the bottom of the Delay section, and drag the Delay Time slider to a<br />
value of 20 ms.<br />
10 Adjust the Wet Level knob to 66%.<br />
11 Click the Body EQ button in the lower right to activate it. Make sure that Lo Mid Hi is chosen<br />
from the Model pop-up menu.<br />
12 Adjust the Low knob to 0.55, the Mid knob to 0.32, and the Hi knob to 0.20.<br />
At this point, you have a working bell sound, but you’ll probably find that there is a tuning issue<br />
below C3 in particular. This programming approach was taken because the harmonics of the<br />
sound are most noticeable after all other parameters have been set. The solution to the tuning<br />
issue primarily lies in the Inner Loss and Stiffness Keyscale parameters.<br />
13 To adjust, first select the Keyscale button, then drag the green horizontal line within the Material<br />
Pad up or down for low notes, or drag the blue horizontal line up or down for high notes.<br />
14 Choose Save Setting As from the Settings pop-up menu, save your settings with a new name,<br />
and use it as the basis for new bell sounds, or for your next Christmas album.<br />
Chapter 13 Sculpture 296


