

The Gougeon Brothers on Boat Construction - WEST SYSTEM Epoxy
The Gougeon Brothers on Boat Construction - WEST SYSTEM Epoxy
The Gougeon Brothers on Boat Construction - WEST SYSTEM Epoxy

Create successful ePaper yourself
Turn your PDF publications into a flip-book with our unique Google optimized e-Paper software.
Chapter 11 – Laminating and B<strong>on</strong>ding Techniques 99<br />
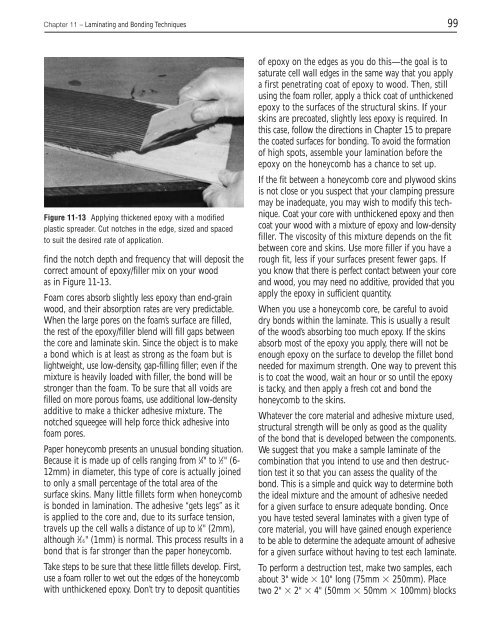
Figure 11-13 Applying thickened epoxy with a modified<br />
plastic spreader. Cut notches in the edge, sized and spaced<br />
to suit the desired rate of applicati<strong>on</strong>.<br />
find the notch depth and frequency that will deposit the<br />
correct amount of epoxy/filler mix <strong>on</strong> your wood<br />
as in Figure 11-13.<br />
Foam cores absorb slightly less epoxy than end-grain<br />
wood, and their absorpti<strong>on</strong> rates are very predictable.<br />
When the large pores <strong>on</strong> the foam’s surface are filled,<br />
the rest of the epoxy/filler blend will fill gaps between<br />
the core and laminate skin. Since the object is to make<br />
a b<strong>on</strong>d which is at least as str<strong>on</strong>g as the foam but is<br />
lightweight, use low-density, gap-filling filler; even if the<br />
mixture is heavily loaded with filler, the b<strong>on</strong>d will be<br />
str<strong>on</strong>ger than the foam. To be sure that all voids are<br />
filled <strong>on</strong> more porous foams, use additi<strong>on</strong>al low-density<br />
additive to make a thicker adhesive mixture. <str<strong>on</strong>g>The</str<strong>on</strong>g><br />
notched squeegee will help force thick adhesive into<br />
foam pores.<br />
Paper h<strong>on</strong>eycomb presents an unusual b<strong>on</strong>ding situati<strong>on</strong>.<br />
Because it is made up of cells ranging from 1 ⁄4" to 1 ⁄2" (6-<br />
12mm) in diameter, this type of core is actually joined<br />
to <strong>on</strong>ly a small percentage of the total area of the<br />
surface skins. Many little fillets form when h<strong>on</strong>eycomb<br />
is b<strong>on</strong>ded in laminati<strong>on</strong>. <str<strong>on</strong>g>The</str<strong>on</strong>g> adhesive “gets legs” as it<br />
is applied to the core and, due to its surface tensi<strong>on</strong>,<br />
travels up the cell walls a distance of up to 1 ⁄8" (2mm),<br />
although 1 ⁄16" (1mm) is normal. This process results in a<br />
b<strong>on</strong>d that is far str<strong>on</strong>ger than the paper h<strong>on</strong>eycomb.<br />
Take steps to be sure that these little fillets develop. First,<br />
use a foam roller to wet out the edges of the h<strong>on</strong>eycomb<br />
with unthickened epoxy. D<strong>on</strong>’t try to deposit quantities<br />
of epoxy <strong>on</strong> the edges as you do this—the goal is to<br />
saturate cell wall edges in the same way that you apply<br />
a first penetrating coat of epoxy to wood. <str<strong>on</strong>g>The</str<strong>on</strong>g>n, still<br />
using the foam roller, apply a thick coat of unthickened<br />
epoxy to the surfaces of the structural skins. If your<br />
skins are precoated, slightly less epoxy is required. In<br />
this case, follow the directi<strong>on</strong>s in Chapter 15 to prepare<br />
the coated surfaces for b<strong>on</strong>ding. To avoid the formati<strong>on</strong><br />
of high spots, assemble your laminati<strong>on</strong> before the<br />
epoxy <strong>on</strong> the h<strong>on</strong>eycomb has a chance to set up.<br />
If the fit between a h<strong>on</strong>eycomb core and plywood skins<br />
is not close or you suspect that your clamping pressure<br />
may be inadequate, you may wish to modify this technique.<br />
Coat your core with unthickened epoxy and then<br />
coat your wood with a mixture of epoxy and low-density<br />
filler. <str<strong>on</strong>g>The</str<strong>on</strong>g> viscosity of this mixture depends <strong>on</strong> the fit<br />
between core and skins. Use more filler if you have a<br />
rough fit, less if your surfaces present fewer gaps. If<br />
you know that there is perfect c<strong>on</strong>tact between your core<br />
and wood, you may need no additive, provided that you<br />
apply the epoxy in sufficient quantity.<br />
When you use a h<strong>on</strong>eycomb core, be careful to avoid<br />
dry b<strong>on</strong>ds within the laminate. This is usually a result<br />
of the wood’s absorbing too much epoxy. If the skins<br />
absorb most of the epoxy you apply, there will not be<br />
enough epoxy <strong>on</strong> the surface to develop the fillet b<strong>on</strong>d<br />
needed for maximum strength. One way to prevent this<br />
is to coat the wood, wait an hour or so until the epoxy<br />
is tacky, and then apply a fresh cot and b<strong>on</strong>d the<br />
h<strong>on</strong>eycomb to the skins.<br />
Whatever the core material and adhesive mixture used,<br />
structural strength will be <strong>on</strong>ly as good as the quality<br />
of the b<strong>on</strong>d that is developed between the comp<strong>on</strong>ents.<br />
We suggest that you make a sample laminate of the<br />
combinati<strong>on</strong> that you intend to use and then destructi<strong>on</strong><br />
test it so that you can assess the quality of the<br />
b<strong>on</strong>d. This is a simple and quick way to determine both<br />
the ideal mixture and the amount of adhesive needed<br />
for a given surface to ensure adequate b<strong>on</strong>ding. Once<br />
you have tested several laminates with a given type of<br />
core material, you will have gained enough experience<br />
to be able to determine the adequate amount of adhesive<br />
for a given surface without having to test each laminate.<br />
To perform a destructi<strong>on</strong> test, make two samples, each<br />
about 3" wide � 10" l<strong>on</strong>g (75mm � 250mm). Place<br />
two 2" � 2" � 4" (50mm � 50mm � 100mm) blocks


