

The Gougeon Brothers on Boat Construction - WEST SYSTEM Epoxy
The Gougeon Brothers on Boat Construction - WEST SYSTEM Epoxy
The Gougeon Brothers on Boat Construction - WEST SYSTEM Epoxy

You also want an ePaper? Increase the reach of your titles
YUMPU automatically turns print PDFs into web optimized ePapers that Google loves.
Chapter 26 – Interior C<strong>on</strong>structi<strong>on</strong> 333<br />
countertops and tables with a light-colored plastic<br />
laminate (easily b<strong>on</strong>ded to wood with <strong>WEST</strong> <strong>SYSTEM</strong><br />
epoxy) results in a durable, easily maintained working<br />
surface. Solid surface laminates like Wils<strong>on</strong>art and<br />
Corian can also be glued to plywood with <strong>WEST</strong><br />
<strong>SYSTEM</strong> epoxy. Just be sure to abrade the b<strong>on</strong>d side with<br />
80-grit sandpaper prior to gluing in place.<br />
Painting the under-deck ceiling and bulkheads with<br />
light colors provides good light reflecti<strong>on</strong>. Choosing<br />
light-colored materials for cushi<strong>on</strong>s and curtains also<br />
brightens an interior.<br />
Generally, it is thought that a varnished natural surface<br />
requires a lot of extra time, but many professi<strong>on</strong>al<br />
builders believe that the naturally finished interior is<br />
more attractive for the same amount of work than the<br />
painted interior. A solid color, especially with high-gloss<br />
paint, will magnify imperfecti<strong>on</strong>s in the surface. <str<strong>on</strong>g>The</str<strong>on</strong>g><br />
same small imperfecti<strong>on</strong>s in a varnished surface are<br />
camouflaged by the natural wood grain.<br />
As we have already discussed, with our method of<br />
c<strong>on</strong>structi<strong>on</strong>, nowhere is prefinishing more important<br />
than <strong>on</strong> interior items. It’s the same old story: coating<br />
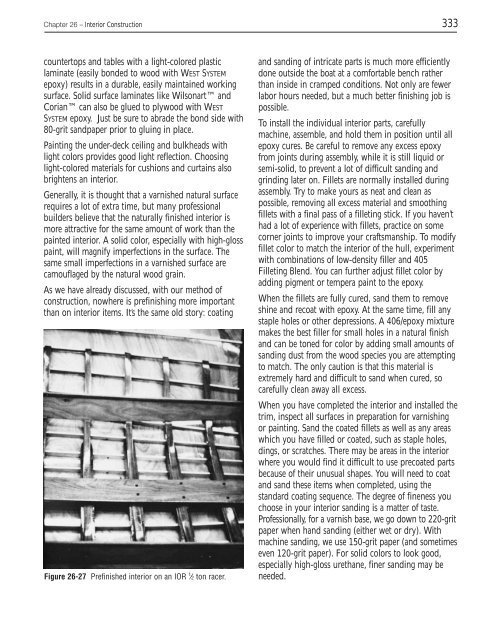
Figure 26-27 Prefinished interior <strong>on</strong> an IOR 1 ⁄2 t<strong>on</strong> racer.<br />
and sanding of intricate parts is much more efficiently<br />
d<strong>on</strong>e outside the boat at a comfortable bench rather<br />
than inside in cramped c<strong>on</strong>diti<strong>on</strong>s. Not <strong>on</strong>ly are fewer<br />
labor hours needed, but a much better finishing job is<br />
possible.<br />
To install the individual interior parts, carefully<br />
machine, assemble, and hold them in positi<strong>on</strong> until all<br />
epoxy cures. Be careful to remove any excess epoxy<br />
from joints during assembly, while it is still liquid or<br />
semi-solid, to prevent a lot of difficult sanding and<br />
grinding later <strong>on</strong>. Fillets are normally installed during<br />
assembly. Try to make yours as neat and clean as<br />
possible, removing all excess material and smoothing<br />
fillets with a final pass of a filleting stick. If you haven’t<br />
had a lot of experience with fillets, practice <strong>on</strong> some<br />
corner joints to improve your craftsmanship. To modify<br />
fillet color to match the interior of the hull, experiment<br />
with combinati<strong>on</strong>s of low-density filler and 405<br />
Filleting Blend. You can further adjust fillet color by<br />
adding pigment or tempera paint to the epoxy.<br />
When the fillets are fully cured, sand them to remove<br />
shine and recoat with epoxy. At the same time, fill any<br />
staple holes or other depressi<strong>on</strong>s. A 406/epoxy mixture<br />
makes the best filler for small holes in a natural finish<br />
and can be t<strong>on</strong>ed for color by adding small amounts of<br />
sanding dust from the wood species you are attempting<br />
to match. <str<strong>on</strong>g>The</str<strong>on</strong>g> <strong>on</strong>ly cauti<strong>on</strong> is that this material is<br />
extremely hard and difficult to sand when cured, so<br />
carefully clean away all excess.<br />
When you have completed the interior and installed the<br />
trim, inspect all surfaces in preparati<strong>on</strong> for varnishing<br />
or painting. Sand the coated fillets as well as any areas<br />
which you have filled or coated, such as staple holes,<br />
dings, or scratches. <str<strong>on</strong>g>The</str<strong>on</strong>g>re may be areas in the interior<br />
where you would find it difficult to use precoated parts<br />
because of their unusual shapes. You will need to coat<br />
and sand these items when completed, using the<br />
standard coating sequence. <str<strong>on</strong>g>The</str<strong>on</strong>g> degree of fineness you<br />
choose in your interior sanding is a matter of taste.<br />
Professi<strong>on</strong>ally, for a varnish base, we go down to 220-grit<br />
paper when hand sanding (either wet or dry). With<br />
machine sanding, we use 150-grit paper (and sometimes<br />
even 120-grit paper). For solid colors to look good,<br />
especially high-gloss urethane, finer sanding may be<br />
needed.


