

The Gougeon Brothers on Boat Construction - WEST SYSTEM Epoxy
The Gougeon Brothers on Boat Construction - WEST SYSTEM Epoxy
The Gougeon Brothers on Boat Construction - WEST SYSTEM Epoxy

You also want an ePaper? Increase the reach of your titles
YUMPU automatically turns print PDFs into web optimized ePapers that Google loves.
Chapter 12 – Scarfing 111<br />
Producti<strong>on</strong> b<strong>on</strong>ding needs to be well organized and<br />
requires the cooperati<strong>on</strong> of at least two people. First,<br />
pre-sort the stock to be joined and lay out the individual<br />
pieces <strong>on</strong> a flat surface opposite <strong>on</strong>e another with each<br />
of the beveled surfaces facing up and pointing toward<br />
its mate. No doubt you will want to make up varying<br />
lengths of scarfed material, and you should do your<br />
planning at this stage to minimize waste when you are<br />
actually assembling the scarfed stock <strong>on</strong> the boat.<br />
When you have laid out and organized all of the stock,<br />
establish a separate assembly area close by <strong>on</strong> a flat<br />
surface and prepare the clamps and a staple gun which<br />
shoots 3�8" (9mm) wide-crown staples. On the floor, lay<br />
out wax paper or a polyethylene sheet that is somewhat<br />
wider than the scarf joints themselves to prevent<br />
inadvertent b<strong>on</strong>ding. Make up the adhesive mixture<br />
and apply it to all the upward-facing beveled surfaces,<br />
following the applicati<strong>on</strong> procedure previously described.<br />
Move two matched pieces of stock to the prepared<br />
assembly area and align their beveled b<strong>on</strong>ding surfaces,<br />
using the procedure previously described. After you<br />
have inserted the locating staples, turn the stock up <strong>on</strong><br />
edge with the side of the scarf joint resting <strong>on</strong> the wax<br />
paper or polyethylene sheet. Before you move another<br />
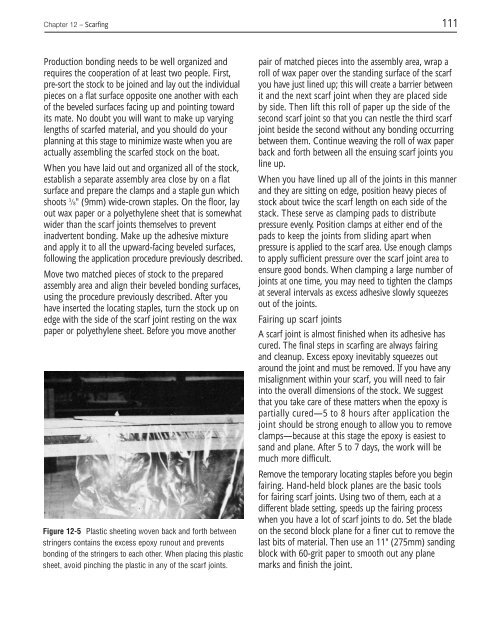
Figure 12-5 Plastic sheeting woven back and forth between<br />
stringers c<strong>on</strong>tains the excess epoxy runout and prevents<br />
b<strong>on</strong>ding of the stringers to each other. When placing this plastic<br />
sheet, avoid pinching the plastic in any of the scarf joints.<br />
pair of matched pieces into the assembly area, wrap a<br />
roll of wax paper over the standing surface of the scarf<br />
you have just lined up; this will create a barrier between<br />
it and the next scarf joint when they are placed side<br />
by side. <str<strong>on</strong>g>The</str<strong>on</strong>g>n lift this roll of paper up the side of the<br />
sec<strong>on</strong>d scarf joint so that you can nestle the third scarf<br />
joint beside the sec<strong>on</strong>d without any b<strong>on</strong>ding occurring<br />
between them. C<strong>on</strong>tinue weaving the roll of wax paper<br />
back and forth between all the ensuing scarf joints you<br />
line up.<br />
When you have lined up all of the joints in this manner<br />
and they are sitting <strong>on</strong> edge, positi<strong>on</strong> heavy pieces of<br />
stock about twice the scarf length <strong>on</strong> each side of the<br />
stack. <str<strong>on</strong>g>The</str<strong>on</strong>g>se serve as clamping pads to distribute<br />
pressure evenly. Positi<strong>on</strong> clamps at either end of the<br />
pads to keep the joints from sliding apart when<br />
pressure is applied to the scarf area. Use enough clamps<br />
to apply sufficient pressure over the scarf joint area to<br />
ensure good b<strong>on</strong>ds. When clamping a large number of<br />
joints at <strong>on</strong>e time, you may need to tighten the clamps<br />
at several intervals as excess adhesive slowly squeezes<br />
out of the joints.<br />
Fairing up scarf joints<br />
A scarf joint is almost finished when its adhesive has<br />
cured. <str<strong>on</strong>g>The</str<strong>on</strong>g> final steps in scarfing are always fairing<br />
and cleanup. Excess epoxy inevitably squeezes out<br />
around the joint and must be removed. If you have any<br />
misalignment within your scarf, you will need to fair<br />
into the overall dimensi<strong>on</strong>s of the stock. We suggest<br />
that you take care of these matters when the epoxy is<br />
partially cured—5 to 8 hours after applicati<strong>on</strong> the<br />
joint should be str<strong>on</strong>g enough to allow you to remove<br />
clamps—because at this stage the epoxy is easiest to<br />
sand and plane. After 5 to 7 days, the work will be<br />
much more difficult.<br />
Remove the temporary locating staples before you begin<br />
fairing. Hand-held block planes are the basic tools<br />
for fairing scarf joints. Using two of them, each at a<br />
different blade setting, speeds up the fairing process<br />
when you have a lot of scarf joints to do. Set the blade<br />
<strong>on</strong> the sec<strong>on</strong>d block plane for a finer cut to remove the<br />
last bits of material. <str<strong>on</strong>g>The</str<strong>on</strong>g>n use an 11" (275mm) sanding<br />
block with 60-grit paper to smooth out any plane<br />
marks and finish the joint.


