

The Gougeon Brothers on Boat Construction - WEST SYSTEM Epoxy
The Gougeon Brothers on Boat Construction - WEST SYSTEM Epoxy
The Gougeon Brothers on Boat Construction - WEST SYSTEM Epoxy

You also want an ePaper? Increase the reach of your titles
YUMPU automatically turns print PDFs into web optimized ePapers that Google loves.
140 Core <strong>Boat</strong>building Techniques<br />
finish. <str<strong>on</strong>g>The</str<strong>on</strong>g> hardware placement, marking, and drilling<br />
procedures differ from the procedures needed for the<br />
b<strong>on</strong>ding operati<strong>on</strong>. Just gathering together the proper<br />
tools (or materials) for either operati<strong>on</strong> requires c<strong>on</strong>siderable<br />
time, and you increase efficiency if you minimize<br />
this unavoidable start-up time.<br />
If you are b<strong>on</strong>ding hardware to a surface that has<br />
received its final paint finish, there is <strong>on</strong>e more step<br />
that you must take before b<strong>on</strong>ding begins. After you<br />
set the hardware in final positi<strong>on</strong>, draw a pencil line<br />
around its perimeter. Remove the hardware and apply<br />
tape, usually 2" (50mm) wide, around the perimeter of<br />
the pencil line, overlapping slightly so that the entire<br />
mark is covered. Repositi<strong>on</strong> the hardware, using the<br />
drilled fastener holes as guides, and then carefully cut<br />
through the overlapping tape with a sharp blade, using<br />
the hardware perimeter as a guide. In this process, do<br />
not cut through the epoxy surface. Use <strong>on</strong>ly enough<br />
pressure <strong>on</strong> the blade to cut through the tape. Remove<br />
the hardware and peel away the tape in the b<strong>on</strong>ding<br />
area, leaving a taped outline which perfectly matches<br />
the hardware perimeter. <str<strong>on</strong>g>The</str<strong>on</strong>g> final step is to scrape away<br />
the paint in the b<strong>on</strong>ding area with a sharp edge tool<br />
down to the cured epoxy surface, being careful not to<br />
disturb the taped outline border. You can then proceed<br />
with hardware b<strong>on</strong>ding without getting epoxy <strong>on</strong> the<br />
painted surface immediately surrounding the hardware<br />
item.<br />
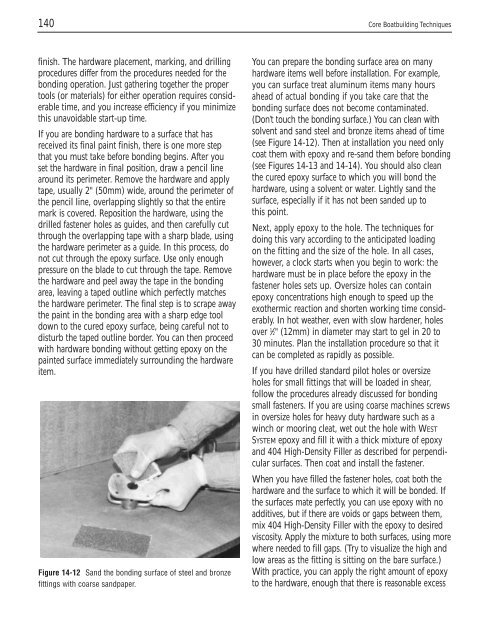
Figure 14-12 Sand the b<strong>on</strong>ding surface of steel and br<strong>on</strong>ze<br />
fittings with coarse sandpaper.<br />
You can prepare the b<strong>on</strong>ding surface area <strong>on</strong> many<br />
hardware items well before installati<strong>on</strong>. For example,<br />
you can surface treat aluminum items many hours<br />
ahead of actual b<strong>on</strong>ding if you take care that the<br />
b<strong>on</strong>ding surface does not become c<strong>on</strong>taminated.<br />
(D<strong>on</strong>’t touch the b<strong>on</strong>ding surface.) You can clean with<br />
solvent and sand steel and br<strong>on</strong>ze items ahead of time<br />
(see Figure 14-12). <str<strong>on</strong>g>The</str<strong>on</strong>g>n at installati<strong>on</strong> you need <strong>on</strong>ly<br />
coat them with epoxy and re-sand them before b<strong>on</strong>ding<br />
(see Figures 14-13 and 14-14). You should also clean<br />
the cured epoxy surface to which you will b<strong>on</strong>d the<br />
hardware, using a solvent or water. Lightly sand the<br />
surface, especially if it has not been sanded up to<br />
this point.<br />
Next, apply epoxy to the hole. <str<strong>on</strong>g>The</str<strong>on</strong>g> techniques for<br />
doing this vary according to the anticipated loading<br />
<strong>on</strong> the fitting and the size of the hole. In all cases,<br />
however, a clock starts when you begin to work: the<br />
hardware must be in place before the epoxy in the<br />
fastener holes sets up. Oversize holes can c<strong>on</strong>tain<br />
epoxy c<strong>on</strong>centrati<strong>on</strong>s high enough to speed up the<br />
exothermic reacti<strong>on</strong> and shorten working time c<strong>on</strong>siderably.<br />
In hot weather, even with slow hardener, holes<br />
over 1 ⁄2" (12mm) in diameter may start to gel in 20 to<br />
30 minutes. Plan the installati<strong>on</strong> procedure so that it<br />
can be completed as rapidly as possible.<br />
If you have drilled standard pilot holes or oversize<br />
holes for small fittings that will be loaded in shear,<br />
follow the procedures already discussed for b<strong>on</strong>ding<br />
small fasteners. If you are using coarse machines screws<br />
in oversize holes for heavy duty hardware such as a<br />
winch or mooring cleat, wet out the hole with <strong>WEST</strong><br />
<strong>SYSTEM</strong> epoxy and fill it with a thick mixture of epoxy<br />
and 404 High-Density Filler as described for perpendicular<br />
surfaces. <str<strong>on</strong>g>The</str<strong>on</strong>g>n coat and install the fastener.<br />
When you have filled the fastener holes, coat both the<br />
hardware and the surface to which it will be b<strong>on</strong>ded. If<br />
the surfaces mate perfectly, you can use epoxy with no<br />
additives, but if there are voids or gaps between them,<br />
mix 404 High-Density Filler with the epoxy to desired<br />
viscosity. Apply the mixture to both surfaces, using more<br />
where needed to fill gaps. (Try to visualize the high and<br />
low areas as the fitting is sitting <strong>on</strong> the bare surface.)<br />
With practice, you can apply the right amount of epoxy<br />
to the hardware, enough that there is reas<strong>on</strong>able excess


