

The Gougeon Brothers on Boat Construction - WEST SYSTEM Epoxy
The Gougeon Brothers on Boat Construction - WEST SYSTEM Epoxy
The Gougeon Brothers on Boat Construction - WEST SYSTEM Epoxy

You also want an ePaper? Increase the reach of your titles
YUMPU automatically turns print PDFs into web optimized ePapers that Google loves.
Chapter 14 – Hardware B<strong>on</strong>ding 143<br />
When you set the hardware in final positi<strong>on</strong>, excess<br />
epoxy mixture will flow out from the hardware<br />
perimeter. You will need to clean it away. This may<br />
require a bit of sculpting, especially if the cast porti<strong>on</strong><br />
is large. We usually make up a wood paddle to the<br />
shape desired so that we can get the best effect when<br />
making a final pass across the uncured epoxy surface.<br />
If you d<strong>on</strong>’t get the results that you’d like, d<strong>on</strong>’t worry.<br />
You can sand, file, or refill the surface to develop the<br />
final desired shape.<br />
When the casting has cured, you can drill the holes for<br />
the fasteners and install the fasteners themselves in the<br />
appropriate manner. We cauti<strong>on</strong> you to remember to<br />
adjust the fastener lengths for the angle change of the<br />
hardware so that you get the same amount of fastener<br />
penetrati<strong>on</strong> into the wood fiber.<br />
Removing B<strong>on</strong>ded Fasteners<br />
and Hardware<br />
<str<strong>on</strong>g>The</str<strong>on</strong>g> b<strong>on</strong>d between a fastener and <strong>WEST</strong> <strong>SYSTEM</strong> epoxy is<br />
str<strong>on</strong>g, but, with the right procedures, you can break it<br />
to remove the fastener from the wood. If you know you<br />
will want to extract a fastener at some point in the<br />
future, coat it with wax, spray cooking oil, or a mold<br />
release before installing it. Although the wax will interfere<br />
with the metal/epoxy b<strong>on</strong>d, it will not compromise the<br />
mechanical keying around the threads which provides<br />
the major load-transfer capability.<br />
B<strong>on</strong>ded fasteners can often be removed with reas<strong>on</strong>able<br />
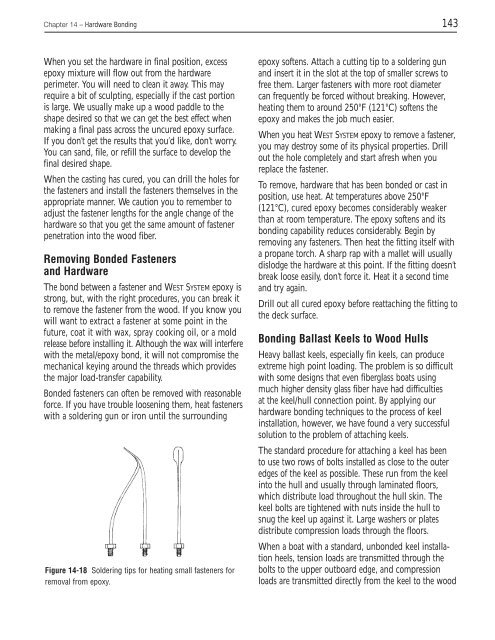
force. If you have trouble loosening them, heat fasteners<br />
with a soldering gun or ir<strong>on</strong> until the surrounding<br />
Figure 14-18 Soldering tips for heating small fasteners for<br />
removal from epoxy.<br />
epoxy softens. Attach a cutting tip to a soldering gun<br />
and insert it in the slot at the top of smaller screws to<br />
free them. Larger fasteners with more root diameter<br />
can frequently be forced without breaking. However,<br />
heating them to around 250°F (121°C) softens the<br />
epoxy and makes the job much easier.<br />
When you heat <strong>WEST</strong> <strong>SYSTEM</strong> epoxy to remove a fastener,<br />
you may destroy some of its physical properties. Drill<br />
out the hole completely and start afresh when you<br />
replace the fastener.<br />
To remove, hardware that has been b<strong>on</strong>ded or cast in<br />
positi<strong>on</strong>, use heat. At temperatures above 250°F<br />
(121°C), cured epoxy becomes c<strong>on</strong>siderably weaker<br />
than at room temperature. <str<strong>on</strong>g>The</str<strong>on</strong>g> epoxy softens and its<br />
b<strong>on</strong>ding capability reduces c<strong>on</strong>siderably. Begin by<br />
removing any fasteners. <str<strong>on</strong>g>The</str<strong>on</strong>g>n heat the fitting itself with<br />
a propane torch. A sharp rap with a mallet will usually<br />
dislodge the hardware at this point. If the fitting doesn’t<br />
break loose easily, d<strong>on</strong>’t force it. Heat it a sec<strong>on</strong>d time<br />
and try again.<br />
Drill out all cured epoxy before reattaching the fitting to<br />
the deck surface.<br />
B<strong>on</strong>ding Ballast Keels to Wood Hulls<br />
Heavy ballast keels, especially fin keels, can produce<br />
extreme high point loading. <str<strong>on</strong>g>The</str<strong>on</strong>g> problem is so difficult<br />
with some designs that even fiberglass boats using<br />
much higher density glass fiber have had difficulties<br />
at the keel/hull c<strong>on</strong>necti<strong>on</strong> point. By applying our<br />
hardware b<strong>on</strong>ding techniques to the process of keel<br />
installati<strong>on</strong>, however, we have found a very successful<br />
soluti<strong>on</strong> to the problem of attaching keels.<br />
<str<strong>on</strong>g>The</str<strong>on</strong>g> standard procedure for attaching a keel has been<br />
to use two rows of bolts installed as close to the outer<br />
edges of the keel as possible. <str<strong>on</strong>g>The</str<strong>on</strong>g>se run from the keel<br />
into the hull and usually through laminated floors,<br />
which distribute load throughout the hull skin. <str<strong>on</strong>g>The</str<strong>on</strong>g><br />
keel bolts are tightened with nuts inside the hull to<br />
snug the keel up against it. Large washers or plates<br />
distribute compressi<strong>on</strong> loads through the floors.<br />
When a boat with a standard, unb<strong>on</strong>ded keel installati<strong>on</strong><br />
heels, tensi<strong>on</strong> loads are transmitted through the<br />
bolts to the upper outboard edge, and compressi<strong>on</strong><br />
loads are transmitted directly from the keel to the wood


